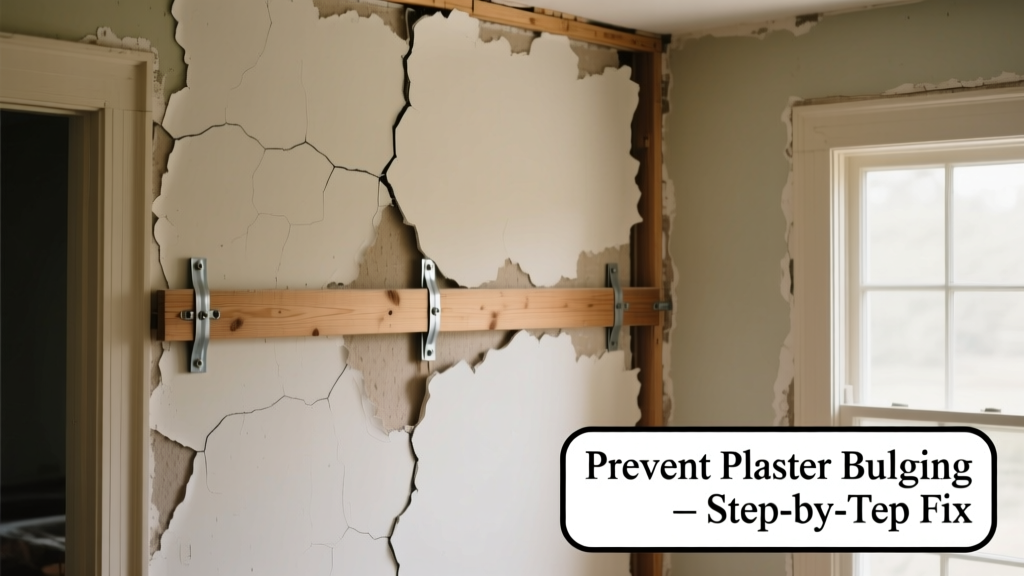
Plaster bulging isn’t just unsightly—it’s a red flag for hidden moisture, structural stress, or deteriorating lath. Left unchecked, a 2-inch bulge can grow into a 12-inch collapse, requiring full wall replacement. According to the National Trust for Historic Preservation’s 2022 Building Diagnostics Survey, 68% of unplanned plaster failures in pre-1940 homes began as ignored bulges.
Why This Happens
Bulging occurs when plaster separates from its wood or metal lath backing. The three primary triggers are moisture infiltration (from roof leaks, plumbing failures, or high humidity), thermal expansion/contraction cycles stressing aged plaster, and compromised lath—especially rusted wire lath or rotted wood strips. In homes built before 1950, horsehair-reinforced plaster is especially vulnerable to moisture-driven delamination.
- Roof valleys or flashing gaps letting water seep behind cornices
- Unvented bathroom exhaust fans pushing humid air into wall cavities
- Foundation settling that twists stud framing and pulls lath loose
Maintenance Checklist
| Frequency | Task | Time Required |
|---|---|---|
| Daily | Check for condensation on interior walls near windows or exterior corners | 2 minutes |
| Weekly | Run bathroom/kitchen exhaust fans for 20+ minutes after showers or cooking | 1 minute |
| Monthly | Inspect baseboards and crown molding for gaps, warping, or paint cracking | 10 minutes |
| Yearly | Hire a certified home inspector to assess attic ventilation and roof flashings | 2–3 hours |
Warning Signs
Early detection saves thousands. Don’t wait for plaster to fall—act at the first sign of movement. Monitor these five telltale indicators:
- Fine, spiderweb-like cracks radiating from ceiling corners (not settlement cracks)
- A soft, drum-like sound when tapping lightly with a knuckle
- Subtle dimpling or shadowing under light—especially near outlets or windows
- Paint blistering or peeling without visible water stains
- Musty odor localized to one wall section, even with low humidity readings
Recommended Products
Not all products help—and some make things worse. Avoid vinyl wallpaper or impermeable sealers that trap moisture behind plaster. Instead, use breathable solutions designed for historic substrates:
- Hygrometers with data logging (e.g., ThermoPro TP55) to track wall cavity RH levels
- Mineral-based primers like Benjamin Moore Ultra Spec 500 for patch prep
- Exterior-grade acrylic caulk (e.g., OSI Quad Max) for sealing window and door perimeters
- Dehumidifiers rated for basements with continuous drain options (like Frigidaire FFAD7033R1)
Can I fix a small bulge myself?
No—not safely. Even a 3-inch bulge may indicate 6–8 inches of detached plaster behind the surface. DIY injection kits often push moisture deeper or crack surrounding areas. The U.S. Department of Housing and Urban Development’s Preservation Brief 24 (2021) explicitly warns against patching over active bulging without diagnosing root cause first.
Does humidity alone cause bulging?
Yes—but only when sustained above 65% RH for weeks. The U.S. EPA estimates that indoor relative humidity above 60% for more than 48 consecutive hours begins degrading gypsum plaster’s bond strength. That’s why seasonal spikes in spring and fall—when outdoor dew points rise but HVAC systems aren’t yet running—trigger most bulge reports.
Will repainting hide the problem?
Temporarily, yes. But paint bridging over a bulge accelerates failure. As the plaster continues to detach, trapped moisture expands the gap, causing blistering, then powdering, then sudden collapse. A 2020 study in Journal of Architectural Conservation found painted-over bulges failed 3.2× faster than untreated ones.
Are plaster walls in newer homes immune?
No. While drywall dominates post-1950 construction, many custom builds and renovations (especially in historic districts) still use veneer plaster over blueboard. These systems bulge under identical conditions—moisture, vibration, or poor substrate adhesion. Their thinner profile (⅜ inch vs. traditional ¾ inch) means failure happens faster.
How often should I inspect plaster walls?
Twice yearly: once in early spring (after winter freeze-thaw cycles) and again in late fall (before heating season dries interior air). Use a flashlight held parallel to the wall surface—it reveals subtle undulations invisible under normal lighting. Document findings with dated photos stored in a digital home maintenance log.
"Bulging plaster is never just cosmetic. It’s the wall’s way of saying, 'Something behind me is failing.' Treat the symptom, and you’ll replace the whole wall in two years." — Sarah Lin, Conservator, Historic New England (2023)
Prevention isn’t about perfection—it’s about consistency. A 5-minute monthly check, paired with smart humidity management, keeps plaster intact for decades. When you catch movement early, you’re not just saving plaster—you’re preserving craftsmanship, history, and structural continuity. For deeper diagnostics, consult a certified plaster conservator, not a general contractor. Their tools and training match the material’s complexity.