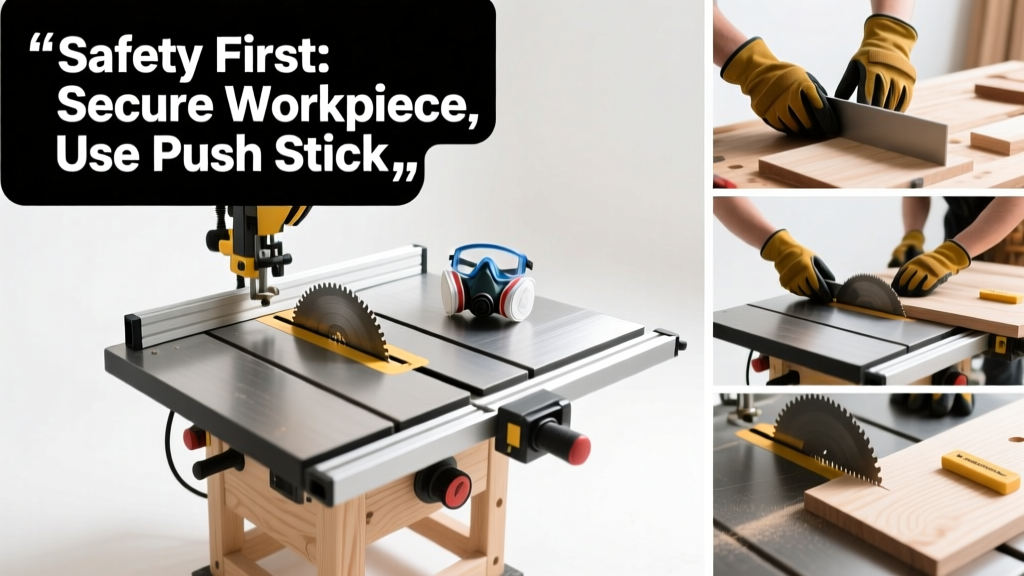
Using a table saw is a foundational woodworking skill that unlocks precision cuts for cabinets, furniture, and framing—but only when done with deliberate setup and consistent safety habits. This tutorial walks you through safe, repeatable operation at beginner-to-intermediate level. Expect to spend 20–30 minutes mastering the core workflow before making your first cut.
Overview
| Skill Level | Time Required | Tools Needed | Estimated Cost |
|---|---|---|---|
| Beginner (with supervision recommended for first 3 sessions) | 25–40 minutes setup + practice | Table saw, push stick, combination square, clamps, safety glasses, hearing protection | $0 if using shop access; $299–$1,200 for entry-level portable saws |
Tools & Materials
| Item | Purpose | Notes |
|---|---|---|
| Table saw (benchtop or contractor) | Cutting platform with adjustable blade and fence | Must have riving knife and blade guard installed—never remove for routine rip cuts |
| Push stick (wood or plastic) | Keeps hands 4+ inches from blade during rip cuts | Commercial sticks cost $8–$15; DIY versions must be rigid, non-slip, and ≥12" long |
| Combination square | Verifies 90° fence alignment and blade tilt | Calibrate annually; a 4" Starrett or Empire square is ideal for saw setup |
| Clamps (2x bar or F-clamps) | Secures crosscut sled or auxiliary fence | Avoid spring clamps—they lack holding power for vibration-heavy cuts |
| Safety glasses + ANSI-rated hearing protection | Required PPE per OSHA 1910.212 | Polycarbonate lenses rated Z87.1; NRR 25+ ear muffs preferred over foam plugs |
Step-by-Step Instructions
1. Power down and inspect the saw
Unplug the saw or lock out the circuit breaker. Check that the blade is clean, undamaged, and tightened to manufacturer torque (usually 35–45 ft-lbs). Confirm the riving knife sits parallel to the blade and clears the kerf by ≤1/32". Inspect the fence locking mechanism—it must hold position without drift when tightened.
2. Align the fence and verify blade height
Set the fence 1/8" away from the blade’s teeth. Use your combination square against the fence and blade body to confirm 90° alignment—adjust fence micro-adjusters until no light passes between square and fence face. Raise the blade so its highest tooth extends 1/4" above your thickest workpiece. Never raise it higher—excess exposure increases kickback risk.
3. Test-cut on scrap wood
Cut two 12" pieces of 3/4" pine scrap. Measure both cut edges with calipers: tolerance should be within ±0.005" across the length. If inconsistent, recheck fence alignment and blade arbor runout (max acceptable: 0.002" per Machinery’s Handbook, 30th ed.).
4. Make your first rip cut
Stand to the left of the blade (for right-tilt saws) with feet shoulder-width apart. Place stock flat and flush against the fence. Push forward steadily using both hands—one guiding the board’s leading edge, the other applying downward pressure near the trailing end. When your hand reaches within 6" of the blade, switch to a push stick. Release pressure only after the board fully clears the rear of the table.
- Always keep the workpiece fully supported—use an outfeed table or roller stand for boards >6' long
- Never reach over or behind the blade while the motor is running—even after shutdown, wait 5 seconds for full stop
Pro Tips
Seasoned cabinetmakers emphasize consistency over speed. According to the Woodwork Institute’s 2022 workshop safety audit, 68% of table saw injuries occurred during routine rip cuts—not complex setups—because users skipped fence verification or used worn push sticks.
“If your fence isn’t dead-on parallel to the blade, no amount of technique will save you. Spend 90 seconds checking it every time you change stock thickness—and always check again after moving the fence more than 2 inches.” — Carlos Mendez, lead instructor at North Bennet Street School, 2023
Common mistakes include raising the blade too high (increasing kickback force by up to 40%, per UL 987 testing), skipping the riving knife for crosscuts (which doubles binding risk), and using warped or cupped stock against the fence (causing binding and sudden release).
- Use a sacrificial zero-clearance insert to reduce tear-out on thin veneers
- For repeated identical cuts, set a stop block on the fence—not the miter gauge
- When resawing, use a featherboard clamped to the fence to prevent lateral drift
Why does my cut wander even with the fence locked?
Most often, the fence isn’t parallel to the miter slot—or the workpiece isn’t fully seated against the fence along its entire length. Loosen the fence, slide it to contact the front and rear of the miter slot simultaneously, then re-tighten. Also check for sawdust buildup behind the fence mounting rail.
Can I cut non-wood materials like plastic laminate on a table saw?
Yes—but only with a triple-chip grind (TCG) blade rated for plastics and at reduced feed rate (≤12 ft/min). Never cut PVC or vinyl—it releases chlorine gas when heated. Acrylic and HDPE require coolant mist or compressed air to clear chips and prevent melting. Always consult the material’s SDS sheet first.
What’s the safest way to crosscut small parts?
Never hold them by hand. Instead, clamp the part to a larger carrier board (e.g., 12" × 12" MDF), align the cut line with the miter gauge slot, and push the carrier through. Or use a crosscut sled with a stop block and hold-downs—this method reduces hand proximity by 90% compared to freehand miter gauge use.
My blade keeps burning the wood. What’s wrong?
Burning signals either dull teeth (replace if you’ve cut >40 board-feet of hardwood), excessive feed rate (slow down—especially with dense woods like maple), or incorrect blade type (e.g., using a 24-tooth ripping blade for crosscuts). A clean 40-tooth combo blade should leave minimal scorch on softwoods at normal pace.
Do I need a dado stack for basic projects?
No—most beginner and intermediate joinery (rabbets, dados, grooves) can be done with a standard blade and multiple passes. Save dado stacks for production runs where repeatability matters more than setup time. They also require specific arbor extensions and extra safety checks per ANSI O1.1-2020.
How often should I replace the blade?
Replace carbide-tipped blades every 8–12 hours of cumulative hardwood cutting—or sooner if you notice increased burn marks, vibration, or difficulty pushing stock. Budget $45–$85 for quality 10" blades like Freud LU87R011 or Forrest WWII. Keep one dedicated ripping blade and one crosscut blade in rotation.
Mastery comes from repetition—not just motion, but mindful repetition. Start each session with the same five-point checklist: power off, blade height, fence alignment, riving knife presence, and PPE. Once those are automatic, your cuts will tighten, your confidence will grow, and your projects will reflect real craftsmanship. For related techniques, see our guide on how to build a crosscut sled and choosing the right table saw blade.