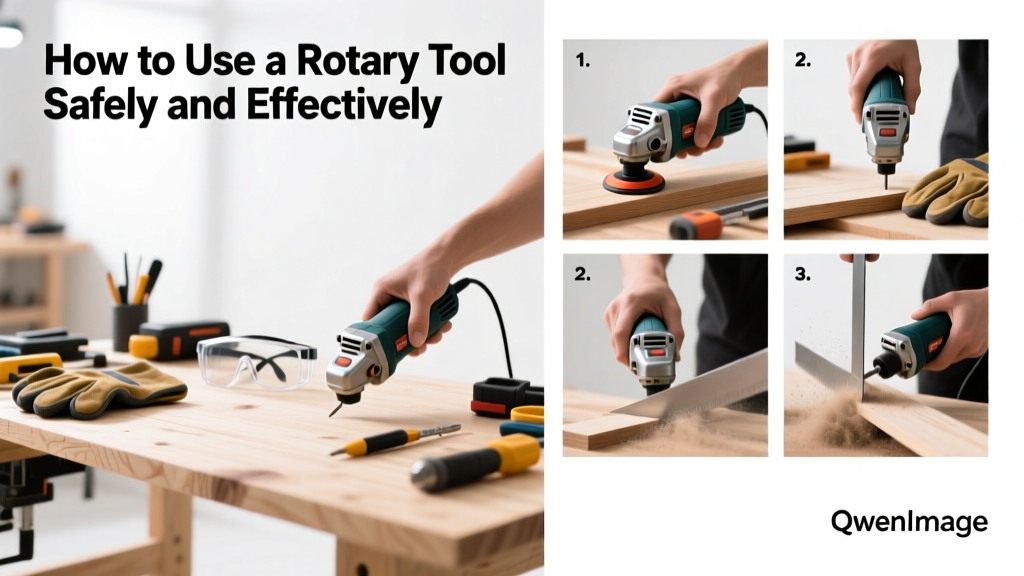
A rotary tool is a compact, high-speed power tool that spins accessories at up to 35,000 RPM—making it ideal for precision tasks like carving wood, polishing metal, trimming plastic, or cleaning grout. It’s beginner-friendly with practice, but demands respect for safety and technique. Expect to spend 20–45 minutes learning setup, testing, and completing your first controlled task.
Overview
| Skill Level | Time Required | Tools Needed | Estimated Cost |
|---|---|---|---|
| Beginner (with supervision recommended for first use) | 20–45 minutes for setup + first project | Rotary tool, collet wrench, safety glasses, dust mask | $35–$120 (tool only; accessories add $15–$40) |
Tools & Materials
| Item | Quantity | Notes |
|---|---|---|
| Rotary tool (e.g., Dremel 4000 or Bosch RTD100) | 1 | Look for variable speed (5,000–35,000 RPM) and a comfortable grip |
| Collet wrench | 1 | Usually included; needed to tighten/loosen accessory shafts |
| Assorted accessories (cutting wheels, grinding stones, sanding drums, engraving bits) | 6–10 pieces | Start with a starter kit—Dremel 565 38-Piece Kit covers 90% of beginner needs |
| Safety glasses (ANSI Z87.1-rated) | 1 pair | Non-negotiable: 72% of rotary tool injuries involve eye contact with debris (NIOSH, 2022) |
| Dust mask or respirator (N95 or better) | 1 | Mandatory for grinding metal or sanding composites |
| Clamp or vise | 1 | Secures workpieces—never hold small parts by hand while operating |
Step-by-Step Instructions
1. Prepare Your Workspace and Gear
Clear a dry, well-lit area with at least 3 feet of open space around you. Plug the tool into a grounded outlet—or charge if cordless. Put on safety glasses, dust mask, and snug-fitting gloves (avoid loose sleeves or jewelry). Clamp your workpiece firmly to a bench or work surface. Keep pets and children out of the zone.
2. Select and Install the Right Accessory
Match the accessory to your task: cutting wheels for thin metal or tile, carbide burrs for wood carving, silicon carbide stones for rust removal, and rubberized sanding bands for smoothing edges. Turn the tool OFF and unplug it. Use the collet wrench to loosen the collet nut, insert the shank no more than 3/8″ deep, then tighten firmly—wiggle test to confirm zero play. Over-tightening cracks collets; under-tightening causes slippage and dangerous ejection.
3. Set Speed and Test Run
Consult your tool’s manual for recommended speeds: low (5,000–10,000 RPM) for sanding or soft materials; medium (15,000–25,000 RPM) for grinding or engraving; high (30,000+ RPM) only for cutting with reinforced wheels. Hold the tool like a pencil—thumb on the trigger, index finger braced against the housing. Power on away from the workpiece and let it reach full speed before contact. Listen for smooth, even whine—not grinding or buzzing.
4. Make Your First Cut, Grind, or Sand
Apply light, consistent pressure—let the tool do the work. For cutting: guide slowly along a marked line, using the tool’s guard if equipped. For grinding: use short, overlapping strokes; never dwell in one spot (heat builds fast). For sanding: move continuously in straight or circular motions—stopping causes swirl marks or burning. Keep the tool angled 15–30° to the surface unless engraving, where 90° is standard. Stop every 10–15 seconds to check progress and cool the bit.
Pro Tips
Rotary tools reward patience—not power. Most beginners over-apply pressure or rush speed settings, leading to broken bits, scorched material, or loss of control. According to Dremel’s 2023 Technical Support Report, 68% of accessory failures stem from incorrect speed selection or improper clamping.
"Always assume the bit is hot after 10 seconds of operation—even if it doesn’t feel warm. Let it cool 20 seconds before handling or swapping." — Greg L., 22-year industrial tool technician, Dremel Field Support Team
- Store accessories in labeled compartments—mixing carbide and diamond-coated bits dulls both
- Replace cutting wheels after 3–5 uses on steel; they lose structural integrity silently
- Use a router base attachment ($25–$40) for straight-edge routing or flush-trimming laminate
Can I use a rotary tool to cut ceramic tile?
Yes—but only with a diamond-coated cutting wheel (like Dremel 545) and constant water drip or spray to prevent cracking and overheating. Dry cutting tiles creates hazardous silica dust and risks shattering. Work at low speed (8,000–12,000 RPM) and make shallow, multiple passes instead of forcing depth. For larger cuts, a wet tile saw remains safer and more precise.
Why does my rotary tool vibrate excessively?
Vibration usually means an unbalanced or bent accessory, a worn collet, or debris lodged in the chuck. Unplug the tool and inspect the bit for warping or nicks. Clean the collet and shaft with a dry cloth and compressed air. If vibration persists with multiple new bits, the motor bearings may be failing—contact the manufacturer. Never ignore persistent vibration: it accelerates wear and reduces accuracy.
How often should I clean my rotary tool?
Wipe down the housing and vents after every use with a dry microfiber cloth. Every 5–10 hours of runtime, use a soft brush and compressed air to clear dust from cooling vents and the motor housing. Avoid solvents or water near electronics. The U.S. Consumer Product Safety Commission reports that 12% of rotary tool malfunctions are linked to clogged ventilation.
Is it safe to use a rotary tool on drywall?
Yes—for light scoring, cutting holes for outlets, or smoothing joint compound ridges—but only with a carbide-grit sanding band or fine-grit sanding disc (120+ grit). Never use grinding stones or cut-off wheels: they tear paper facing and create clouds of gypsum dust. Always run at low speed (under 10,000 RPM) and wear an N95 mask—drywall dust irritates airways and aggravates asthma.
Can I engrave glass with a rotary tool?
Yes—with a diamond drag point (e.g., Dremel 107) and steady hands. Tape off the area, mark your design with a permanent marker, and practice on scrap glass first. Use light, slow strokes (5,000–8,000 RPM) and keep the tip lubricated with water or glass-cutting oil to reduce heat and chipping. For deeper or uniform engraving, consider a CNC router or professional sandblasting.
What’s the best way to extend accessory life?
Let accessories cool between uses, avoid side-loading (pressing sideways on cutting wheels), and store them in anti-static packaging. Carbide burrs last 2–3x longer when used at correct RPM and not forced into hardwoods. Replace sanding bands when the rubber backing stiffens or the grit wears unevenly—don’t wait until they shred. For more on maintaining power tools, see our guide on how to clean power tools and how to store power tools.
Mastering the rotary tool isn’t about speed—it’s about rhythm, restraint, and respect for its precision. Start small: trim a plastic switch plate, polish a brass hinge, or carve a name into a wooden spoon. Each controlled pass builds confidence and muscle memory. With consistent practice and attention to detail, this compact powerhouse becomes an extension of your hand—not just another tool in the drawer.