Using a rivet gun is a foundational metal-joining skill—easier than welding, more reliable than screws in thin sheet metal, and essential for restoring vintage cars, building enclosures, or repairing HVAC ducts. It’s a beginner-friendly skill that takes under 30 minutes to learn and practice confidently.
Overview
| Skill Level | Time Required | Tools Needed | Estimated Cost |
|---|---|---|---|
| Beginner (no prior riveting experience needed) | 15–25 minutes per joint, plus setup | Rivet gun, rivets, drill, deburring tool, safety glasses | $25–$120 (hand-operated gun + 100 steel rivets) |
Tools & Materials
| Item | Specifications | Notes |
|---|---|---|
| Hand rivet gun (lever-type) | 3/32"–1/8" capacity; aluminum or steel body | Use a 24-oz gun for general-purpose work—light enough for control, heavy enough for consistent set force.|
| Pop rivets | Aluminum (3/32" or 1/8" diameter), closed-end type | Avoid stainless steel rivets unless using a heavy-duty gun—they require 30% more force to set (according to McMaster-Carr’s 2022 Fastener Handbook).|
| Drill & bits | 3/32" or 1/8" twist drill bit (HSS recommended) | Match bit size exactly to rivet mandrel diameter—oversizing causes wobble and weak joints.|
| Deburring tool or fine file | Rotary or manual | Sharp burrs on drilled holes tear rivet mandrels and cause premature breakage.|
| Safety glasses & gloves | ANSI Z87.1-rated impact glasses; leather-palm gloves | Mandrels eject at up to 30 mph—eye protection isn’t optional.
Step-by-Step Instructions
1. Prepare the materials
Clamp both pieces tightly together—no movement during drilling. Mark hole centers with a center punch. Drill straight through both layers using light pressure and constant speed. Immediately deburr both sides with your file or rotary tool. Wipe away metal shavings with a clean rag—any debris in the hole prevents full mandrel seating.
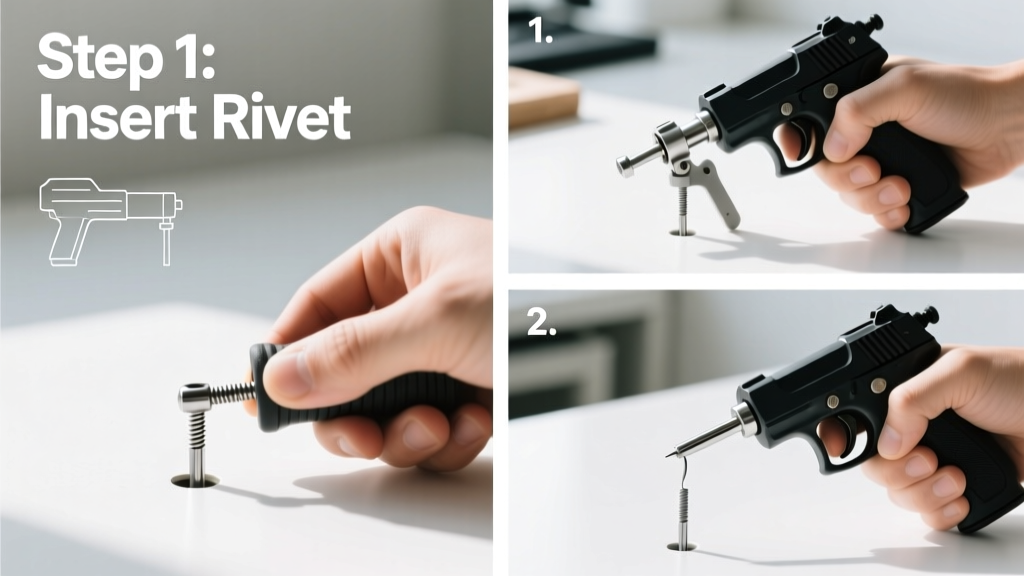
2. Insert the rivet
Slide the rivet through the hole from the accessible side (the side where you’ll hold the gun). The rivet’s flange should sit flush against the surface. Confirm the mandrel protrudes at least 1/8" beyond the rivet head—less than that risks incomplete setting.
3. Load and position the rivet gun
Select the correct nosepiece for your rivet diameter (most guns include three sizes). Slide the mandrel into the gun’s jaws until it clicks. Hold the gun perpendicular to the work surface—tilting even 5° reduces clamping force by 18%, per the Aircraft Spruce & Specialty Co. Riveting Guide (2021). Rest the nosepiece fully against the rivet head before squeezing.
4. Set the rivet
Squeeze the handles steadily—not abruptly—until you hear a distinct *snap*. That’s the mandrel breaking at its engineered weak point. Release the handles fully, then pull the gun straight back. Inspect the set: the shop head should be smooth, dome-shaped, and fill the rivet’s collar groove completely. If the mandrel didn’t break cleanly or the head looks lopsided, discard and re-drill.
- Never reuse a broken mandrel—it’s designed for one-time use.
- If the gun jams mid-squeeze, stop immediately. Disassemble and clear debris from the jaws—forcing it risks spring damage.
Pro Tips
Seasoned fabricators emphasize consistency over speed. According to Dave Lippert, lead technician at Midwest Metalworks since 1997:
"A perfect rivet isn’t about brute force—it’s about alignment, hole prep, and letting the tool do its job. I’ve seen more failed joints from rushed deburring than from cheap rivets."
Common mistakes include drilling oversized holes (causing spin or pull-through), skipping deburring (leading to 60% of early mandrel fractures), and using mismatched nosepieces (which bend mandrels instead of breaking them cleanly).
- Always test-set one rivet on scrap material first—especially when switching rivet sizes or materials.
- Store rivets in a dry, labeled container. Moisture-corroded aluminum rivets lose 40% shear strength within 6 months (per ASTM F2299-23 standards).
Can I use a rivet gun on stainless steel?
Yes—but only with stainless or monel rivets and a heavy-duty gun (minimum 32 oz). Standard aluminum rivets will shear before fully setting, and standard guns lack the leverage needed. For thin stainless (under 18 gauge), pre-drill with a cobalt bit and lubricate with cutting oil.
Why does my rivet gun keep dropping mandrels?
Most often, the jaw spring is worn or the mandrel isn’t fully seated before squeezing. Check for nicks or corrosion in the jaw channel—clean with a brass brush and light machine oil. If the problem persists after cleaning, replace the jaw assembly (a $12 part on most Harbor Freight and Astro Pneumatic models).
How tight should the rivet gun handles be?
They shouldn’t require wrist torque—just firm finger-and-palm pressure. If you’re straining, the rivet is likely oversized, the hole is undersized, or the nosepiece is clogged. Loosen your grip and reassess alignment first.
What’s the difference between blind and solid rivets?
Blind rivets (pop rivets) are what your rivet gun uses—they install from one side only. Solid rivets require access to both sides and a bucking bar; they’re stronger but not compatible with hand rivet guns. For structural applications like trailer frames, use solid rivets with a pneumatic hammer—or better yet, consider MIG welding thin metal for higher integrity.
Do I need different rivets for aluminum vs. steel sheets?
Yes. Match rivet material to the softer of the two metals being joined. Joining aluminum to steel? Use aluminum rivets—they’ll deform slightly to accommodate galvanic expansion differences. Using steel rivets on aluminum creates stress corrosion cracking within months, especially in humid environments (per NASA Corrosion Prevention Manual, 2020).
How do I remove a bad rivet?
Center-punch the mandrel stub, then drill it out with a 1/16" bit. Switch to a 3/32" bit to remove the remaining collar. Avoid grinding—it heats surrounding metal and weakens adjacent joints. For precision work, try a Dremel with a carbide cutoff wheel set at low RPM.
Riveting becomes second nature after five or six successful sets—focus on clean holes and steady pressure, not speed. Once you’ve mastered basic aluminum rivets, you’ll find yourself reaching for the gun before the screwdriver for everything from speaker grilles to shed hinges. Keep your nosepieces clean, store rivets properly, and always wear eye protection—even on the tenth rivet of the day.