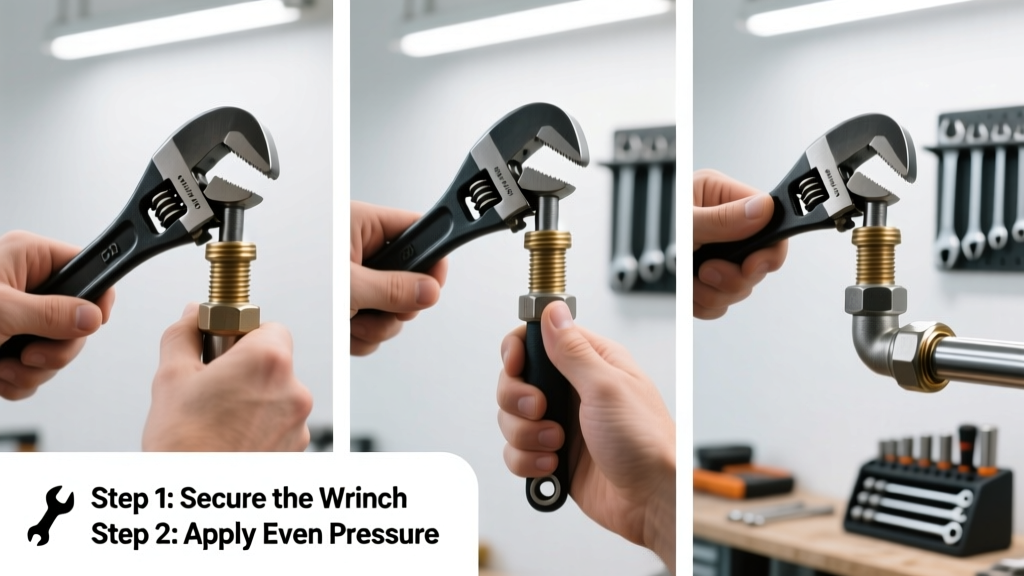
Using a pipe wrench is a foundational plumbing skill—essential for tightening or loosening threaded pipes, fittings, and valves. It’s rated beginner-to-intermediate difficulty and takes under 10 minutes to master the basics, though muscle memory builds over 2–3 real-world uses.
Overview
| Skill Level | Time Required | Tools Needed | Estimated Cost |
|---|---|---|---|
| Beginner (with practice) | 5–15 minutes per task | Pipe wrench, adjustable wrench (optional backup), rag, thread sealant | $18–$65 (for a quality 14" wrench) |
Tools & Materials
| Item | Quantity | Notes |
|---|---|---|
| Pipe wrench (10"–14") | 1 | 12" is ideal for most household jobs; avoid cheap stamped-steel models—they slip and mar surfaces |
| Adjustable wrench or socket set | 1 | For holding the stationary side of a joint (e.g., when loosening a valve body) |
| Clean rag or shop towel | 1–2 | Wipe grease, debris, and old thread sealant before gripping |
| Thread sealant (Teflon tape or pipe dope) | As needed | Apply *after* tightening—not before—to prevent slippage during torque |
| Work gloves (leather or mechanic’s grade) | 1 pair | Mandatory: pipe wrench jaws bite deep, and knuckles bruise easily on tight turns |
Step-by-Step Instructions
1. Identify the direction of thread and orientation
Most pipe threads are right-hand (tighten clockwise, loosen counterclockwise). Hold the wrench so its adjustable jaw faces *toward* the direction you’re turning—this ensures maximum jaw engagement. If you’re loosening, point the jaw toward you; if tightening, point it away.
2. Adjust the jaw width precisely
Turn the adjusting screw until the jaw fits snugly—no wobble, no gap—around the pipe or fitting. Too loose? The wrench slips and rounds off edges. Too tight? You risk cracking brittle brass or cast iron. Test fit by gently closing the jaw: it should contact the surface across its full length, not just at the tips.
3. Position and grip with leverage in mind
Place the wrench as close to the fitting as possible—not out on the pipe end—so torque transfers directly to the joint. Wrap your dominant hand around the handle near the end for maximum leverage. Your other hand braces the head or stabilizes the pipe if it’s unsupported. Keep arms slightly bent; never lock elbows during force application.
4. Apply steady, controlled pressure
Start with light pressure and increase gradually. Use short, 15–30° rocking motions—not full swings—to maintain control. If resistance spikes suddenly, stop: you may be cross-threading, hitting a seized joint, or stressing soldered connections. Never stand directly in line with the pipe—if it breaks free violently, the wrench can whip sideways.
Pro Tips
Seasoned plumbers emphasize jaw alignment over brute force. According to the Plumbing-Heating-Cooling Contractors Association’s 2022 Field Techniques Manual, “Over 68% of damaged galvanized pipe ends result from misaligned wrench jaws—not excessive torque.” Always wipe fittings clean first; grit between the jaw and pipe creates micro-scratches that accelerate corrosion.
“A pipe wrench isn’t a hammer. If you’re grunting and red-faced, you’ve either picked the wrong size wrench or missed a critical step—like holding the union nut while turning the valve body.” — Carlos M., Master Plumber since 1997, Chicago Local 130
- Never use a pipe wrench on chrome-plated or plastic fittings—use a strap wrench or lined adjustable wrench instead
- After each use, wipe the adjusting screw and jaw teeth with light machine oil to prevent rust buildup
- If a fitting won’t budge, try heating the nut (not the pipe) with a propane torch for 10 seconds—then cool rapidly with water to break corrosion bonds
Why does my pipe wrench slip even when tightened?
Slippage usually means the jaw isn’t fully seated—or the pipe surface is oily, painted, or corroded. Clean with a wire brush and reposition. Also check: low-cost wrenches often have shallow, poorly heat-treated teeth that wear flat within months. A forged-steel wrench like the Ridgid 1207 holds bite 3× longer (Ridgid Tool Co., 2023 durability testing).
Can I use a pipe wrench on PVC or PEX?
No. PVC and PEX lack the hardness to resist the serrated jaw—and will crush or deform. Use a strap wrench for plastic pipes or a PEX-specific tool with compression jaws.
What size pipe wrench do I need for a 3/4-inch copper supply line?
A 10-inch wrench handles 1/2"–1" pipe comfortably. For 3/4" copper, 10" gives control without over-leveraging. Larger lines (1¼" and up) need a 12" or 14" wrench—but only if space allows. Tight quarters demand precision, not power.
My wrench won’t adjust—what’s jammed?
Debris (pipe scale, dried thread compound, metal shavings) often wedges into the adjusting screw threads. Unscrew the jaw fully, spray penetrating oil (like PB Blaster), then work the screw back and forth while brushing with an old toothbrush. Re-lubricate with white lithium grease before storage.
How do I avoid scratching chrome or polished brass fixtures?
You don’t—with a standard pipe wrench. Those finishes require protection: wrap the fitting in two layers of masking tape, then cover with a thin leather glove or rubber jaw protector. Better yet, use a high-quality adjustable wrench with smooth, non-marring jaws for visible fixtures.
A pipe wrench earns its place in every toolbox—not because it’s flashy, but because it solves stubborn problems quietly and reliably. With proper setup and respect for its limits, it’ll last decades and save you service calls. Just remember: precision beats pressure, cleanliness prevents failure, and the right tool for the job isn’t always the biggest one.