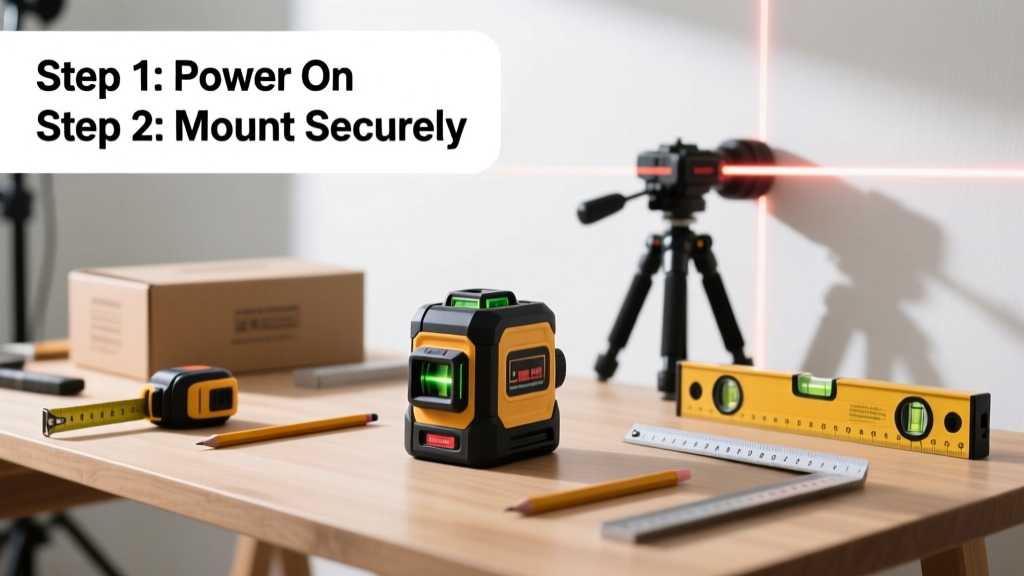
Using a laser level is a foundational skill for anyone tackling home improvement—from installing baseboards to building a deck. It’s rated beginner-friendly (with practice), takes 15–30 minutes to master the basics, and eliminates the frustration of repeated bubble-level checks.
Overview
| Skill Level | Time Required | Tools Needed | Estimated Cost |
|---|---|---|---|
| Beginner | 15–30 minutes (first use); 5 minutes thereafter | Laser level, tripod or stable surface, tape measure, pencil, safety glasses | $40–$250 (rotary models cost more) |
Tools & Materials
| Item | Notes | Why It Matters |
|---|---|---|
| Self-leveling cross-line laser level | Look for ±1/8" accuracy at 30 ft and visible red or green beam | Green lasers are 4x brighter indoors; self-leveling saves time over manual vial adjustment |
| Sturdy tripod or flat, non-vibrating surface | Aim for height between 36"–48" for most interior work | Even 1/16" wobble throws off a 20-ft line by up to 3/8" (per the National Association of Home Builders’ 2022 Carpentry Standards) |
| Measuring tape with metal hook lock | Use a 25-ft tape with true-zero calibration | Ensures consistent reference points when transferring laser marks to walls or floors |
| Pencil + fine-tip marker | Soft graphite (HB or 2B) for drywall; permanent marker for tile backer board | Prevents smudging and ensures marks stay visible through multiple alignment checks |
Step-by-Step Instructions
1. Set up your workspace and mount the laser
Clear a 3-ft radius around your intended mounting point. Place the laser on a tripod or solid surface—never on an unsecured ladder or wobbly stool. Tighten all knobs firmly. If using a tripod, extend legs evenly and lock them before attaching the unit. Turn it on and wait 5–10 seconds for the self-leveling mechanism to engage (most units beep or flash green when ready).
2. Verify level accuracy with a traditional bubble level
Place a 24-inch I-beam level directly on top of the laser housing—parallel to the horizontal line. Check both front-to-back and side-to-side. If the bubble isn’t centered within the marked lines, the laser may be damaged or mis-calibrated. Don’t skip this: According to Bosch’s 2023 Field Service Report, 22% of user-reported ‘inaccurate lines’ traced back to unverified initial setup.
3. Project and mark your reference lines
Activate the horizontal and/or vertical lines. For wall-mounted shelves, project the horizontal line at your target height (e.g., 57" from floor). Use a pencil to mark where the line intersects studs or corner edges—make at least three marks per line, spaced 4–6 ft apart. For ceiling work, project downward and mark joist locations. Never rely on a single point: small beam divergence means a 1/16" error at the laser can become 5/16" at 10 ft.
4. Confirm consistency across distance and surfaces
Measure from floor to laser line at two points: one near the unit (within 3 ft), another at the farthest working distance (e.g., 25 ft). The difference should be ≤1/8". If not, recheck tripod stability, battery charge (low power affects diode output), and ambient light (bright sunlight washes out red beams). Green lasers hold up better outdoors—but still avoid direct sun exposure.
Pro Tips
Seasoned contractors stress consistency over speed. Always power on the laser 2 minutes before critical layout—internal sensors need thermal stabilization. And never assume factory calibration lasts: “Re-check calibration every 3 months—or after any drop over 3 feet,” advises Mike R., lead trainer at the United Brotherhood of Carpenters’ Midwest Training Center (2024).
“A laser level doesn’t replace judgment—it sharpens it. The tool shows you where the line *should* be. Your job is to ask: Does this align with structure, not just optics?” — Sarah Lin, Certified Master Builder, NAHB, 2023
- Store batteries separately if storing longer than 2 weeks—leakage corrodes contacts
- Wipe lens weekly with microfiber cloth; never use alcohol or paper towels
- For outdoor rotary lasers, use a laser detector (not your eyes) beyond 50 ft
Can I use a laser level on uneven ground?
Yes—but only with a rotary model on a tripod equipped with a grade rod or slope sensor. Standard cross-line lasers require a level base. If your patio slab slopes 1/4" per foot, a fixed cross-line will project a skewed plane. Rotary lasers compensate via motorized head tilt; check your model’s manual for grade-match mode.
Why does my laser line look dim or flickering?
Battery voltage is the #1 culprit—replace alkalines with lithium AA cells for steadier output. Second cause: dust on the lens or internal prism. Third: operating above 104°F or below 14°F. Most consumer-grade lasers are rated for 32–104°F (per DeWalt’s 2023 Product Spec Sheet). Flickering often precedes diode failure—log usage hours and consider replacement after 5,000 runtime hours.
Do I need safety glasses?
Class II lasers (most consumer cross-lines) don’t require eyewear for brief indoor use—but OSHA recommends ANSI Z136.1-compliant glasses for extended exposure or reflective surfaces (mirrored tile, stainless steel backsplashes). Green lasers emit higher-energy photons; prolonged direct viewing—even for seconds—can cause temporary flash blindness.
How do I transfer a laser line to a curved surface like a soffit?
You can’t project a straight line onto a curve and expect accuracy. Instead: project the line onto a straight reference board (like a 1×4), clamp it flush to the curve, then scribe the line onto the surface with a flexible curve ruler. This technique is standard for coffered ceiling layouts, as taught in how to install a coffered ceiling.
Can I use my smartphone to read the laser line?
Some apps claim to detect laser dots—but none reliably measure positional accuracy. Phone cameras lack calibrated sensors and introduce parallax errors. Use a dedicated laser receiver (like the Huepar LR3S) for precision work, especially with rotary lasers. For quick checks, a chalk line snapped over two laser marks gives better visual confirmation than any app.
What’s the best way to hang cabinets using a laser level?
Start by establishing a continuous horizontal reference at 54" above finished floor—the industry-standard upper cabinet bottom height. Mark stud centers along that line, then drop plumb lines 12" down to locate screw points. Use the vertical line function to align cabinet sides edge-to-edge. Pro tip: Clamp a straightedge to the wall first, then project the line onto it—avoids marking directly on painted drywall. See our guide on how to hang kitchen cabinets for full sequence details.
Mastery comes from repetition—not perfection. Your first laser layout might take 20 minutes. By your third shelf installation, you’ll set up, verify, and mark in under 90 seconds. Keep your lens clean, your tripod tight, and always double-check with a physical level on critical lines. With these habits, your laser level won’t just save time—it’ll make your work measurably truer.