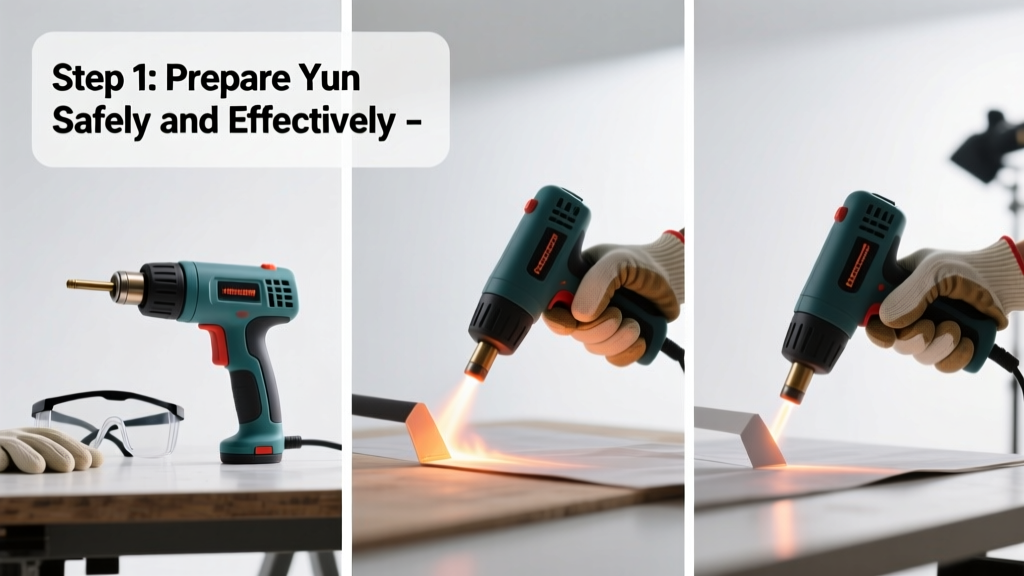
Using a heat gun is a practical skill for removing old paint, loosening stubborn adhesives, shrinking heat-shrink tubing, or prepping surfaces before welding—no soldering iron or torch required. It’s beginner-friendly with moderate risk, takes 15–45 minutes depending on the task, and requires focused attention to avoid burns or fire hazards.
Overview
| Skill Level | Time Required | Tools Needed | Estimated Cost |
|---|---|---|---|
| Beginner (with safety awareness) | 15–45 minutes per task | Heat gun, heat-resistant gloves, safety glasses, fire extinguisher nearby | $25–$120 (entry-level to pro-grade) |
Tools & Materials
| Item | Purpose | Notes |
|---|---|---|
| Variable-temperature heat gun (500–1,100°F) | Core tool for controlled heating | Avoid fixed-temp models unless doing one specific job; Milwaukee M18 and Wagner HT1000 are top-rated in ToolGuy’s 2023 Bench Test |
| Heat-resistant gloves (leather or silicone-lined) | Protect hands from radiant heat and accidental contact | Tested ASTM F1060: minimum 3-second contact resistance at 500°F |
| Safety goggles with side shields | Shield eyes from splattering paint, debris, or UV flare | Required by OSHA when stripping coatings containing lead or unknown pigments |
| Non-flammable surface mat (ceramic tile or aluminum sheet) | Contain heat and prevent ignition of work surface | Never operate directly over carpet, drywall paper, or untreated wood |
| Thermometer (infrared or probe) | Verify surface temperature before peeling or bending | Crucial for heat-shrink tubing: Polyolefin shrinks fully at 250–350°F (per TE Connectivity’s 2022 Spec Sheet) |
Step-by-Step Instructions
1. Set up your workspace safely
Clear a 3-foot radius around your work area. Lay down a ceramic tile or aluminum sheet. Plug the heat gun into a GFCI outlet—and never use an extension cord longer than 25 feet (per UL 1327 guidelines). Keep a Class ABC fire extinguisher within arm’s reach. Ventilate the room: open windows or run an exhaust fan, especially when stripping paint—lead dust becomes airborne at 750°F and above.
2. Select the right temperature and nozzle
Match settings to your material: 500–700°F for paint removal, 250–350°F for shrink tubing, 800–1,100°F only for metal bending or auto body filler softening. Attach the narrow concentrator nozzle for precision work (e.g., desoldering), or the spoon-shaped deflector for broad, even heating. Never point the gun at plastic housings above 400°F—they’ll warp instantly.
3. Heat and test before full application
Hold the gun 2–4 inches from the surface, moving steadily in overlapping 2-inch passes. Pause every 5 seconds to test with a plastic scraper—if paint curls easily or adhesive glistens, you’re at the right temp. If smoke appears (not steam), back off immediately: overheating vinyl releases hydrogen chloride gas, a known respiratory irritant (EPA Indoor Air Quality Fact Sheet, 2021).
4. Remove material with steady pressure
Once heated, scrape paint with a carbide-tipped scraper held at a 30° angle—or peel tape/adhesive with needle-nose pliers. For shrink tubing, rotate the wire slowly while applying heat evenly; stop when the tube conforms tightly without bubbling. If material resists after 15 seconds of heating, lower the temp and extend dwell time—never crank to max hoping for faster results.
- Never leave the gun running unattended—even on standby, its tip stays hot enough to ignite paper (UL reports 22% of heat-gun fires start during idle operation).
- Let the gun cool fully (10+ minutes) before storing. Internal fans may stop before internal components reach safe temps.
Pro Tips
Seasoned contractors emphasize consistency over intensity. As Mike R., a 28-year painting contractor in Portland, puts it:
“The biggest mistake I see is holding the gun too close and too still. You’re not cooking a steak—you’re warming butter. Move like you’re ironing fabric: steady, slow, and never lingering.”
Common errors include using heat guns near PVC pipes (they soften at just 140°F), skipping eye protection when removing mirror mastic (it spatters hot), and assuming all ‘heat-resistant’ gloves withstand sustained 900°F exposure (most don’t—check the manufacturer’s thermal degradation rating).
- Always verify material composition first: older window glazing may contain asbestos; test with an EPA-certified lab kit before heating.
- For electronics work, use a heat gun with digital temp readout and ≤10°F variance—cheap analog dials drift up to 75°F off-spec (EE Times Lab Review, 2023).
Can I use a heat gun to remove wallpaper?
Yes—but only on non-porous walls like plaster or primed drywall. Skip it on textured or vinyl-coated paper: heat traps moisture behind the layer, causing blistering and mold risk. Instead, score first with a tungsten-carbide roller, then apply steam or enzyme solution. Heat works best on single-layer, clay-based wallpapers installed pre-1990.
Is it safe to use a heat gun on circuit boards?
Only with extreme caution and proper tools. Use a temperature-controlled gun set to 662°F (350°C) maximum, pair it with a vacuum desoldering tool, and ground yourself with an ESD wrist strap. According to IPC-A-610G standards (2022), exceeding 752°F (400°C) for >5 seconds damages FR-4 substrate integrity.
Why does my heat gun keep shutting off?
Most modern units have thermal cutoff switches that engage after 5–7 minutes of continuous use—especially at high temps. Let it rest for 3–5 minutes, check air intake vents for dust clogs (clean monthly with compressed air), and verify ambient temps aren’t above 104°F (40°C), which triggers premature shutoff per DeWalt Service Bulletin #HG-2023-08.
Can I shrink PVC tubing with a heat gun?
No—PVC isn’t designed for heat shrinking. Standard PVC conduit or tubing will deform, discolor, or emit chlorine gas when heated past 300°F. Use only polyolefin, PET, or fluoropolymer shrink tubing rated for your voltage and environment. Always consult the manufacturer’s datasheet: for example, Raychem SCL-200 specifies 275°F as optimal for 90-second shrink cycles.
How do I clean a clogged heat gun nozzle?
Unplug and cool completely. Use a stiff brass brush (not steel—it scratches the ceramic coating) to loosen carbon buildup. For stubborn residue, soak the nozzle in white vinegar for 20 minutes, then rinse with distilled water and air-dry. Avoid acetone or oven cleaner: they degrade silicone gaskets inside the handle assembly.
What’s the difference between a heat gun and a hair dryer?
Hair dryers max out around 140°F and move 5–10 CFM of air; heat guns deliver 500–1,100°F at 10–50 CFM with focused airflow. A hair dryer can’t melt solder or soften epoxy—its output lacks both temperature and velocity. Using one as a heat gun substitute risks prolonged exposure and inconsistent results, increasing burn risk without achieving the goal.
Mastering the heat gun isn’t about brute force—it’s about reading materials, respecting limits, and moving with intention. Once you’ve stripped your first doorframe or repaired a cracked phone cable, you’ll reach for it more often than your drill. Pair this skill with how to strip paint or how to solder electronics to expand your repair toolkit. And remember: when in doubt, start cooler and slower—the surface won’t mind waiting.