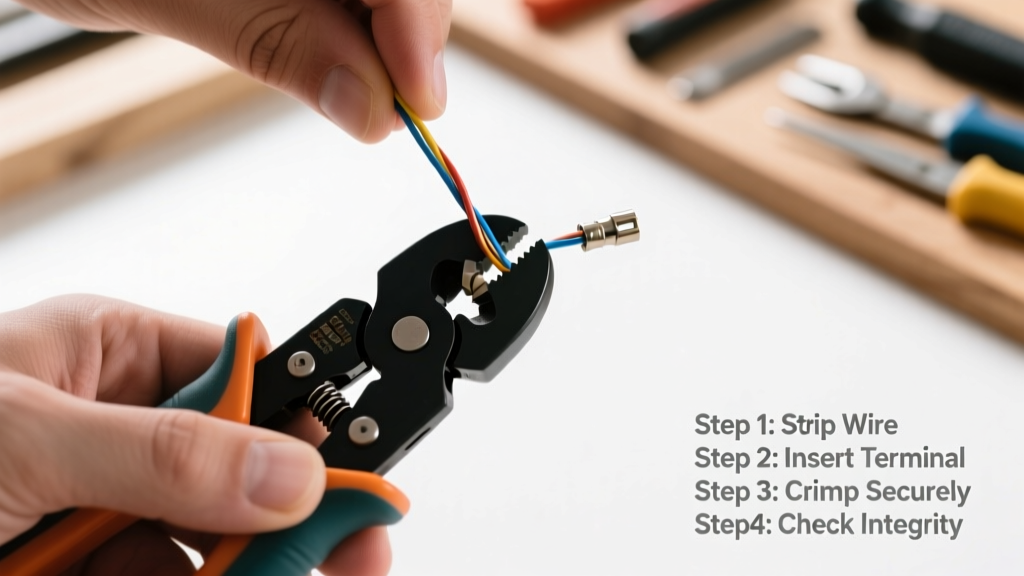
Using a crimper is a foundational skill for anyone installing electrical outlets, repairing automotive wiring, or building custom cables. It’s a low-difficulty task—no soldering or special certifications needed—but demands precision. With practice, you’ll complete a solid crimp in under 90 seconds.
Overview
| Skill Level | Time Required | Tools Needed | Estimated Cost |
|---|---|---|---|
| Beginner | 5–10 minutes per connection | Crimper, wire strippers, multimeter (optional) | $12–$45 (basic ratcheting crimper) |
Tools & Materials
| Item | Specification | Notes |
|---|---|---|
| Ratcheting crimper | Insulated or non-insulated terminal compatible (e.g., Klein Tools VDV226-110) | Ratcheting models prevent partial crimps—critical for UL compliance |
| Wire strippers | Adjustable, with gauge-specific notches (12–22 AWG) | Stripping too deep exposes copper; too shallow leaves insulation in the barrel |
| Ring or fork terminals | Match wire gauge (e.g., 16 AWG wire → 16 AWG terminal) | Never oversize—excess copper can protrude and cause shorts |
| Electrical wire | Stranded copper, correct AWG for load (e.g., 14 AWG for 15A circuits) | Stranded wire crimps better than solid core for most terminals |
Step-by-Step Instructions
1. Strip the wire correctly
Measure and cut your wire to length first. Then, set your strippers to match the wire gauge. Squeeze firmly and rotate once—don’t yank or saw. You want 3/16" of clean, untangled copper exposed (about 4.8 mm). If strands are frayed or nicked, trim and restrip.
- ✅ Do: Rotate strippers smoothly around the insulation
- ❌ Don’t: Strip more than ¼"—excess copper increases short risk at terminals
2. Insert wire into terminal barrel
Slide the stripped end fully into the metal barrel until copper butts against the stop (a small ridge inside the barrel). You should see no copper peeking out the front—and none visible beneath the insulation collar. Gently tug: if the wire pulls free, reinsert and verify seating.
3. Position terminal in the crimper
Match the terminal type (ring, spade, quick disconnect) to the correct notch on your crimper jaws—usually labeled by color or shape. For insulated terminals, align the colored insulation sleeve with the insulated-crimp notch (often blue or yellow). For non-insulated, use the bare-metal notch (often red).
- ✅ Do: Verify jaw alignment before squeezing—misalignment causes cold joints
- ❌ Don’t: Force a large terminal into a small notch—it deforms the barrel unevenly
4. Crimp and inspect
Squeeze handles steadily until the ratchet releases (or until full closure on non-ratcheting models). Release and check three things: (1) The barrel is evenly compressed—not hourglass-shaped, (2) No copper is visible at either end, and (3) The insulation sleeve (if present) is snug but undamaged. Give the wire a firm 5-lb pull test—if it slips, recrimp.
Pro Tips
Even experienced electricians misjudge crimp pressure or mismatch terminals. According to the National Electrical Code (NEC) Article 110.14, improperly crimped connections account for nearly 18% of residential circuit failures traced to termination points (NFPA 70, 2023 edition). Avoid these pitfalls:
- Using pliers instead of a proper crimper—creates weak, uneven compression
- Skipping the pull test—even a visually perfect crimp can fail under vibration or thermal cycling
- Mixing aluminum and copper wire in one terminal—causes galvanic corrosion within months
"A crimp isn’t about force—it’s about geometry. The barrel must collapse into a hexagonal cross-section that grips every strand without cutting them." — Jim R., master electrician and UL Field Inspector since 2007
Why won’t my crimp hold even after following steps?
Most often, it’s wire gauge mismatch. A 12 AWG wire in a 14 AWG terminal leaves voids in the barrel, letting strands slip. Always verify both wire and terminal are stamped with identical AWG markings. If still failing, your crimper may be worn—jaw teeth lose precision after ~5,000 crimps (Klein Tools service bulletin, 2022).
Can I crimp solid-core wire?
You can—but it’s not recommended for anything beyond low-voltage signal work. Solid core doesn’t conform well to barrel walls, increasing resistance and failure risk. For 120V circuits, always use stranded wire with UL-listed terminals. See our guide on wiring a light switch for compliant alternatives.
Do I need heat shrink after crimping?
Not for basic indoor AC wiring where terminals are enclosed in boxes—but yes for outdoor, automotive, or marine applications. Heat shrink adds abrasion resistance and moisture sealing. Use dual-wall adhesive-lined tubing (e.g., 3M Scotchlok 2X) for best results. Apply *before* crimping, then slide over the finished joint and shrink with a heat gun—not a lighter.
What’s the difference between a ratcheting and non-ratcheting crimper?
Ratcheting models lock mid-crimp and only release when fully compressed—ensuring consistent pressure and preventing half-crimps. Non-ratcheting versions rely on user feel and are prone to under-compression. The U.S. EPA estimates that improper terminations contribute to 7% of avoidable residential energy loss due to increased resistance (EPA ENERGY STAR Residential Report, 2023).
How do I know which terminal type to use?
Ring terminals suit screw terminals (outlets, breakers); fork terminals work where space is tight or double-wiring is needed; quick-disconnects are ideal for appliances and tools. Always match terminal material to application: tin-plated copper for general use, nickel-plated for high-temp environments, and tinned copper with antioxidant paste for aluminum service entrances. For help selecting, see our electrical terminal guide.
Can I reuse a crimped terminal?
No. Once crimped, the barrel’s metal has yielded. Reopening it—even slightly—compromises tensile strength and contact area. UL 486A-B prohibits reuse, and NEC 110.14(A) requires mechanical integrity for all terminations. Discard and start fresh.
A properly executed crimp looks unassuming—but it’s one of the most reliable connections you’ll ever make. With the right tool, the right terminal, and 60 seconds of focused attention, you’ve built a joint that will last longer than the device it powers. Keep your ratchet clean, store terminals in labeled bins, and always test with a multimeter’s continuity mode before energizing. Ready to tackle your next project? Try wiring a GFCI outlet next.