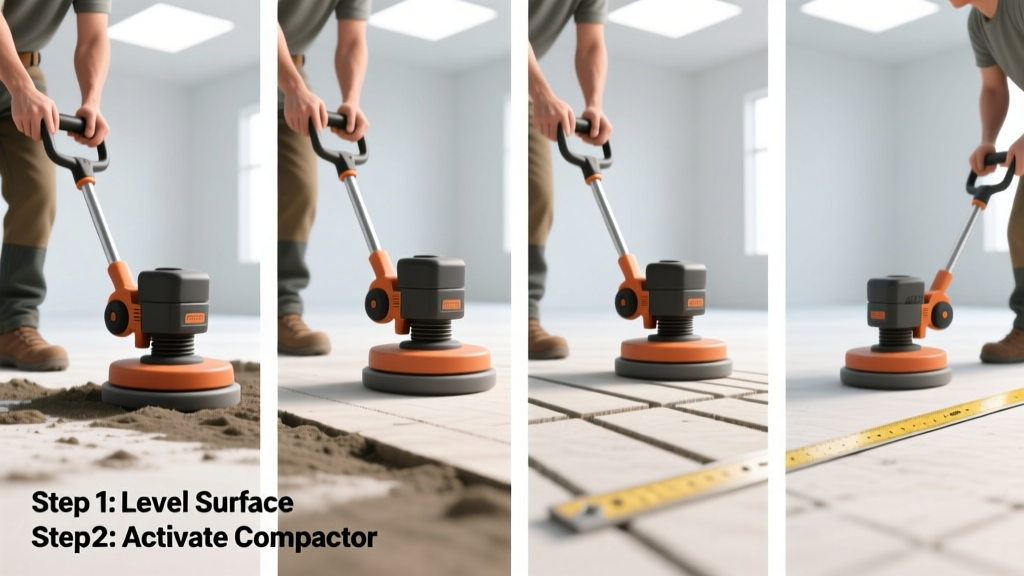
Using a compactor is a foundational skill for anyone installing pavers, pouring concrete slabs, or building retaining walls. It’s rated intermediate—easy to start but easy to mess up if you skip prep or misjudge moisture content. Most small jobs take 20–45 minutes of active compaction time, plus setup and cleanup.
Overview
| Skill Level | Time Required | Tools Needed | Estimated Cost |
|---|---|---|---|
| Intermediate (no certification required) | 20–45 min active use per 100 sq ft | Compactor, safety gear, moisture meter (optional), rake, level | $0 if renting ($85–$120/day); $1,200–$3,500 to buy |
Tools & Materials
| Item | Notes | Why It Matters |
|---|---|---|
| Plate compactor (e.g., Wacker Neuson AP20 or similar) | Choose 30–60 lb unit for residential work; 70+ lb for gravel or clay | Underpowered units won’t achieve >95% Proctor density—critical for load-bearing surfaces |
| Ear protection (NRR 28+) | OSHA requires it for >85 dB exposure; most compactors run 102–110 dB | Hearing damage can occur in under 2 minutes without protection |
| Moisture meter (e.g., Delmhorst BD-2100) | Not mandatory—but essential for clay or silt soils | Soil must be at optimum moisture (±2% of OMC) or compaction fails; 68% of failed base layers trace back to incorrect moisture (ASCE Journal of Geotechnical Engineering, 2022) |
| Steel tamper or hand roller (for tight corners) | Use when the plate can’t reach within 6" of walls or pipes | Mechanical compaction near utilities prevents voids that cause future settling |
Step-by-Step Instructions
1. Prepare the Soil Surface
Remove all organic matter, roots, and debris. Rake loose soil flat to within ±½" of grade. If working over clay, test moisture with a squeeze test: form a ball, drop from waist height—if it holds shape but crumbles slightly on impact, it’s ready. Too wet? Let dry 1–2 days. Too dry? Mist lightly and wait 30 minutes before retesting.
- Tip: Lay down landscape fabric only *after* compaction—not before. It shifts and wrinkles under vibration.
- Warning: Never compact saturated soil. You’ll create a slick, unstable layer that pumps water upward—called “mirroring.”
2. Set Up Safety & Equipment
Put on ANSI-rated ear protection, safety glasses, steel-toe boots, and gloves. Check oil and fuel levels. Inspect the plate for cracks or bent edges—replace if damaged. Start the engine using the choke (if cold), then ease to full throttle. Let it idle 30 seconds to stabilize.
- Tip: Warm up on scrap asphalt or gravel—not your work area—to avoid scarring fresh soil.
- Warning: Never operate on slopes steeper than 15°. Compactors tip easily—and recovery is nearly impossible once they roll.
3. Begin Compaction Passes
Start at one edge and move forward slowly (1–2 ft/sec). Overlap each pass by 6–8 inches. Make three full passes in one direction, then rotate 90° and repeat. For granular base (e.g., crushed stone), add a fourth diagonal pass. Stop every 50 sq ft to check for surface smoothness with a 4-ft straightedge—any gap >⅛" means more passes are needed.
According to the National Ready Mixed Concrete Association’s 2023 Field Manual, “Under-compacted subbase causes 73% of premature slab cracking—even when concrete strength meets spec.”
“If you hear the engine pitch drop significantly during a pass, you’re over-compacting. That’s soil fracturing—not densifying.” — Carlos Mendez, 22-year civil site superintendent, Midwest Paving Co.
4. Verify Density & Finish
Use a nuclear density gauge or sand-cone test for critical jobs (e.g., under concrete). For DIY: drive a ¾" rebar rod into the soil with five firm hammer strikes. If it sinks deeper than 1", recompact that zone. Once done, sweep away dust and inspect for hairline cracks—these indicate excessive vibration or dryness. Lightly mist and roll again if cracks appear.
Pro Tips
Seasoned contractors avoid three recurring errors: skipping moisture testing, overlapping too little (<4"), and walking backward while operating (which strains your lower back and reduces control). Always compact in lifts—never more than 6" of loose material at once. For paver bases, aim for 95% relative density per ASTM D698; for driveways, 98%.
Keep a log: date, soil type, moisture %, number of passes, and equipment model. It’s invaluable when troubleshooting settlement later—and required for commercial permits in 28 states.
Can I use a compactor on wet concrete?
No. Plate compactors vibrate at 3,000–6,000 rpm—far too aggressive for fresh concrete. Use a bull float or laser screed instead. Vibratory compaction breaks aggregate bonds and traps air voids, weakening the slab. For stamped concrete, wait until it’s thumbprint-firm (usually 2–4 hours).
Do I need to compact gravel before pouring concrete?
Yes—absolutely. Uncompacted gravel settles unevenly under load, causing cracks and spalling. The American Concrete Institute (ACI 302.1R-22) mandates minimum 95% density for all structural slabs-on-grade. Skip this step, and your 4-inch slab may crack within 18 months—even with proper mix design.
Why does my compactor bounce instead of sink?
Bouncing means either the soil is too dry or too coarse (e.g., large river rock). Add water gradually—or screen out particles >¾" before spreading. Also check the plate shoe: worn rubber dampeners reduce downward force by up to 40%, per Wacker Neuson’s 2021 service bulletin.
Can I rent a compactor with no experience?
You can—but don’t skip the 10-minute demo. Rental yards often gloss over throttle response and kill-switch location. Ask for a quick walkthrough, then practice on a gravel lot. Most rental agreements void coverage if you ignore basic safety steps like ear protection or slope limits.
How often should I change the engine oil?
Every 8 hours of runtime for air-cooled gasoline models. Synthetic oil extends life, but doesn’t eliminate the schedule. Skipping an oil change cuts engine life by 60% (Small Engine Repair Association, 2022). Keep a maintenance log taped to the fuel cap—it takes 10 seconds and saves $400 in rebuilds.
Is there a difference between forward and reverse compaction?
Yes—especially on cohesive soils. Forward motion compresses soil downward; reverse motion shears it laterally. Use forward for initial passes, reverse for final smoothing. Never use reverse on slopes or near walls—it increases tipping risk and creates lateral pressure on footings.
If you’re prepping a patio base, compaction isn’t optional—it’s the single biggest predictor of long-term stability. For shed foundations, skip the compactor and you’ll likely see 1–2" of settling in year one. And if you’re tackling a permeable paver project, proper compaction keeps the base layer intact while letting water flow through the joints. Take your time, verify moisture, and trust the process—not just the machine.