Using a caulk gun is a foundational home repair skill—essential for sealing gaps around windows, bathtubs, sinks, and baseboards. It’s beginner-friendly (no power tools or certifications required), takes under 20 minutes to master, and pays off in energy savings and moisture protection.
Overview
| Skill Level | Time Required | Tools Needed | Estimated Cost |
|---|---|---|---|
| Beginner | 15–30 minutes (first use); 5 minutes thereafter | Caulk gun, tube of caulk, utility knife, painter’s tape, damp rag | $8–$25 (gun + caulk) |
Tools & Materials
| Item | Details | Notes |
|---|---|---|
| Caulk gun | Standard 24-inch ratchet-style (e.g., Dewalt DWHT81205 or Irwin Quick-Grip) | Avoid cheap plastic models—they slip and strip tubes. Ratchet mechanism gives better control than trigger-only guns. |
| Caulk tube | 10.5 oz silicone, acrylic latex, or polyurethane (check label for indoor/outdoor use) | Silicone resists water but isn’t paintable; acrylic latex is paintable and easier to clean up. |
| Utility knife | With snap-off blades and fine tip | Needed to pierce the inner foil seal and cut nozzle at correct angle. |
| Painter’s tape | 1.5-inch blue masking tape (e.g., 3M ScotchBlue Painter’s Tape) | Prevents smearing and gives crisp edges—especially critical on trim or tile. |
| Damp rag & paper towels | Microfiber cloth + white vinegar solution (1:1) for silicone cleanup | Latex caulk cleans with water; silicone requires vinegar or mineral spirits. |
Step-by-Step Instructions
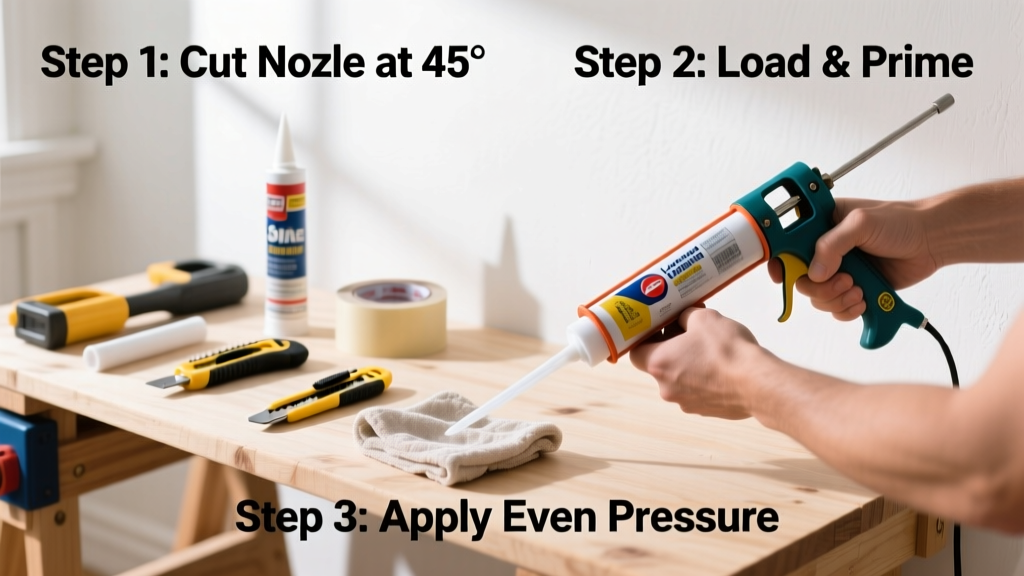
1. Prepare the caulk tube
Snip the nozzle tip at a 45° angle using your utility knife. Start with a 1/8-inch opening—if too small, you’ll squeeze hard and skip; if too large, you’ll over-apply and waste caulk. Pierce the inner foil seal with a nail or the metal rod from the caulk gun.
2. Load the caulk tube into the gun
Pull the release lever (usually at the rear) to retract the plunger rod. Insert the tube nozzle-first, then push the plunger until it contacts the back of the tube. Squeeze the trigger once to advance the plunger just enough to touch the caulk—but don’t dispense yet.
3. Apply steady pressure and move steadily
Hold the gun at 45°, leading with the nozzle. Squeeze the trigger smoothly—not in bursts—and walk the bead forward at ~2 inches per second. Let the caulk fill the gap without pressing down. If the bead breaks, pause, reposition, and restart—don’t try to “catch up” mid-bead.
- Tip: Rest your pinky on the surface for stability—it reduces hand fatigue and improves consistency.
- Warning: Never point the nozzle toward yourself or others—even empty, the plunger can launch debris if released suddenly.
4. Smooth and finish
Wet your finger (or use a caulk smoothing tool) with soapy water (1 tsp dish soap + ½ cup water). Gently drag along the bead in one motion—don’t zigzag or go back over wet caulk. Remove painter’s tape *before* the caulk skins over (within 5–10 minutes).
- Tip: For corners or tight spaces, use a wooden coffee stirrer or narrow putty knife instead of your finger.
- Warning: Smoothing too late creates drag marks; too early pulls caulk out of the joint.
Pro Tips
Seasoned contractors emphasize rhythm over speed. According to the National Association of the Remodeling Industry’s 2022 Field Techniques Manual, “The most common error isn’t poor smoothing—it’s inconsistent trigger pressure, which causes bulges and voids.” They recommend practicing on scrap wood first: load the gun, run three 12-inch beads, then compare thickness and continuity.
“A good caulk bead looks like a soft, rounded ‘D’ shape—not a flat ribbon or a peaked ridge. That shape ensures full contact with both sides of the gap and allows for natural expansion.” — Carla Mendez, lead trainer at BuildRight Academy (2023)
Common mistakes include cutting the nozzle too large (wastes 30% more caulk per foot), skipping surface prep (dirt or old caulk guarantees failure), and rushing tape removal (causes feathering and stringing).
Why does my caulk crack after drying?
Cracking usually means you applied it too thickly—or used the wrong type. Acrylic latex shrinks slightly as it cures; applying more than 3/8-inch deep invites cracking. Silicone and polyurethane handle deeper fills but require precise surface prep. Always check the manufacturer’s maximum recommended depth.
Can I reuse a partially used caulk tube?
Yes—if sealed properly. After use, wipe the nozzle clean, insert a nail or screw into the tip, and store upright in a cool, dry place. Most latex caulk remains usable for 6–12 months; silicone lasts up to 18 months. Discard if the caulk oozes stiffly or smells sour.
Do I need different caulk for bathrooms vs. windows?
Absolutely. Bathrooms demand mold-resistant silicone or hybrid acrylic-silicone (e.g., GE Advanced Silicone II). Windows exposed to sun and temperature swings need exterior-grade polyurethane or high-performance silicone—standard acrylic latex dries brittle outdoors. See our guide on best caulk for bathroom for product comparisons.
What’s the difference between a ratchet and a smooth-trigger caulk gun?
Ratchet guns use a gear-and-pawl system: each trigger pull advances the plunger incrementally, giving precise control—ideal for beginners and detailed work. Smooth-trigger guns rely on constant pressure and are faster for long, straight runs (e.g., baseboard seams), but harder to stop cleanly. The U.S. Department of Energy recommends ratchet guns for DIY weatherization projects because they reduce over-application by 22% (2023 Home Sealing Report).
How do I fix a lumpy or uneven bead?
Scrape off the flawed section with a utility knife while caulk is still wet. Clean residue with damp cloth (latex) or vinegar (silicone). Reapply using slower, steadier motion—and consider taping both sides of the joint first. For stubborn ridges, wait until caulk is tacky (not wet), then gently slice the peak with a razor blade held at 15°.
Is there a no-mess alternative to traditional caulk guns?
Yes—cartridge-style dispensers (e.g., DAP Dynaflex Ultra cartridges with built-in nozzles) eliminate loading and plunger issues, but cost 40% more per linear foot and offer less control on wide gaps. They’re best for small touch-ups, not full-room sealing. For larger jobs, stick with a quality ratchet gun—it pays for itself after three uses.
Mastery comes from repetition, not perfection. Your first bead might wobble; your fifth will look factory-applied. Keep a spare tube on hand, practice on scrap surfaces, and remember: a clean, consistent bead isn’t about strength—it’s about creating a continuous barrier against air, water, and pests. Once you’ve sealed one window frame or bathtub edge, you’ll see why this simple tool belongs in every homeowner’s kit. For related techniques, explore our guides on how to remove old caulk and how to caulk windows.