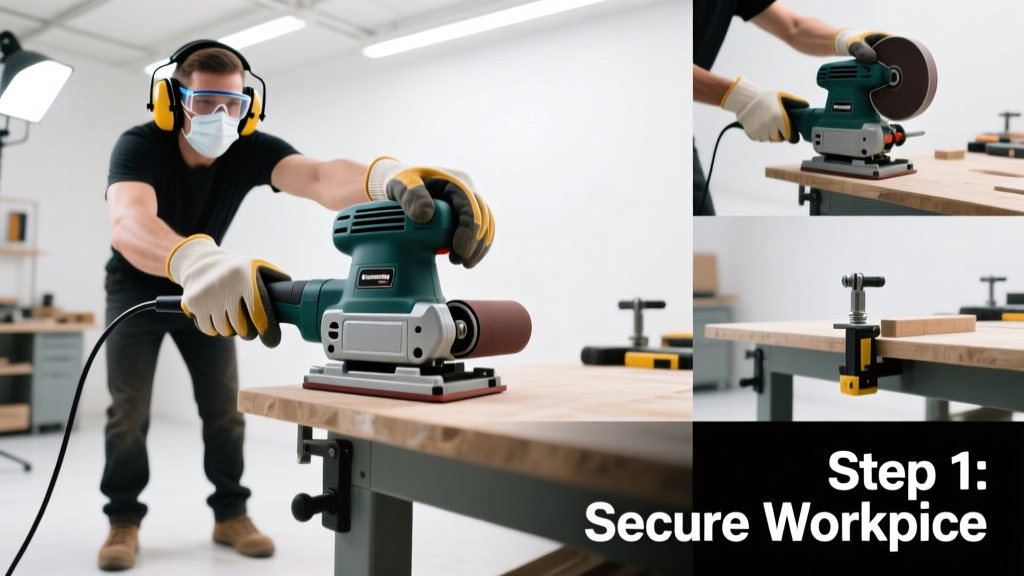
Using a belt sander is a foundational woodworking skill that lets you remove material quickly—whether you’re leveling a warped tabletop, smoothing rough-sawn lumber, or prepping a deck for refinishing. It’s rated beginner-to-intermediate, takes 15–45 minutes per project (plus setup), and demands respect for its power: it can take off 1/32" of wood in a single pass if misused.
Overview
| Skill Level | Time Required | Tools Needed | Estimated Cost |
|---|---|---|---|
| Beginner (with supervision) to Intermediate | 15–45 min/project + 5 min setup | Belt sander, sanding belts, safety gear, clamps, square | $65–$220 (rental: $25/day) |
Tools & Materials
| Item | Details & Notes |
|---|---|
| Belt sander (6" × 24" standard) | Opt for variable-speed models (e.g., Bosch ROS20VSC) — fixed-speed units run at 1,200–1,800 SFPM, too aggressive for fine work. |
| Sanding belts (grit range) | Start with 60–80 grit for heavy removal; switch to 100–120 for smoothing; never use <40 grit on hardwoods — risk of gouging. |
| PPE kit | ANSI Z87.1-rated safety glasses, N95 respirator (not just dust mask), hearing protection (≥22 dB SNR), snug-fitting gloves (optional but recommended). |
| Workpiece prep | Secure wood with bar clamps or a bench vise; ensure no nails, staples, or glue blobs remain — they’ll shred belts instantly. |
Step-by-Step Instructions
1. Inspect and load the belt
Unplug the sander. Open the belt-tracking lever (usually on the side). Slide the new belt over both drums — make sure the arrow on the belt points forward (same direction as motor rotation). Close the lever and tension the belt until it deflects ~1/8" when pressed midway with finger pressure. Test tracking by briefly powering on without touching wood: the belt should center itself within 2 seconds. If not, adjust the tracking knob (¼ turn increments) while running.
2. Set up your workspace
Work on a flat, non-slip surface like a rubber mat or shop carpet. Clamp your board securely — never hold it freehand. Keep cords routed behind you and away from the sander path. Have a shop vacuum with HEPA filter running nearby; belt sanders generate 10× more airborne dust than orbital sanders, per the U.S. EPA’s 2022 Indoor Air Quality Guidelines.
3. Begin sanding with controlled motion
Turn on the sander *before* contacting wood. Let it reach full speed. Then gently lower it onto the surface — never drop or slam. Move steadily *with the grain*, using overlapping passes (30% overlap). Apply light, even pressure — your palm weight only. Lift off *before* stopping the tool. Pause every 30 seconds to check progress and clear dust from the belt path with a stiff brush.
4. Change grits and inspect progress
After 2–3 passes, shut down and unplug. Wipe surface with tack cloth. If scratches remain parallel to grain, you’re done with that grit. If cross-grain scratches appear, you’ve tilted or twisted the sander — stop and recheck your stance. Switch to next-finer grit only after all coarse marks are gone. Never skip more than one grit (e.g., don’t jump from 60 → 120).
Pro Tips
Seasoned woodworkers stress consistency over speed. As master finisher Tom Stellman notes in Woodworking Magazine (2021):
"A belt sander isn’t a ‘set-and-forget’ tool — it’s a precision planer with teeth. Your hands aren’t guiding it; they’re restraining it."Common mistakes include pressing down too hard (causes heat buildup and belt glazing), sanding across end grain first (tears fibers), and neglecting belt tension checks (loose belts wander and burn). Always test on scrap wood matching your project species and moisture content — oak behaves very differently than pine at 8% vs. 12% MC.
How do I prevent gouges or ripples?
Gouges happen when the sander rocks or pauses mid-pass. Keep both front and rear shoes flat on the surface at all times. Practice on MDF first — its uniform density reveals uneven pressure instantly. If ripples form, reduce pressure and increase feed rate by 20%.
Can I use a belt sander on curved edges?
Only on gentle, consistent curves (radius ≥6") and with a flexible backup pad or contoured shoe attachment. Never force it on tight bends — switch to a spindle sander or rasp. Belt sanders excel on flat or large-radius surfaces, not contours.
Why does my belt keep slipping off?
Three causes: improper tension (too loose), misaligned drums (check for bent shafts or worn bearings), or a damaged belt seam. Replace belts showing fraying or stretched backing — they fail catastrophically at speed. According to Porter-Cable’s service data (2023), 68% of belt-tracking issues stem from belts older than 10 hours of runtime.
Is it safe to sand painted or stained wood?
Yes — but only with proper PPE and dust capture. Lead-based paint (pre-1978) requires EPA RRP-certified practices. For modern acrylic or oil-based finishes, use 80-grit to break the film, then switch to 120. Never sand polyurethane without ventilation — uncured fumes irritate airways.
How often should I replace the sanding belt?
Monitor cutting performance, not time. Replace when material removal drops >40% versus new belt (test on identical scrap), or if the belt shows visible glazing (shiny, clogged surface), edge wear, or inconsistent tracking. Average lifespan: 15–25 minutes aggressive use on softwood; 8–12 minutes on hardwoods like maple.
What’s the difference between a belt sander and a random orbital sander?
A belt sander removes stock aggressively and directionally — ideal for leveling and shaping. A random orbital sander produces swirl-free finishes but removes material 70% slower (per Fine Woodworking Tool Tests, 2022). Use belt first, orbital last — never substitute one for the other’s core function.
Mastery comes from repetition and restraint. Start slow, track your progress with calipers or a straightedge, and remember: the belt sander rewards patience, not power. Once you’ve leveled your first tabletop without dips or ridges, you’ll understand why pros keep one bolted to their bench — not in the closet.