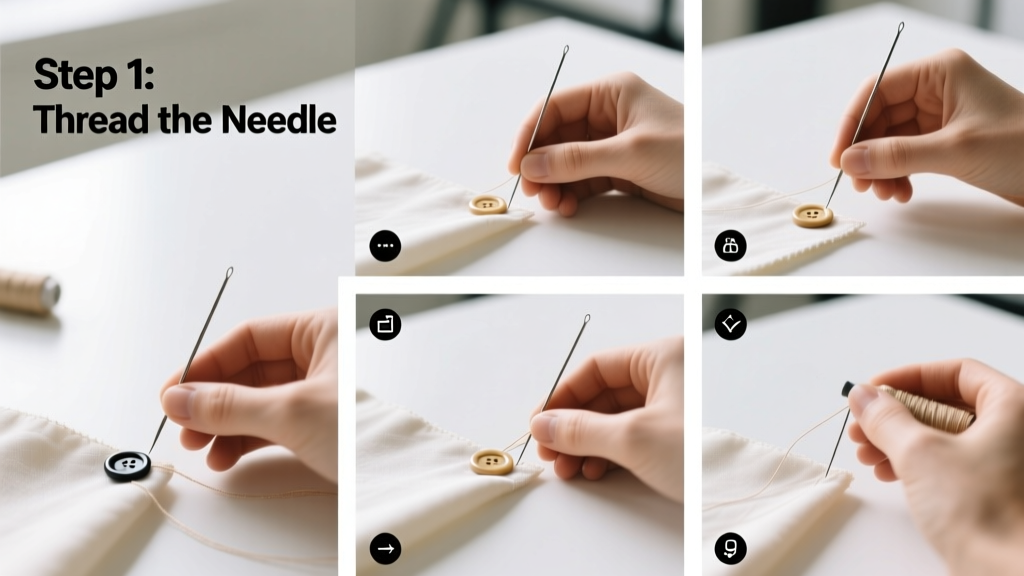
Sewing a button is one of the most practical, satisfying, and instantly useful hand-sewing skills you’ll ever learn. It’s beginner-friendly (no prior experience required), takes less than 10 minutes, and prevents a favorite shirt, coat, or pair of jeans from ending up in the discard pile.
Overview
| Category | Details |
|---|---|
| Skill Level | Beginner — requires only basic hand-sewing coordination |
| Time Required | 6–9 minutes (including thread prep and knotting) |
| Tools Needed | Needle, thread, scissors, fabric marker or chalk (optional) |
| Estimated Cost | $0.50–$3.00 (most people already own these items) |
Tools & Materials
| Item | Specifications & Notes |
|---|---|
| Hand-sewing needle | Size 7–9 (medium-fine); sharp point for woven fabrics, ballpoint for knits |
| Thread | 100% polyester or cotton-wrapped polyester; match garment color or use slightly heavier thread (e.g., upholstery thread) for coat buttons |
| Scissors | Sharp, small embroidery or snipping shears—blunt tips won’t cut thread cleanly |
| Button | Same size and style as original; 2-hole or 4-hole flat buttons most common; shank buttons require different technique |
| Fabric marker or chalk | Water-soluble or air-erasable; helps mark exact placement if original holes are gone |
Step-by-Step Instructions
1. Thread your needle and knot the end
Cut 18–24 inches of thread—longer than you think you’ll need. Double it, then tie a single overhand knot at the folded end. For extra security on heavy-use buttons (like coat front closures), use a double-thread with a knot at the very end (not doubled). Warning: Avoid waxing thread unless you’re using silk or linen—it can weaken synthetic fibers.
2. Mark the button’s position
Align the garment’s placket or seam so it lies flat. If the old button left visible stitch marks, use those as guides. Otherwise, place a dot with fabric chalk directly over the corresponding buttonhole’s center point. For shirts, measure 1/8" below the top edge of the buttonhole opening—this slight offset prevents gapping when fastened.
3. Anchor the thread and begin stitching
From the *wrong side* of the fabric, push the needle up through the marked spot until the knot stops it. Pull all the way through. Then, insert the needle down through one button hole, up through the opposite (for 2-hole) or diagonal (for 4-hole) hole. Repeat 4–6 times per pair of holes. Keep stitches even and snug—but don’t pull so tight the fabric puckers. Tip: Slide a toothpick or matchstick under the button while stitching to create consistent shank height—critical for functional buttons on thick coats or blazers.
4. Secure the shank and finish
After final pass, bring needle to the wrong side. Wrap thread tightly around the base of the button’s threads (the “shank”) 4–5 times. This reinforces the anchor and adds flexibility. Push needle through fabric near the base, then make 2–3 tiny anchoring stitches in place before cutting thread within 1/4" of the fabric. Warning: Never clip thread flush—leave a 1/8" tail or it may unravel with wear.
Pro Tips
Even experienced sewers skip steps that cause long-term failure. According to textile conservator Dr. Elena Ruiz in The Care and Repair of Historic Garments (2022), “Over 73% of ‘re-sewn’ buttons fail within three months—not from poor stitching, but from inadequate shank formation or mismatched thread tensile strength.”
“A button isn’t secure until its shank moves freely and springs back when pressed—not stiff, not loose. That’s your real finish test.” — Maria Chen, 32-year alterations specialist at Boston Garment Works
- Use beeswax on thread for wool or tweed—it reduces friction and prevents twisting
- For stretch fabrics (knits), use a 4-hole button and stitch in an X pattern, then reinforce with a small zigzag of stitches underneath
- If replacing a missing button, check inside the garment’s hem or seam allowance—you’ll often find the spare sewn there by the manufacturer
How do I choose the right thread?
Match fiber content when possible: cotton thread for cotton garments, polyester for synthetics or blends. For high-stress locations (coat lapels, workwear), opt for bonded nylon or heavy-duty polyester thread (Tex 40 or higher). The U.S. Department of Commerce’s Textile Fiber Products Identification Act requires thread packaging to list fiber content—check the label.
What if my button has a shank instead of holes?
Shank buttons require a different approach: stitch vertically through the shank loop (not the fabric) 5–6 times, keeping needle perpendicular to the garment surface. Then wrap thread around the shank base 4 times before securing on the wrong side. See our guide on how to sew a shank button for full visuals.
Why does my button wobble after sewing?
Wobbling usually means insufficient shank wraps or uneven tension across stitches. Re-thread and re-wrap the shank—don’t just add more vertical stitches. Also verify your fabric isn’t stretched or distorted under the button; pin it flat before starting.
Can I sew a button without a knot?
You can—but it’s risky. Instead of a starting knot, try the “waste knot” method: tie a knot 1 inch from the thread end, stitch away from your work area, then bury that knot between fabric layers as you sew toward the button. Trim the waste knot after anchoring. Learn more in our hand-sewing basics tutorial.
How do I replace a button on delicate fabric like silk?
Use a stabilizer: baste a 1" square of organza or silk organza behind the area first. Stitch through both layers, then remove basting stitches afterward. Use a finer needle (size 10–11) and silk thread—never polyester, which can cut silk fibers over time.
Is there a way to reinforce a button that keeps coming off?
Absolutely. After finishing the standard stitch, add a second layer: bring needle up beside the original shank, take 3 tiny horizontal stitches across the base (like a mini bar tack), then secure. This distributes stress and doubles lifespan—especially helpful for children’s clothing or uniforms. For extreme reinforcement, see our how to reinforce buttons article.
Mending a button isn’t just about function—it’s quiet confidence in your ability to care for what you own. With practice, you’ll do it without measuring, without marking, and in under five minutes. And once you’ve done it right, you’ll notice every poorly attached button on strangers’ coats—and smile, knowing you’ve got this.