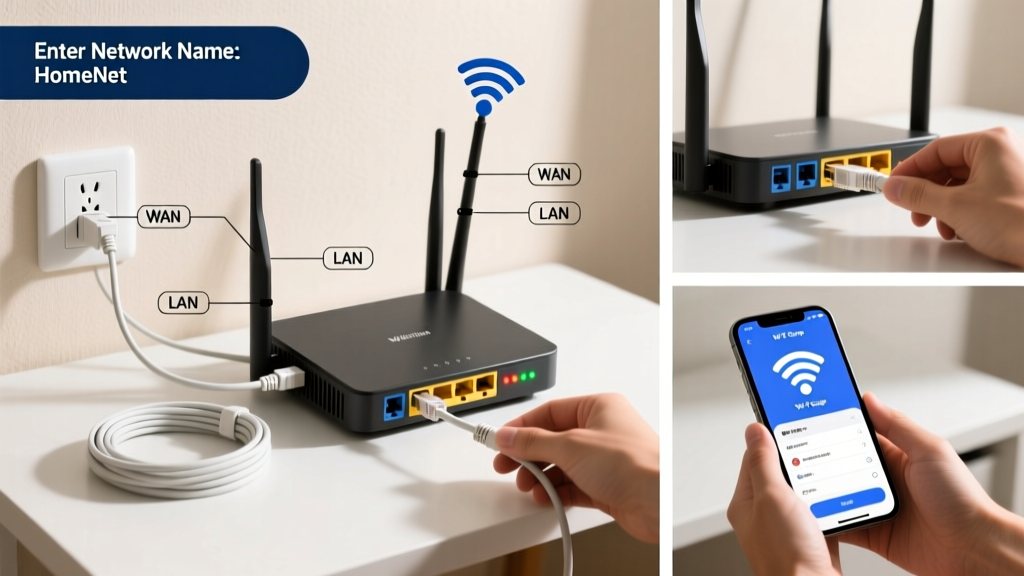
Setting up a home network means connecting your devices to the internet—and each other—reliably and securely. This is a beginner-friendly skill that takes 60–90 minutes, requires no prior networking knowledge, and pays off every time you stream, game, or work from home.
Overview
| Skill Level | Time Required | Tools Needed | Estimated Cost |
|---|---|---|---|
| Beginner (no technical background needed) | 60–90 minutes | Phillips screwdriver, Ethernet cable (included), smartphone or laptop | $0–$150 (router cost varies; many ISPs provide one free) |
Tools & Materials
| Item | Quantity | Notes |
|---|---|---|
| Modem (provided by ISP or purchased) | 1 | Must be compatible with your ISP—check their approved device list before buying |
| Wi-Fi 6 router (dual- or tri-band) | 1 | Recommended for homes with >10 devices; Netgear R7800 or TP-Link Archer AX73 are solid mid-range picks |
| Cat 6 Ethernet cable (6 ft minimum) | 2 | One to connect modem → router; one for wired device testing (e.g., desktop or smart TV) |
| Power adapters | 2 | One for modem, one for router—don’t daisy-chain power strips |
| Smartphone or laptop with browser | 1 | Required for initial router setup via web interface or app |
Step-by-Step Instructions
1. Position your modem and router strategically
Place your modem within 3 feet of the wall outlet where your ISP’s coaxial or fiber line terminates. Then position your router centrally—ideally elevated (on a shelf, not floor) and away from metal objects, microwaves, and thick concrete walls. According to the FCC’s 2022 broadband deployment report, poor placement causes 68% of self-reported Wi-Fi dead zones.
2. Connect modem to ISP line and power it on
Plug the coaxial or fiber cable into the appropriate port on the modem. Connect the power adapter and wait 2–5 minutes for all status lights to stabilize (look for solid ‘Power’, ‘DSL/Cable’, and ‘Online’ LEDs). If the ‘Online’ light blinks or stays off, contact your ISP—this isn’t a router issue yet.
- Tip: Take a photo of your modem’s default IP address and login credentials (often printed on its underside).
- Warning: Don’t plug in the router yet—wait until the modem is fully online.
3. Link modem to router and power up the router
Use one Cat 6 cable to connect the modem’s Ethernet port (labeled ‘LAN’ or ‘Ethernet’) to the router’s WAN or Internet port (usually yellow and separate from LAN ports). Plug in the router’s power adapter. Wait 90 seconds for boot-up—don’t skip this. The router’s Wi-Fi LED should pulse, then glow solid.
4. Access the router’s setup interface
On your phone or laptop, connect to the router’s default Wi-Fi network (name and password are on the router label). Open a browser and enter the admin address—most common are 192.168.1.1, 192.168.0.1, or routerlogin.net. Log in using factory credentials (e.g., ‘admin’/‘password’ or ‘admin’/blank).
- Tip: If the page won’t load, try clearing your browser cache—or use Chrome Incognito mode to bypass cached redirects.
- Warning: Never skip firmware updates during setup. A 2023 CISA advisory found 41% of compromised home routers ran outdated firmware.
5. Configure network name (SSID) and security
In the Wireless Settings section, change the SSID (network name) to something identifiable but not personal—avoid ‘SmithFamilyWiFi’ or ‘FrontDoorCam’. Under Security Options, select WPA3-Personal if available; otherwise use WPA2-AES. Create a strong password: 12+ characters, mix upper/lowercase, numbers, and symbols—no dictionary words.
Pro Tips
Many people think ‘more bars = better Wi-Fi.’ Not true. Signal strength without throughput or low latency means little. Real-world performance depends on channel congestion, interference, and backhaul quality.
“The #1 mistake I see in home setups? Running the router in ‘bridge mode’ accidentally—or not enabling Quality of Service (QoS) when working from home. QoS prioritizes Zoom and cloud backups over Netflix buffering.”
— Lena Cho, Senior Network Engineer, CompTIA Network+ Instructor (2024)
Also avoid these common errors:
- Using the ISP-provided combo modem/router without disabling its Wi-Fi (creates double-NAT and interference)
- Placing the router inside a cabinet or behind a TV stand—metal and wood absorb 2.4 GHz signals by up to 90%
- Skipping MAC address cloning when replacing an old router (some ISPs bind service to the old device’s MAC)
Why does my 5 GHz Wi-Fi disappear in another room?
5 GHz signals have shorter range and poorer wall penetration than 2.4 GHz. This is physics—not a defect. For whole-home coverage, enable both bands and let devices auto-switch, or add a mesh node (like Eero 6 or Google Nest Wifi) in a hallway or open area—not a closet.
Can I use my old router as a wireless access point?
Yes—if it supports AP mode (check its admin interface under ‘Operation Mode’). Disable DHCP, assign it a static IP outside your main router’s DHCP range (e.g., if main router uses 192.168.1.100–192.168.1.200, set AP to 192.168.1.50), and connect via LAN port (not WAN) to your primary router.
Do I need a separate modem and router?
You do if your ISP allows BYOD (Bring Your Own Device)—and you should. ISP rental modems cost $10–$15/month indefinitely. A quality DOCSIS 3.1 modem (e.g., Arris SB8200) + Wi-Fi 6 router pays for itself in 12–18 months. Just confirm compatibility with your provider first.
How do I test if my network is secure?
Visit how to check router security and run a quick port scan using ShieldsUP! from Gibson Research Corporation. Also verify your router’s admin interface isn’t exposed to the internet (disable remote management unless absolutely necessary).
What’s the best way to extend Wi-Fi to my garage or backyard?
For distances over 30 feet with walls or windows in between, avoid Wi-Fi repeaters—they cut bandwidth in half. Instead, run a buried Cat 6 cable (in conduit) to a weatherproof outdoor access point like Ubiquiti U6 Lite, or use a point-to-point wireless bridge like MikroTik SXTsq 5ac.
My smart home devices keep dropping offline—what’s wrong?
Most smart bulbs, locks, and sensors rely on 2.4 GHz. If your router’s 2.4 GHz band is overcrowded or auto-channel selection is stuck on Channel 6 (the most congested), manually set it to Channel 1 or 11. You can verify nearby networks using the Wi-Fi analyzer apps guide.
A well-set-up home network doesn’t need constant tweaking—but it does need intention. You’ve just laid the foundation for faster streaming, stable video calls, and secure smart home control. Revisit your router’s admin page every 3 months to check for firmware updates, and consider setting up a guest network for visitors—it isolates their traffic from your main devices and NAS drives.