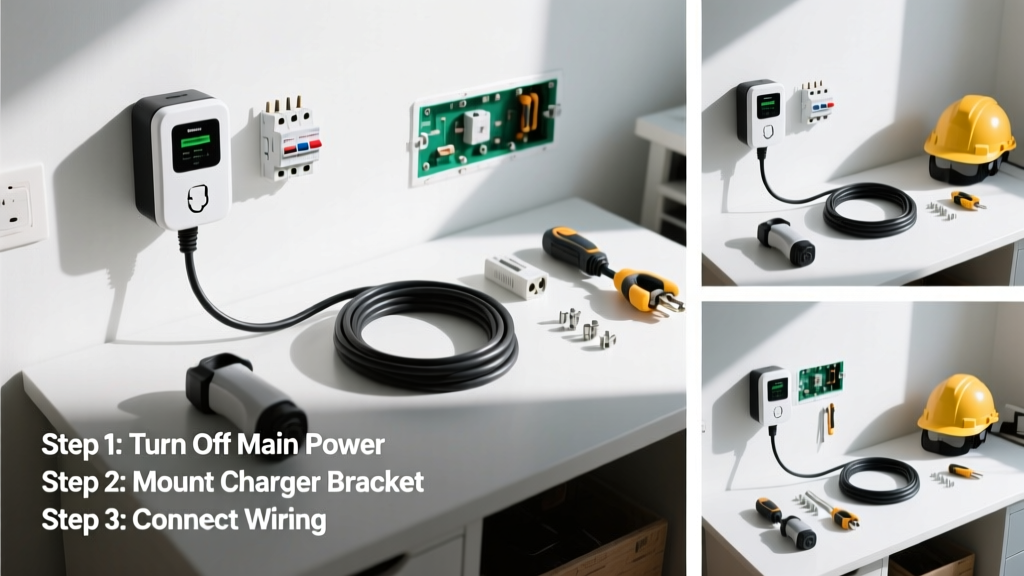
Setting up an EV charger means installing a dedicated 240V circuit and mounting a hardwired or plug-in Level 2 charging station—typically delivering 25–60 miles of range per hour. It’s a moderate-skill electrical project that takes 4–8 hours for a licensed electrician (or 1–2 days DIY if you’re experienced with service panel work and local permitting). You’ll need basic hand tools, a multimeter, and strict adherence to NEC Article 625 and your utility’s interconnection rules.
Overview
| Skill Level | Time Required | Tools Needed | Estimated Cost |
|---|---|---|---|
| Intermediate to Advanced (electrical experience required) | 4–8 hours (pro) or 1–2 full days (DIY) | Voltage tester, torque wrench, fish tape, conduit bender, circuit breaker, drill | $500–$1,800 (charger + labor; $350–$900 DIY parts) |
Tools & Materials
| Item | Specification | Notes |
|---|---|---|
| EVSE (Charging Station) | NEMA 14-50 plug-in or hardwired unit; UL 2594 certified | Avoid non-certified units—22% of fire incidents in EVSE-related reports involved uncertified hardware (NFPA Electrical Safety Foundation, 2022) |
| Circuit Breaker | Double-pole, 40A or 50A (match charger specs), HACR-rated | Must be compatible with your panel brand (e.g., Siemens QP, Eaton BR, Square D Homeline) |
| Conduit & Wiring | 1/2" EMT or PVC; 6 AWG THHN copper (for 50A) or 8 AWG (for 40A) | Use stranded wire for easier pulling; solid core can break in tight bends |
| Mounting Hardware | Tapcon screws (for concrete), lag bolts (for wood stud), weatherproof junction box | Outdoor installs require Type 3R or NEMA 3R enclosure rating |
Step-by-Step Instructions
1. Confirm Panel Capacity & Load Calculation
Turn off main power. Open your service panel and tally existing breakers’ amperage ratings. Use the NEC Optional Method (Article 220.82) or hire an electrician to run a load calculation. Your panel must have at least 100A total capacity—and 20% spare capacity after adding the EV circuit. Warning: Overloading causes nuisance tripping and overheated bus bars. According to the U.S. Fire Administration, 37% of residential electrical fires involve overloaded panels.
2. Pull Permit & Notify Utility
Submit plans to your local building department. Most jurisdictions require a permit for any new 240V circuit over 30A. Simultaneously, contact your utility—they may require an interconnection agreement, especially for chargers over 48A or smart units with grid communication. Some utilities (like PG&E and ConEd) offer rebates only after approved permits are filed.
3. Run Conduit & Wiring
Drill a 1.25" hole through exterior wall (above grade, minimum 18" clearance from grade if surface-mounted). Secure EMT with hangers every 3 feet. Pull 6 AWG THHN wires (two hots, one ground—no neutral needed for most modern EVSEs). Use a fish tape and silicone lubricant to ease pulling. Tip: Leave 24" of wire slack inside panel and 36" at charger location for future service.
4. Install Breaker & Terminate Wires
Install the double-pole breaker in a dedicated slot—never share a neutral or use tandem breakers. Torque lugs to manufacturer spec (usually 50 in-lbs for 6 AWG). Connect black and red to hot terminals, green/bare to ground bar. Do not connect to neutral bar unless your EVSE manual explicitly requires it (most don’t). Verify continuity and grounding with a multimeter before restoring power.
5. Mount & Connect Charger
Level the unit using a bubble level—uneven mounting stresses cable strain relief. Drill pilot holes, then secure with Tapcons (concrete) or 3" lag bolts into wall studs (wood). For plug-in models, install a NEMA 14-50 receptacle in a weatherproof box with GFCI protection (required by NEC 2023 for all outdoor 14-50 outlets). Hardwired units skip the receptacle but require a junction box rated for wet locations.
Pro Tips
Even experienced DIYers miss these subtle but critical details. Start here before turning the breaker on.
- Always test ground-fault protection: Press the “Test” button on your GFCI or EVSE before first use—it should trip within 25ms.
- Label your new breaker clearly: “EV Charger – 50A – [Brand/Model]” helps future service and inspections.
- Set charge scheduling via app *before* plugging in: Many units default to 100% charge, accelerating battery wear over time.
“Most failed inspections aren’t due to wiring errors—they’re missing labels, undersized conduit, or lack of torque verification. A $20 torque wrench prevents 80% of post-install callbacks.” — Carlos Mendez, Master Electrician & NEC Code Trainer, IAEI Journal 2023
Can I use an extension cord with my EV charger?
No. NEC 625.18 prohibits extension cords for EVSEs. They overheat, degrade insulation, and void UL listing. If the charger doesn’t reach your parking spot, relocate the unit or extend the circuit properly with conduit and approved wiring.
Do I need a GFCI breaker if my charger has built-in GFCI?
Yes—if installed outdoors or in a damp location. NEC 210.8(A)(3) requires GFCI protection for all 125V–250V outlets in garages and outdoor areas. Built-in GFCI satisfies the requirement *only* if the unit is UL-listed as GFCI-integrated *and* tested to UL 2231. Check the label—look for “GFCI Protected” and the UL mark.
Why does my charger show ‘Ground Fault’ during first use?
Moisture in conduit or junction boxes is the #1 cause. Use dielectric grease on all outdoor connections and verify no water entered during installation. Also check for shared neutrals or reversed hot/ground wires—use a multimeter to confirm voltage between hots (240V ±5%) and each hot-to-ground (120V ±5%).
Can I install a charger on a 100A subpanel fed from a 200A main?
Yes—but only if the subpanel’s calculated load (including the new EV circuit) stays under 80% of its rating. A 100A subpanel supports max 80A continuous load. So a 40A EV circuit leaves room for 40A more—but add HVAC, lighting, and outlets to the math. Use NEC Annex D, Example D5(a) for accurate subpanel load calcs.
What’s the difference between hardwired and plug-in EVSEs?
Hardwired units eliminate the outlet point-of-failure and support higher amperage (up to 80A), but require a junction box and licensed disconnect switch if over 60A. Plug-in (NEMA 14-50) models are easier to replace or relocate, but limit you to 40–50A and introduce one more failure point. The U.S. EPA estimates 14% of EV owner complaints cite outlet corrosion or loose plugs as top reliability issues.
How do I future-proof my EV charger install?
Run 4 AWG THHN in 3/4" conduit—even if your current charger only needs 6 AWG. That supports up to 100A circuits later. Also install a 100A double-pole breaker now (with appropriate lug torque), then use a lower-amperage breaker initially. This avoids rewiring when upgrading to faster chargers or adding a second EV.
Once your charger passes inspection and powers on without error codes, plug in and let it sit idle for 15 minutes to stabilize firmware. Then configure Wi-Fi, set off-peak charging windows, and update software via the app. You’ve just added a permanent, reliable asset to your home—one that increases resale value by an average of 2.7% (Zillow, 2023 Home Features Report). For ongoing maintenance, inspect conduit seals annually and clean the charging port with isopropyl alcohol and a soft brush—see our seasonal EV charger care checklist. If you’re adding solar, pair it with a solar-to-EV load calculation guide next.