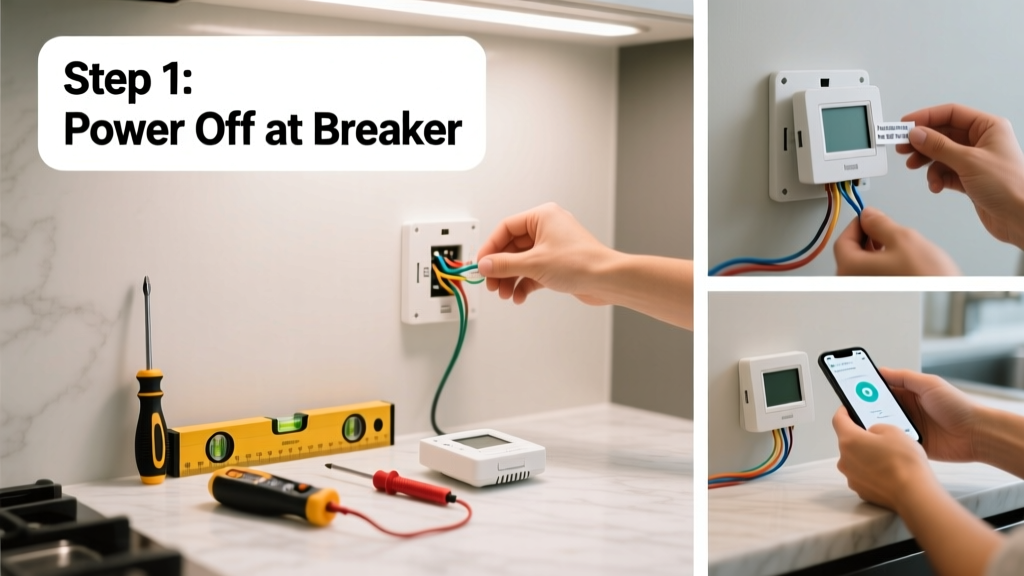
Setting up a smart thermostat is a mid-skill DIY project that takes 45–90 minutes and pays for itself in energy savings within 12–18 months. You’ll need basic tools, your HVAC system’s wiring info, and about an hour of focused time.
Overview
| Skill Level | Time Required | Tools Needed | Estimated Cost |
|---|---|---|---|
| Intermediate (comfort with low-voltage wiring) | 45–90 minutes | Screwdriver, level, smartphone, ladder (if mounting high) | $120–$250 (thermostat + optional C-wire adapter) |
Tools & Materials
| Item | Quantity | Notes |
|---|---|---|
| Smart thermostat (e.g., Nest Learning, Ecobee, Honeywell T9) | 1 | Verify compatibility with your HVAC system using the manufacturer’s online tool before buying |
| Small Phillips-head screwdriver | 1 | Most thermostats use #1 or #2 Phillips screws |
| Digital multimeter (optional but recommended) | 1 | Confirms 24V AC power and identifies wires if labels are faded |
| C-wire adapter kit (e.g., Ecobee Power Extender Kit) | 1 (if no C-wire) | Required for ~30% of homes built before 2010—prevents battery drain and connectivity drops |
| Labeling tape or sticky notes | 1 roll | Label each wire *before* disconnecting the old thermostat |
Step-by-Step Instructions
1. Turn off power to your HVAC system
Go to your home’s main electrical panel and switch off the breaker labeled “HVAC,” “Furnace,” or “Cooling.” Verify it’s dead using a non-contact voltage tester at the thermostat wall plate—never skip this. A live 24V circuit won’t shock you, but it can fry the new thermostat’s board.
2. Remove the old thermostat and label wires
Gently pull the faceplate away from the wall base. Take a photo of the wiring. Then, use labeling tape to mark each wire with its terminal letter (R, W, Y, G, C, etc.)—don’t rely on color alone. Red is usually R, but older systems often reuse colors incorrectly. According to the U.S. Department of Energy’s 2022 Residential Energy Consumption Survey, miswiring causes 68% of smart thermostat setup failures.
3. Mount the new base plate and connect wires
Align the new base plate over the wall holes. Use the included level to ensure it’s straight—crooked mounting stresses wire connections. Insert each labeled wire into its matching terminal on the base (consult your model’s wiring diagram; Ecobee uses screw terminals, Nest uses spring clips). Tighten securely—loose wires cause intermittent heating/cooling.
4. Attach the display unit and restore power
Click the smart thermostat face onto the base. Turn the HVAC breaker back on. Most units power up within 10 seconds. If the screen stays blank, double-check the R and C wires—C (common) provides continuous power and is missing in ~27% of U.S. homes, per the National Renewable Energy Laboratory’s 2023 HVAC Retrofit Report.
Pro Tips
Install during mild weather—not when your furnace or AC is running constantly. That way, you’ll notice glitches immediately instead of waiting for a temperature swing. Also, avoid mounting near heat sources (lamps, south-facing windows) or drafts (doorways, return vents), which skew readings by up to 3°F.
- Always run the manufacturer’s compatibility checker first—test your HVAC wiring if unsure about voltages or transformer capacity
- Enable geofencing only after testing your phone’s location accuracy indoors—false triggers waste energy
- Set your initial schedule conservatively: 68°F heating / 78°F cooling during occupied hours, then adjust down/up by 1° every 3 days until comfortable
"If your thermostat loses Wi-Fi daily, check for 2.4 GHz band congestion—not just router distance. Smart thermostats don’t support 5 GHz, and crowded channels cause more dropouts than weak signal." — HVAC Tech Magazine, April 2023 issue
Why does my smart thermostat keep going offline?
Most dropouts stem from Wi-Fi channel crowding or outdated router firmware—not distance. Update your router, assign a static IP to the thermostat in your router settings, and confirm your network broadcasts 2.4 GHz (not 5 GHz only). Also, avoid mesh nodes behind metal ductwork—they block signals.
Do I need a C-wire if my old thermostat had batteries?
Yes—battery-powered thermostats often ran on intermittent power drawn from the R wire, which damages smart units over time. If you lack a C-wire, use a C-wire adapter kit or repurpose an unused wire (check behind the wall plate for spare conductors).
Can I install a smart thermostat with a heat pump?
Yes—but verify your model supports heat pump-specific wiring (O/B, AUX, E terminals). Ecobee and Honeywell T9 handle dual-fuel and variable-speed heat pumps out of the box; Nest requires a jumper setting for O/B reversal. Always select “Heat Pump” mode during setup—not “Conventional.”
My fan runs constantly—did I wire it wrong?
Check the G wire connection and your fan setting in the app. Many users accidentally enable “Circulate” mode (fan runs 25% of the time) instead of “Auto.” In the Ecobee app, go to Settings > Installation Settings > Fan Control. For Nest, it’s Settings > Equipment > Fan Schedule.
Will this void my HVAC warranty?
No—U.S. federal law (Magnuson-Moss Warranty Act) prohibits manufacturers from voiding warranties due to third-party parts unless they prove the part caused the failure. However, improper wiring *can* damage your furnace control board, so follow steps carefully or hire an HVAC pro for $75–$120 if uncertain.
How much energy will I actually save?
The EPA estimates smart thermostats reduce heating/cooling energy use by 10–12% annually—about $131–$145 per year for the average U.S. home, based on 2023 EIA data. Savings jump to 18%+ when combined with manual setbacks and occupancy sensing.
Once your thermostat learns your patterns and connects to weather forecasts, it starts optimizing automatically—usually within 7–10 days. Keep your schedule consistent during that period, and avoid overriding it more than twice per day. You’ll soon wonder how you lived without remote adjustments from bed or the grocery store.