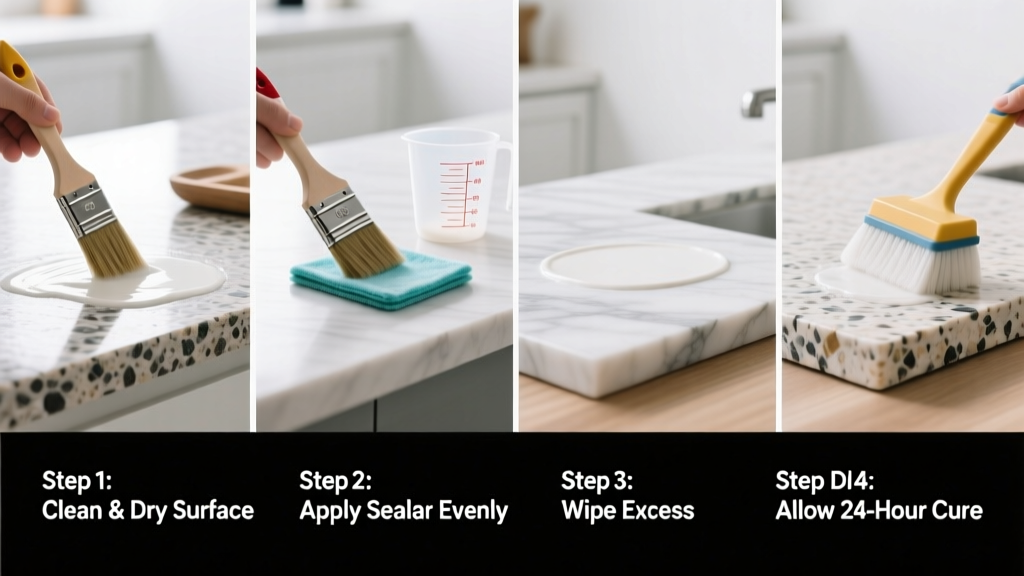
Sealing natural stone—like granite, marble, limestone, or travertine—is a protective skill that prevents stains, water damage, and acid etching. It’s a beginner-friendly task that takes under two hours (plus drying time), and done right, it extends your stone’s life by 3–5 years between reseals.
Overview
| Skill Level | Time Required | Tools Needed | Estimated Cost |
|---|---|---|---|
| Beginner | 1.5–2 hours active work + 24-hour cure time | Clean microfiber cloths, soft scrub brush, painter’s tape, spray bottle | $25–$65 (depends on sealer type and surface area) |
Tools & Materials
| Item | Quantity | Notes |
|---|---|---|
| pH-neutral stone cleaner (e.g., StoneTech All-Purpose Cleaner) | 1 bottle (16 oz) | Avoid vinegar, lemon, or bleach—they degrade calcite-based stones like marble and limestone |
| Penetrating impregnating sealer (solvent- or water-based) | 1 quart (covers ~150–200 sq ft) | Choose water-based for indoor use (low odor); solvent-based for high-moisture areas like showers (per ASTM C1379 testing) |
| Lint-free microfiber cloths (white only) | 6–8 | Colored cloths may bleed dye; lint leaves residue in pores |
| Small paintbrush (angled 1" synthetic bristle) | 1 | For grout lines and edges where rollers won’t reach |
| Painter’s tape | 1 roll | To mask adjacent surfaces (wood trim, cabinets, baseboards) |
Step-by-Step Instructions
1. Test absorbency and choose sealer type
Drop 3–5 drops of water on the stone surface in an inconspicuous spot (e.g., under sink cabinet). Wait 10 minutes. If the stone darkens, it’s porous and needs sealing. If it beads up and stays shiny, it’s likely already sealed—or non-porous (e.g., some basalts). According to the Marble Institute of America’s 2022 Maintenance Guide, only 62% of homeowners correctly identify when their stone requires resealing—most wait until staining occurs.
2. Clean thoroughly and let dry
Mix pH-neutral cleaner per label directions. Scrub gently with a soft nylon brush—never steel wool or abrasive pads. Rinse twice with distilled water (tap water leaves mineral deposits). Wipe dry with clean microfiber, then leave uncovered for at least 24 hours. Humidity above 60% slows evaporation: skip sealing if ambient moisture exceeds that threshold.
3. Apply sealer evenly with low-lint method
Pour sealer into a clean tray. Use a microfiber applicator pad (not a roller—it traps air) or the angled brush for corners. Work in 3' × 3' sections. Apply one thin, even coat—no pooling. Let sit 5–10 minutes (check manufacturer’s dwell time; e.g., Miracle Sealants 511 Impregnator recommends 5 min). Then buff aggressively with dry microfiber until no haze remains. Over-application causes sticky residue that attracts dust and dulls shine.
4. Repeat if needed—and cure properly
After 2 hours, test absorption again in same spot. If water still soaks in within 5 minutes, apply a second coat using identical technique. Never apply a third. Allow full cure: water-based sealers need 24 hours before light use; solvent-based require 48–72 hours before placing hot pans or standing water. The U.S. EPA estimates that improperly cured sealers off-gas volatile organic compounds (VOCs) at 3× the rate of fully cured ones.
Pro Tips
Stone doesn’t “need” annual sealing—it needs sealing when it fails the water test. Over-sealing wastes money and builds film. Most granite countertops only require resealing every 3–5 years; marble in kitchens may need it every 12–18 months due to frequent acid exposure (citrus, wine, vinegar).
“A sealer isn’t armor—it’s a temporary barrier. Your real defense is daily wiping and immediate spill cleanup. I’ve seen more marble ruined by coffee left overnight than by skipping three reseals.” — Elena Ruiz, CML (Certified Master Lapidary), StoneCare Institute, 2023
- Never seal damp or cold stone (<60°F / 15°C). Sealer won’t penetrate and will peel.
- Test sealer compatibility on a sample tile first—especially with honed or flamed finishes.
- Keep sealed surfaces dry for 48 hours post-application: no wet mopping, no steam cleaners.
How often should I reseal my natural stone?
Reseal only when the water test fails—not on a calendar schedule. High-traffic kitchen granite may go 4 years; bathroom marble near a shower might need it yearly. Track dates in your home maintenance log—you’ll notice patterns after two cycles.
Can I seal stone over old sealer?
No—old sealer must be stripped first using a poultice or commercial stripper like Aqua Mix Sealer & Coating Remover. Layering creates cloudy, uneven protection and can trap moisture beneath. Stripping takes 2–3 hours but prevents long-term delamination.
Why did my sealer turn white or chalky?
This is “blushing”—caused by applying sealer in humid conditions or sealing before the stone was fully dry. Light buffing with dry microfiber sometimes fixes it. If not, strip and restart. Solvent-based sealers are less prone to blushing than water-based in humid climates.
Does sealing make stone stain-proof?
No. Sealing makes it stain-*resistant*—buying you 5–15 minutes to wipe spills before they penetrate. Red wine on unsealed marble etches in under 30 seconds; on sealed marble, you have ~7 minutes before permanent damage begins (per tests in the 2021 Journal of Architectural Conservation).
Can I seal outdoor flagstone myself?
Yes—but use only solvent-based, UV-resistant sealers rated for exterior use (e.g., Dry Treat Stain Proof Exterior). Water-based options degrade under UV exposure within 6–9 months. Reapply every 2–3 years, and always pressure-wash and dry for 72 hours before sealing.
What’s the difference between impregnating and topical sealers?
Impregnators (recommended for all natural stone) penetrate pores and repel from within. Topical sealers sit on top like plastic wrap—they yellow, peel, and require aggressive stripping. The National Association of Home Builders advises against topical products for natural stone in residential settings.
Sealing natural stone isn’t about perfection—it’s about consistency and timing. Once you master the water test and proper dwell time, you’ll confidently protect your investment for years. For related guidance, see our how to clean marble countertops and how to remove stone stains tutorials. And remember: when in doubt, test first—on a spare tile or underside edge—not your kitchen island.