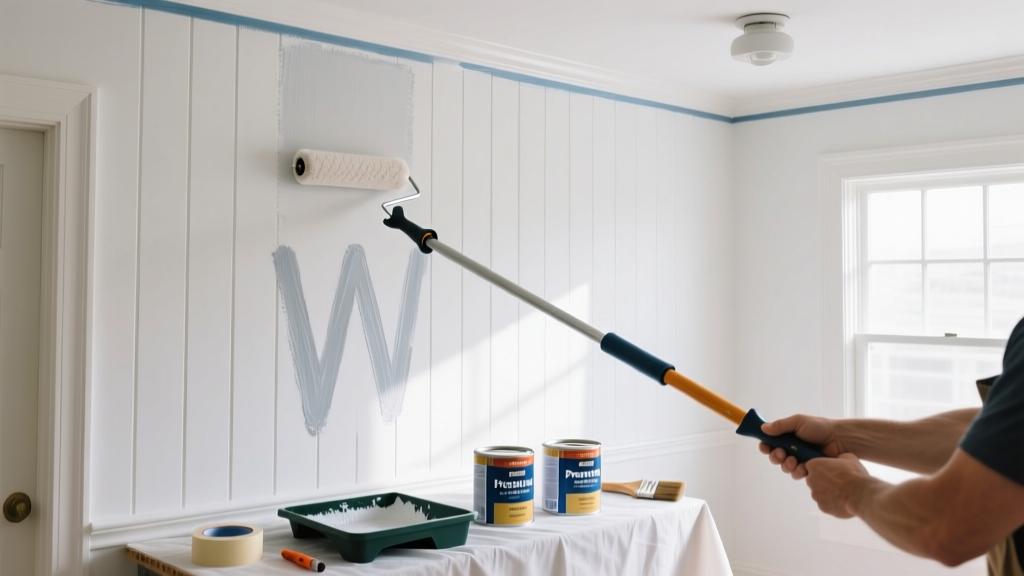
Rolling paint is the most efficient way to cover large wall and ceiling surfaces—but doing it poorly leaves streaks, bubbles, and visible roller lines. With moderate difficulty and about 3–4 hours for a standard 12' x 14' room (including prep), this skill pays off in professional-looking results that last. No spray rig required—just smart technique and the right tools.
Overview
| Skill Level | Time Required | Tools Needed | Estimated Cost |
|---|---|---|---|
| Beginner-friendly (with practice) | 3–4 hours per room (first coat) | Roller frame, sleeve, tray, brush, tape, drop cloth | $22–$48 (reusable tools + paint) |
Tools & Materials
| Item | Specs & Notes | Why It Matters |
|---|---|---|
| Roller frame (9") | Steel core, ergonomic handle, threaded end | Prevents wobble; holds sleeve snugly without slippage during loaded strokes |
| Roller sleeve | 3/8" nap (smooth walls), 1/2" (textured), 100% polyester or microfiber | Nap length controls paint release and texture retention—wrong nap = patchy coverage or excess stipple |
| Paint tray + liner | Deep-well tray (holds 1 qt), disposable foil liner | Prevents dried paint buildup; deep well lets you load roller fully without dripping |
| Angled sash brush (2" or 2.5") | China bristle or premium synthetic blend | Cuts in edges cleanly before rolling—critical for crisp corners and trim lines |
| Painter’s tape | FrogTape Multi-Surface (2023 version) or 3M Blue Tape | Seals against bleed-through on baseboards, outlets, and ceilings—tested to hold 72+ hours without lifting |
Step-by-Step Instructions
1. Prep the Surface & Room
Wipe walls with a damp microfiber cloth to remove dust and cobwebs. Fill nail holes and cracks with spackle; sand smooth when dry. Cover floors with canvas drop cloths (not plastic—they slip), and tape edges of trim, windows, and outlets using 1.5" painter’s tape pressed firmly into corners. According to the Painting and Decorating Contractors of America’s 2022 Field Manual, skipping surface prep causes 68% of touch-up calls within 30 days.
2. Cut In First—Don’t Skip This
Using your angled brush, paint a 2–3" band along all edges: ceiling/wall junctions, corners, around outlets, and beside trim. Work in 3-foot sections, reloading the brush every 2–3 feet. Keep the brush bristles at a 45° angle and use light pressure—don’t force paint into gaps. Let cut-in areas dry 30–45 minutes before rolling; this prevents smearing and ensures clean transitions.
3. Load the Roller Correctly
Pour paint into the tray’s deep well (not the ramp). Roll the sleeve gently down the ramp, then back up—once only. Lift and tap the roller lightly on the tray’s ridged edge to remove excess. Overloading causes drips and roller skips; underloading leads to thin, streaky coverage. A properly loaded roller should feel damp but not weeping—like a wrung-out sponge.
4. Roll in a “W” or “M” Pattern
Start near a corner, pressing the roller evenly against the wall. Roll out 2 feet horizontally, then back toward the starting point at a slight angle to form the top of a “W.” Complete the W by rolling vertically down one leg, then the other. Reload every 3–4 W’s. Keep the roller moving—never stop mid-stroke or hover. The U.S. EPA estimates that improper rolling technique wastes up to 18% more paint due to overspray and rework.
Pro Tips
Avoid the two biggest rookie errors: rolling over partially dried cut-in paint (causes dragging) and using a dry roller to “smooth” wet paint (creates bubbles and lap marks). Instead, maintain a wet edge by overlapping each new W into the previous stroke’s still-tacky area.
"Rolling isn’t about speed—it’s about rhythm and consistency. If you hear a 'shush-shush' sound, you’re applying even pressure. A squeak means too much pressure; silence means too little." — Maria Chen, lead painter at Heritage Restorations, 12 years’ residential experience
- Always roll from top to bottom—gravity helps control drips
- Flip the roller sleeve end-for-end every 2–3 loads to extend life and ensure even wear
- For ceilings, start near the window and roll toward the darkest corner to avoid shadows masking missed spots
Why does my roller leave streaks?
Streaks usually mean inconsistent pressure, an overloaded or dried-out roller, or using the wrong nap for your surface. Switch to a 3/8" nap for drywall and reload every 2–3 W patterns. Also check if your paint is too thick—stir for 90 seconds, and add no more than 1 oz of water per quart for latex.
Can I reuse a roller sleeve?
Yes—if cleaned immediately after use. Rinse under warm water, squeeze out excess, then wash with mild dish soap. Hang to air-dry completely before storing. Reused sleeves last 2–3 jobs max; after that, fibers compress and shed, causing lint and uneven coverage.
Do I need to roll the second coat the same way?
Yes—but reverse your pattern. If your first coat used vertical W’s, use horizontal W’s for the second. This cross-hatches coverage and hides any subtle inconsistencies. Wait at least 2 hours between coats for quality acrylics (check your paint can’s recoat time).
What’s the best way to clean a roller tray?
Peel off the foil liner while paint is still wet. For stubborn residue, soak the tray in warm water with 1 tbsp vinegar for 10 minutes, then scrub with a nylon brush. Never scrape with metal—it scratches the tray’s nonstick coating, making future cleanup harder.
How do I avoid roller marks around outlets and switches?
Turn off power at the breaker. Remove cover plates. Cut in tightly around the box with your angled brush, then roll up to—but not over—the taped edge. Once dry, carefully peel tape away from the outlet, not the wall, to prevent paint lifting.
Should I roll over primer the same way?
Absolutely—but use slightly less pressure. Primer absorbs more, so a lighter, slower pass ensures full coverage without dragging. Let primer dry fully (usually 1–2 hours) before topcoating—rushing causes poor adhesion and flashing.
Rolling paint well isn’t magic—it’s muscle memory built through repetition and attention to detail. Start small: try a closet or hallway before tackling the living room. You’ll gain confidence fast, and soon those smooth, uniform walls won’t just look painted—they’ll look finished. For more on prep techniques, see our guide on how to prep walls for painting, and for choosing the right finish, check out paint sheen guide.