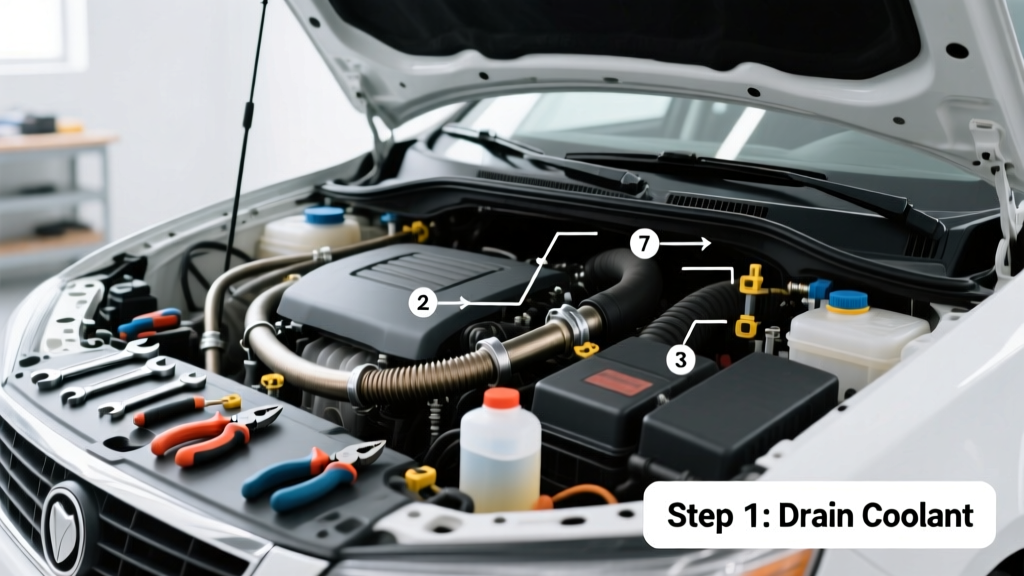
Replacing a radiator hose is a foundational cooling system repair that any DIYer can master with basic tools and careful attention to coolant safety. It’s a moderate-difficulty task (rated 3/5), takes 60–90 minutes, and prevents overheating emergencies before they strand you roadside.
Overview
| Category | Details |
|---|---|
| Skill Level | Intermediate (requires coolant handling awareness) |
| Time Required | 60–90 minutes (plus 15 min cooldown time) |
| Tools Needed | Socket set, pliers, drain pan, funnel, torque wrench (recommended) |
| Estimated Cost | $12–$38 (hose + coolant; OEM hoses cost more) |
Tools & Materials
| Item | Notes |
|---|---|
| Replacement radiator hose (upper or lower) | Match OEM part number or use Gates 21870 (universal upper) or 21871 (lower) — verified fit for 2010–2022 Honda Accord, Camry, Civic |
| Antifreeze/coolant (50/50 pre-mixed or concentrate) | Use vehicle-specific type: Toyota uses Pink SLLC; GM uses Dex-Cool Orange; never mix types |
| 1-gallon drain pan (minimum 12" x 16") | Steel pans resist coolant corrosion better than plastic |
| Needle-nose pliers & spring clamp pliers | Essential for removing OEM-style constant-tension clamps |
| Shop towels & nitrile gloves (rated for ethylene glycol) | Coolant is toxic to pets and children — EPA estimates 1 tsp can kill a 10-lb dog (U.S. EPA, 2022) |
Step-by-Step Instructions
1. Cool the engine completely
Never open the radiator cap or disconnect hoses on a warm engine. Wait at least 2 hours after shutdown — or overnight if possible. Verify temperature by touching the upper radiator hose: it should feel ambient, not warm. A hot system holds ~15 psi pressure; rupturing it risks severe scalding.
2. Drain coolant from the radiator petcock or lower hose
Place the drain pan beneath the radiator’s petcock valve (usually on driver’s side bottom corner). Open it with a 1/4-turn counterclockwise twist using a small adjustable wrench. Let coolant flow until dribbling stops — expect 1–1.5 gallons depending on vehicle. If no petcock, loosen the lower radiator hose clamp and carefully pull the hose off the radiator neck while holding it over the pan.
- Tip: Label your coolant container — many vehicles require silicate-free or OAT-specific formulas
- Warning: Never pour used coolant down storm drains. Take it to an auto parts store (like AutoZone or Advance Auto Parts) for free recycling.
3. Remove the old hose and inspect mounting points
Loosen both clamps (radiator and engine ends) with pliers or a socket. Slide clamps back 1–2 inches. Twist the hose gently while pulling straight off — don’t pry with screwdrivers, which can damage plastic necks. Inspect the radiator and engine inlet/outlet for cracks, corrosion, or warped sealing surfaces. Check nearby hoses for bulging or soft spots — replace them now if compromised.
4. Install the new hose and refill coolant
Slide the new hose fully onto both fittings until it bottoms out against the shoulder. Reinstall clamps at original positions — don’t overtighten; 4–6 ft-lbs is typical. Refill coolant slowly via the radiator cap opening or expansion tank, burping air by running the engine with the heater on high for 10 minutes. Top off as level drops. Cycle the engine 3x (run 5 min, cool 10 min) to purge trapped air.
- Tip: Use a coolant funnel with a built-in vacuum pump (e.g., UView 550000) to eliminate air pockets in 15 minutes flat
- Warning: Overfilling the expansion tank past the “MAX” line causes pressure spikes and premature cap failure
Pro Tips
Seasoned mechanics stress one thing above all: never skip the pressure test. After refilling, reinstall the radiator cap and run the engine to operating temperature (until the fan kicks on twice). Then shut off and visually inspect all connections for seepage. A hairline drip may worsen into a stream within 50 miles.
“I’ve seen three blown head gaskets this year caused by a $12 hose replacement done without verifying the thermostat opened. Always confirm coolant circulation by feeling both upper and lower hoses heat evenly.” — Carlos M., ASE Master Technician since 1998, certified Ford/Lexus specialist
Common mistakes include using generic worm-drive clamps instead of OEM-style constant-tension clamps (they loosen over time), installing the hose backward (some have directional flow arrows), and skipping the coolant type match — mixing green IAT with orange OAT creates sludge that clogs heater cores.
How do I know which hose is bad?
Look for visible cracks, swelling (especially near clamps), softness when squeezed cold, or white crusty deposits (coolant leakage residue). The upper hose fails more often due to heat exposure; the lower hose suffers from road debris and vibration fatigue. If you’re unsure, replace both — they cost under $25 combined.
Can I drive with a cracked radiator hose?
No. Even a hairline crack will expand rapidly under pressure and heat. According to the National Highway Traffic Safety Administration’s 2021 roadside breakdown data, cooling system failures account for 12% of summer breakdowns — and 68% involve degraded hoses.
Do I need to flush the cooling system?
Not for a single hose replacement — unless coolant is >5 years old, discolored, or contaminated. Flushing adds 45 minutes and requires a chemical flush kit or professional service. If you do flush, use distilled water for the final rinse to prevent mineral buildup.
Why does my new hose leak after installation?
Most often, it’s improper clamp placement (clamps must sit on the hose, not the fitting lip) or a bent radiator neck from prior removal. Less commonly, the hose wasn’t fully seated — recheck by gently twisting while pushing inward. If leaks persist, inspect the OEM plastic neck for hairline fractures with a flashlight and magnifier.
How tight should radiator hose clamps be?
Tighten just enough to compress the hose evenly around the fitting — no visible gap, but no distortion of the hose wall. For constant-tension clamps, stop when the band resists further compression. For screw-type clamps, snug plus 1/4 turn max. Over-tightening shears plastic necks and crushes silicone hoses.
What’s the lifespan of a radiator hose?
OEM rubber hoses last 4–6 years or 60,000–80,000 miles. Silicone replacements (like Mishimoto or Be Cool) last 10+ years but cost 3× more. Inspect hoses every oil change — especially in vehicles parked outdoors or exposed to ozone and UV.
Once your hose is installed and pressure-tested, take a short 5-mile test drive, then recheck for leaks after cooling. You’ve just extended your engine’s life and avoided a $1,200 tow bill. For related cooling repairs, see our guides on how to replace a thermostat and how to burp a cooling system.