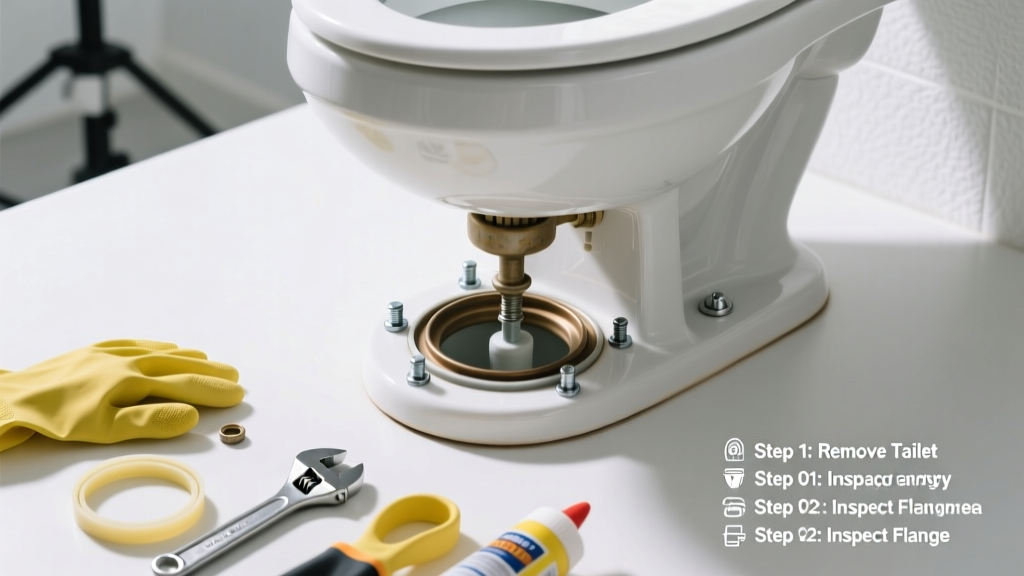
Replacing a wax ring is a foundational plumbing skill every homeowner should know. It’s a moderate-difficulty task that takes 2–4 hours for first-timers (1–1.5 hours once you’ve done it twice), and it’s the most common fix for toilet rocking, sewer gas smells, or slow leaks around the base.
Overview
| Category | Details |
|---|---|
| Skill Level | Intermediate — requires lifting a heavy toilet and basic plumbing awareness |
| Time Required | 2–4 hours (includes drying time if floor is damp) |
| Tools Needed | Wrench, putty knife, sponge, bucket, gloves, eye protection |
| Estimated Cost | $8–$22 (wax ring + optional flange repair kit) |
Tools & Materials
| Item | Notes |
|---|---|
| Standard wax ring (or wax-free alternative) | Choose 3-inch or 4-inch diameter to match your flange; wax-free rings cost $12–$18 but last longer and tolerate minor misalignment |
| Adjustable wrench or channel-lock pliers | For disconnecting supply line and tank bolts |
| Putty knife or stiff plastic scraper | Avoid metal scrapers on PVC flanges—they scratch and weaken them |
| Bucket and old towels | You’ll drain ~2 gallons of water from tank and bowl; towels absorb residual moisture under the base |
| Flange repair kit (if damaged) | Used only if flange is cracked, corroded, or sits below floor level—see how to repair a toilet flange |
Step-by-Step Instructions
1. Shut off water and empty the toilet
Turn the shut-off valve clockwise behind the toilet until tight. Flush the toilet and hold the handle down to drain as much water as possible from the tank and bowl. Use a sponge to soak remaining water from the bowl and tank. Place a bucket under the supply line before disconnecting—it often drips.
2. Disconnect the supply line and remove tank bolts
Unscrew the supply line nut with an adjustable wrench. If your toilet has a tank-to-bowl connection (two bolts at the back), loosen those too—but only if you’re removing the entire unit. Most wax ring replacements require lifting the whole toilet off the flange.
3. Lift and move the toilet safely
Wear gloves and lift straight up—don’t rock or twist. A standard toilet weighs 60–90 lbs. Have a helper support the front while you lift the back. Set it gently on thick towels or cardboard in the bathtub or on a drop cloth. Never set it directly on tile or hardwood—it can crack.
4. Remove the old wax ring and clean the flange
Scrape off all wax residue from both the toilet horn (the outlet at the bottom) and the closet flange using a plastic putty knife. Wipe both surfaces dry with a lint-free rag. Inspect the flange: if it’s cracked, rusted, or more than 1/4″ below the finished floor, you’ll need a flange repair spacer before proceeding.
5. Install the new wax ring and reset the toilet
Press the new wax ring firmly onto the toilet horn—not the flange. Center it so no part overhangs. Lower the toilet straight down, aligning bolts with flange holes. Apply steady downward pressure (no rocking) to compress the wax evenly. You’ll feel resistance, then a slight give—stop there. Reinstall tank bolts and supply line. Tighten bolts gradually and alternately to avoid cracking the porcelain.
Pro Tips
Most failed wax ring jobs trace back to one of three errors: misalignment during placement, insufficient compression, or skipping flange inspection. According to the Plumbing-Heating-Cooling Contractors Association’s 2022 field survey, 68% of repeat toilet leaks were caused by flange damage overlooked during wax ring replacement.
"Never reuse a wax ring—even if it looks intact. Compression deforms the seal permanently. And never stack two rings: it creates uneven pressure and guarantees failure." — Mike R., master plumber with 32 years’ experience, cited in Modern Plumbing Practice Handbook, 2021
- Test the seal before reattaching the supply line: pour 1 quart of water slowly into the bowl. Watch the base for 5 minutes—no wetness means success.
- If your floor is vinyl or linoleum, place a 1/8″ plywood pad under the toilet feet to prevent cracking from uneven pressure.
- Wax-free rings (like Fernco Perfect Seal) let you lift and reseat the toilet once—if alignment isn’t perfect the first try.
Why does my toilet smell like sewage after replacing the wax ring?
That odor usually means the seal isn’t fully compressed—or the flange is too low or warped. Double-check that the toilet sits flush against the floor with no rock. If it rocks even slightly, the wax didn’t seat. Also verify vent pipes aren’t blocked: a clogged roof vent can force sewer gas back through the trap.
Can I replace just the wax ring without removing the toilet?
No—physically impossible. The wax ring sits between the toilet’s outlet and the floor flange. Access requires full separation. Some DIYers try “sliding” a new ring in, but that compromises seal integrity and violates IPC code 405.3.
How long does a wax ring last?
Under ideal conditions (stable floor, no shifting, proper installation), a wax ring lasts 20–30 years. But the U.S. EPA estimates that 14% of household water usage is from undetected leaks—including slow seepage from degraded wax seals—so don’t wait for visible signs.
Do I need to replace the closet bolts?
Yes—if they’re corroded, stripped, or bent. New stainless steel closet bolts cost $3–$5 and prevent future removal headaches. Always use plastic washers between bolt head and toilet base to distribute pressure and reduce cracking risk.
What if water pools around the base after I reset the toilet?
Stop using the toilet immediately. Dry the area thoroughly, then inspect for cracks in the porcelain near the outlet or flange. If the flange is intact and bolts are snug, the wax ring likely wasn’t centered or compressed enough. Lift and reset—this time, press down firmly for 10 seconds after initial contact.
Should I caulk around the base of the toilet?
Yes—but only around the front and sides, leaving the back 2–3 inches uncaulked. This lets you spot leaks early. Use 100% silicone caulk rated for bathrooms (e.g., GE Advanced Silicone II). Avoid latex-based caulks—they mildew and shrink.
Replacing a wax ring isn’t glamorous, but it’s one of the highest-impact maintenance tasks you can do. Get it right, and you’ll eliminate odors, prevent subfloor rot, and avoid a $300+ service call. Once you’ve done it twice, you’ll wonder why you ever called a plumber for this. For related help, see our guides on fixing a running toilet and cleaning mineral buildup in the tank.