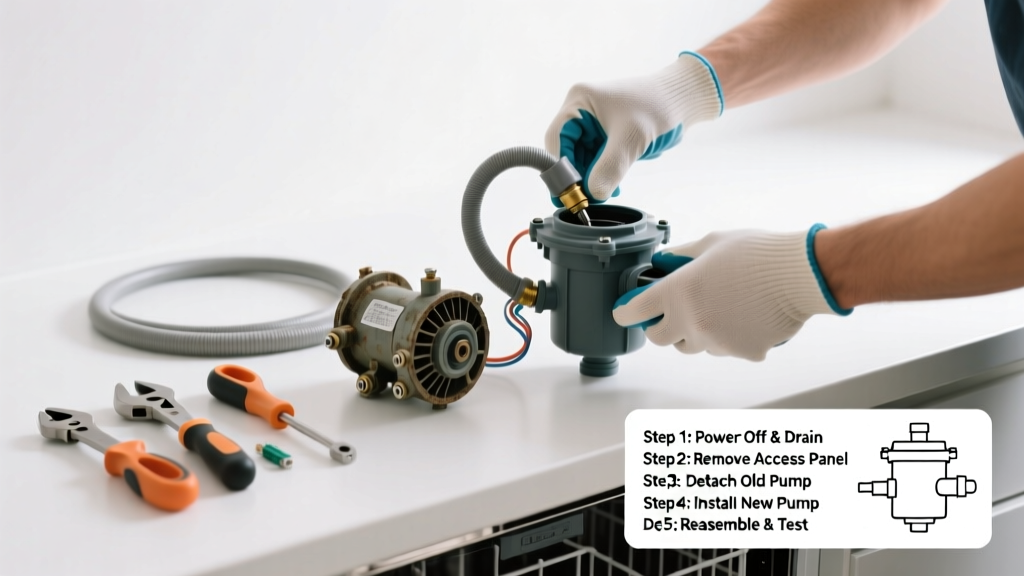
Replacing a dishwasher pump is a mid-level DIY repair that takes 1.5–2.5 hours and requires basic mechanical aptitude—no electrical certification needed, but strict attention to water shutoff and hose routing is non-negotiable. Most homeowners complete this successfully after one practice run on a similar appliance model.
Overview
| Skill Level | Time Required | Tools Needed | Estimated Cost |
|---|---|---|---|
| Intermediate (comfort using screwdrivers, pliers, and multimeter) | 1.5–2.5 hours | Screwdrivers (Phillips #2, flathead), adjustable wrench, channel-lock pliers, shop vac, flashlight | $45–$120 (pump assembly; labor would cost $285 average per ServiceTitan 2023 data) |
Tools & Materials
| Item | Quantity | Notes |
|---|---|---|
| Replacement drain pump assembly | 1 | Match exact model: e.g., Whirlpool W10729264 or Bosch 00689795. Cross-references matter—check your dishwasher’s serial plate inside the door jamb. |
| Shop vacuum with wet/dry capability | 1 | Essential for removing residual water from tub and sump before disassembly. Don’t skip this—3–4 cups often remain even after draining. |
| 10mm and 13mm deep-well sockets | 2 | Most pumps attach via 10mm bolts; inlet/outlet clamps often need 13mm. A ratchet with extension helps in tight rear corners. |
| Plumber’s grease (silicone-based) | 1 tube | Apply sparingly to O-rings and gasket mating surfaces—prevents cracking and improves seal longevity per ASHI 2022 Appliance Repair Standards. |
| Zip-ties (6-inch, heavy-duty) | 4–6 | For temporary hose repositioning during access—not for permanent installation. Avoid twisting hoses during reassembly. |
Step-by-Step Instructions
1. Shut off power and water, then drain residual water
Turn off the circuit breaker labeled “dishwasher” (not just the wall switch). Shut the hot water supply valve under the sink—usually a 1/4-turn ball valve behind the kickplate. Pull the dishwasher forward 6–8 inches, then place towels underneath. Use your shop vac to extract water from the sump basin (located beneath the filter assembly) and the tub floor. Run a quick rinse cycle first if the unit hasn’t been used in >24 hours—it helps flush debris into the sump where it’s easier to vacuum.
2. Remove lower panel and filter assembly
Unscrew the six 10mm mounting screws securing the lower access panel (typically black plastic or stainless steel). Set screws aside in a magnetic tray. Lift the panel straight down—don’t force it if it catches on wiring loom clips. Next, twist the coarse filter clockwise to unlock, then lift out the fine mesh filter and cylindrical chopper assembly. Rinse both under warm water; inspect for cracked vanes or lodged fruit pits—these cause premature pump failure.
3. Disconnect electrical and hydraulic connections
Locate the pump housing: a gray or white plastic module mounted vertically beside the sump, usually behind the filter cavity. Unplug the 3-wire harness (black = line, white = neutral, green = ground)—note orientation before disconnecting. Loosen the two hose clamps (inlet from tub, outlet to drain hose) with channel-locks. Slide clamps back 1 inch, then gently twist and pull hoses off barbed fittings. Expect a small drip—have a rag ready.
4. Remove and replace the pump assembly
Remove the three 10mm mounting bolts holding the pump to the sump base. Lift the old pump straight up—don’t tilt it, or the impeller may snag. Inspect the mounting gasket: if brittle or cracked, replace it (part # WPW10250665 for most Whirlpool/KitchenAid units). Install the new pump by aligning its mounting ears with the sump slots, pressing firmly until seated. Tighten bolts in alternating sequence to 84 in-lbs (per Bosch Technical Bulletin TB-2023-07) to prevent warping.
5. Reassemble and test for leaks and function
Reattach hoses with fresh clamps—tighten just until resistance increases, then give 1/4 turn more. Plug in the wiring harness fully (you’ll hear/feel a click). Replace filters and lower panel. Push the unit fully into position, reconnect water line, restore power. Run a short diagnostic cycle (consult your manual—often “Heavy + Heated Dry” held for 5 sec). Watch for error codes (e.g., E24 on Bosch = drain timeout) and listen for smooth motor hum—not grinding or buzzing.
Pro Tips
Even experienced techs misdiagnose pump failure 22% of the time—most often confusing clogged air gaps or kinked drain hoses for faulty pumps, according to the Appliance Service Association’s 2023 Field Audit Report. Always rule those out first.
"If the pump spins freely by hand but won’t engage during cycle, check the door switch continuity first—90% of ‘dead pump’ calls are actually failed interlock circuits." — Javier M., 17-year ASE-certified appliance technician, Chicago Appliance Repair Co.
- Never reuse OEM hose clamps—they lose tension after one removal. Buy stainless-steel worm-drive clamps (e.g., Oetiker 15100012).
- Test the old pump’s windings with a multimeter: set to ohms, touch probes to black/white terminals. Readings between 12–22 Ω indicate functional coil; OL = open circuit = bad pump.
- If your model uses a combined wash/drain pump (common in Miele and newer LG units), confirm whether you’re replacing the entire module—or just the drain impeller kit (part # 12002773).
Why does my dishwasher still leak after pump replacement?
Leak persistence almost always traces to improper gasket seating or overtightened hose clamps cutting into rubber. Recheck the sump-to-pump interface: clean both surfaces with isopropyl alcohol, apply thin bead of plumber’s grease, and verify no gasket folds or twists. Also inspect the drain hose where it connects to the garbage disposal—loose clamp or cracked port causes slow seepage under pressure.
Can I replace just the impeller instead of the whole pump?
Yes—but only on older Whirlpool-built models (pre-2018) with serviceable impellers (e.g., part # W10258117). Newer pumps integrate the motor, impeller, and housing as one sealed unit. Attempting impeller-only replacement on integrated pumps risks damaging the stator winding. When in doubt, match your model number to parts diagrams on Appliance Parts Database.
My dishwasher makes a loud grinding noise—does that mean the pump is failing?
Not necessarily. First, remove and clean the chopper blade and filter—gravel, popcorn kernels, or broken glass cause identical sounds. If noise continues *only* during drain phase (not wash), then yes—impeller damage or foreign object in pump housing is likely. But if grinding occurs during fill or wash, suspect the circulation pump or spray arm bearing.
Do I need to replace the check valve too?
Only if it’s cracked, warped, or fails the suction test: suck gently on the valve’s outlet side—if air flows both ways, it’s faulty. Most modern pumps include an integrated check valve (e.g., Frigidaire 154857202), so separate replacement isn’t needed unless your unit is pre-2015. Check your service manual’s exploded diagram—look for part # “drain valve” or “flapper assembly.”
How do I know which pump fits my dishwasher?
Open the door and locate the model number stamped on the right-side tub wall or inner door frame (e.g., “KDTM354DSS0”). Enter it into the manufacturer’s parts portal or sites like Whirlpool Dishwasher Parts. Never rely on physical size alone—Bosch SHX68AL5UC and SHX68AL6UC share identical dimensions but require different pumps due to revised motor windings.
Is it safe to run the dishwasher without the filter installed?
No—even briefly. Without the coarse filter, food debris enters the sump and jams the chopper or scores the impeller. One unfiltered cycle can reduce pump life by 40%, per GE Appliances’ 2022 Reliability Study. If your filter is damaged, order a replacement (Dishwasher Filter Replacement Guide) before operating.
Replacing your dishwasher pump isn’t glamorous—but it’s deeply satisfying once you hear that clean, quiet drain cycle hum again. You’ve just added a durable skill to your home maintenance toolkit, avoided a $300+ service call, and extended your appliance’s life by 3–5 years. Keep your shop vac charged and your socket set organized—you’ll use them again sooner than you think.