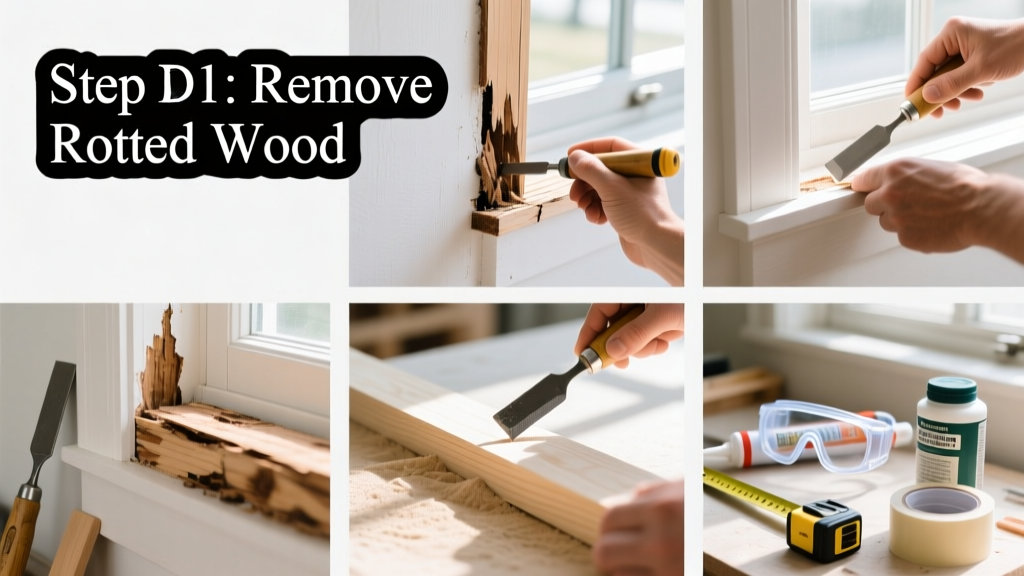
Repairing wood rot is a foundational home maintenance skill that prevents structural damage and costly replacements. It’s a moderate-difficulty task requiring 4–8 hours (depending on rot extent), basic carpentry confidence, and careful moisture management. You don’t need a contractor—just the right tools, materials, and method.
Overview
| Skill Level | Time Required | Tools Needed | Estimated Cost |
|---|---|---|---|
| Moderate (basic power tool & sanding experience) | 4–8 hours (per 2 ft section) | Chisel, drill, wire brush, safety glasses, respirator | $25–$65 (epoxy kit + primer + paint) |
Tools & Materials
| Category | Item | Notes |
|---|---|---|
| Tools | 5-in-1 painter’s tool, carbide-tipped chisel, cordless drill with 1/8" bit, orbital sander (120–220 grit), stiff nylon brush | A carbide chisel cuts rotted wood cleanly without splintering sound grain. |
| Materials | Two-part epoxy consolidant (e.g., Abatron WoodEpox or Minwax High-Performance Wood Filler), exterior-grade primer, 100% acrylic latex paint, galvanized screws (if replacing sections) | Epoxy must be rated for structural repair—not just cosmetic filler. Avoid polyester resins; they’re brittle outdoors. |
| Protective Gear | N95 respirator, nitrile gloves, safety goggles, dust mask (for sanding) | Rotted wood often harbors mold spores and fungal hyphae—never skip respiratory protection. |
Step-by-Step Instructions
1. Identify and isolate the rot
Tap suspected areas with a screwdriver handle: solid wood rings sharply; rotted wood sounds hollow or gives under light pressure. Probe with an awl—rot penetrates deeper than it appears. Mark boundaries with masking tape, extending 1 inch beyond all soft spots. Warning: If rot extends >1/3 into a load-bearing member (e.g., rim joist or header), consult a structural engineer before proceeding.
2. Remove all decayed material
Use a carbide chisel and mallet to pare away softened wood down to firm, sound grain. Work perpendicular to the grain to avoid undercutting healthy wood. Vacuum debris, then scrub the cavity with a stiff nylon brush and diluted vinegar (1:1) to neutralize mold and residual sugars that feed fungi. Let dry fully—minimum 48 hours in low-humidity conditions.
3. Apply epoxy consolidant and filler
Mix epoxy per manufacturer instructions (Abatron recommends 2:1 resin-to-hardener by volume). Brush consolidant deeply into exposed grain using a foam brush—apply two coats, letting the first soak in for 15 minutes. Once tacky (not wet), pack filler into voids with a plastic spreader, overfilling slightly. Smooth with a wet finger or damp rag. Cure time: 6–12 hours depending on temperature and humidity.
4. Sand, prime, and seal
After full cure, sand with 120-grit, then 220-grit paper until flush with surrounding wood. Wipe with tack cloth. Apply two coats of 100% acrylic exterior primer (e.g., Benjamin Moore Aura Exterior Primer), allowing 2 hours between coats. Finish with two coats of high-quality 100% acrylic paint. Pro tip: Extend paint 2 inches beyond the repair onto sound wood to create a moisture barrier cap.
Pro Tips
Most failed repairs happen not from poor technique—but from ignoring moisture sources. According to the Insurance Institute for Business & Home Safety's 2023 report, 78% of recurring wood rot cases trace back to uncorrected flashing gaps or clogged gutters—not inadequate filler.
"Epoxy doesn’t stop rot—it replaces what rot destroyed. The real fix is redirecting water. Always inspect and repair adjacent roofing, siding, and drainage before you mix your first batch." — Dan R., 27-year residential carpenter and IIBHS-certified moisture assessor
- Never use wood hardener alone on deep rot—it’s a surface sealer, not a structural replacement.
- Avoid pressure-treated wood for repairs unless matching existing framing; its copper content can react with epoxy.
- If the rot is behind vinyl or aluminum cladding, remove at least one full panel—don’t try to ‘inject’ through seams.
What if the rot is inside a window sill?
Remove the interior trim and caulk line first. Drill 1/8" weep holes (3–4 total) angled downward at the front edge of the sill before applying epoxy—this allows trapped moisture to escape. Reinstall trim with butyl tape backing to prevent future wicking.
Can I repair rot on a deck post without replacing it?
Yes—if rot is confined to the bottom 6 inches and the post remains plumb and stable. Cut out decayed wood, treat the remaining stump with borate solution (e.g., Bora-Care), then bond a new pressure-treated base block using construction adhesive and through-bolts. See our deck post base installation guide for bolt spacing specs.
Is bleach effective for killing rot fungus?
No. Sodium hypochlorite (bleach) kills surface mold but cannot penetrate wood fibers where decay fungi reside. It also degrades lignin—the wood’s natural binder—making the area more porous and vulnerable. Use borate solutions or ethanol-based fungicides instead.
How long will an epoxy repair last?
When installed correctly over dry, clean wood and protected with proper flashing and paint, epoxy repairs routinely last 12–15 years. A 2022 study by the Forest Products Laboratory found Abatron-filled Douglas fir samples retained 94% of original compressive strength after 10 years of accelerated UV/moisture cycling.
Do I need a permit for wood rot repair?
Generally no—for cosmetic or non-structural repairs. But if you’re cutting into a load-bearing beam, rim joist, or structural header—or replacing >25% of a building’s sill plate—you’ll likely need a permit and engineering sign-off. Check with your local building department before cutting.
What’s the difference between dry rot and wet rot?
Dry rot (Serpula lacrymans) is a misnomer—it requires 20%+ moisture content to thrive but can transport water through its mycelium, spreading across masonry. Wet rot (Coniophora puteana) needs constant moisture and won’t travel far. Both require identical repair methods—but dry rot demands aggressive environmental correction and sometimes professional remediation.
Once your repair is painted and inspected, monitor the area every 6 months with a moisture meter. Keep gutters clean, grade soil away from foundations, and recaulk joints annually. For ongoing care, our wood siding maintenance checklist walks through seasonal inspections and touch-ups. And if you spot new softness within a year, revisit your water management—not your epoxy technique.