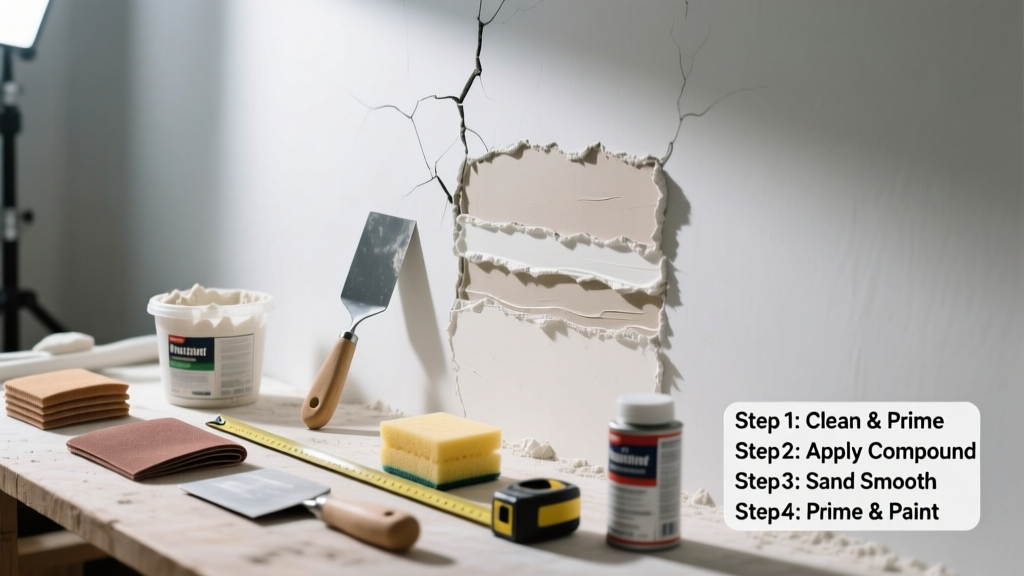
Repairing plaster isn’t just about patching holes—it’s about restoring structural integrity and surface continuity in older homes. This skill sits at intermediate difficulty: it demands patience and precision but requires no specialized trade certification. Most small- to medium-sized repairs take 4–8 hours across two days (including drying time), while larger sections may span three days.
Overview
| Skill Level | Time Required | Tools Needed | Estimated Cost |
|---|---|---|---|
| Intermediate | 4–8 hrs (plus 24–48 hrs drying) | Scraper, hawk, trowel, drill, utility knife | $12–$38 (materials only) |
Tools & Materials
| Item | Quantity | Notes |
|---|---|---|
| Plaster base coat (gypsum or lime-based) | 1–2 lbs | Avoid premixed 'patching plaster' for anything over 2" wide—too weak for structural layers |
| Plaster finish coat (e.g., Imperial or Durabond 90) | 1 lb | Durabond 90 sets in 90 minutes; ideal for thin, smooth top layers |
| Mesh or wood lath (if backing is missing) | As needed | Use 1/4" galvanized expanded metal lath for holes >4" |
| Plaster bonding agent (e.g., Plaster-Weld) | 1 pint | Required for repairs over old, glossy, or chalky surfaces per ASTM C1063 standards |
| Stainless steel trowel (10") | 1 | Carbon steel rusts and stains wet plaster; stainless prevents contamination |
Step-by-Step Instructions
1. Assess and Prepare the Area
Start by tapping around the damaged zone with a plastic handle—hollow sounds mean loose plaster behind. Cut away all crumbling or detached material using a utility knife and cold chisel, stopping at solid plaster edges. Remove dust and debris with a stiff brush, then vacuum thoroughly. Wipe the exposed lath and surrounding plaster with a damp (not wet) rag—excess moisture causes poor adhesion.
- Warning: Never sand old plaster without a N95 respirator—pre-1978 homes may contain lead-based paint or asbestos-contaminated joint compound.
- Tip: For hairline cracks under 1/16", skip removal—clean, prime, and fill with flexible acrylic caulk instead.
2. Apply Bonding Agent and Base Coat
Brush Plaster-Weld evenly over the entire repair area—including 2" beyond the edges—and let dry until tacky (about 15 minutes). Mix base coat plaster to the consistency of thick peanut butter. Press it firmly into the lath gaps with a hawk and trowel, working from bottom to top. Aim for 3/8" thickness, slightly proud of the surrounding wall. Let cure 24 hours before finishing.
3. Float and Smooth the Finish Coat
Mix finish coat plaster to a creamy, spreadable consistency. Apply in two thin passes: first pass fills low spots and embeds any mesh; second pass creates a level surface. Use long, overlapping strokes with light pressure—don’t overwork it. Let set 30–45 minutes, then lightly scrape high spots with a clean trowel edge. Avoid sanding unless absolutely necessary; wet-sanding with 220-grit sponge is safer than dry-sanding.
- Pro tip: Keep a spray bottle of water nearby—mist the surface if it starts pulling or dragging during troweling.
- Warning: Don’t rush the finish coat application. If the plaster begins to ‘grab’ too soon, stop and wait—it’s setting faster than expected.
4. Prime and Paint
Wait 48 hours after final troweling before priming. Use a high-build primer like Zinsser Gardz or Kilz Restoration—standard PVA primers often fail on plaster due to its alkalinity. Apply one full coat, let dry 4 hours, then lightly scuff with 320-grit paper. Finish with quality acrylic paint (e.g., Benjamin Moore Aura or Sherwin-Williams Emerald). Avoid flat sheens—they highlight minor texture differences.
Pro Tips
Plaster repair fails most often not from technique—but from skipping prep or misjudging substrate stability. According to the National Trust for Historic Preservation’s 2022 Preservation Briefs No. 21, over 68% of failed plaster repairs traced back to inadequate bonding or insufficient curing time.
“If the lath moves when you press on it, the whole section needs re-anchoring—not patching. Nail or screw loose lath to studs first, or install new furring strips behind.” — James H. Miller, Master Plasterer & Instructor, North Bennet Street School (2023)
Common mistakes include using drywall joint compound as a finish (it shrinks and yellows), applying coats too thick (causes cracking), and painting before full carbonation (plaster must fully hydrate and harden—minimum 48 hours).
Why does my plaster crack in the same spot repeatedly?
Recurring cracks usually signal underlying movement—not poor repair work. Check for shifting foundations, roof truss uplift, or seasonal timber shrinkage. If cracks reopen within 6 months, consult a structural engineer before re-repairing. You’ll likely need to install control joints or reinforce framing—not just replaster.
Can I repair plaster over drywall?
Yes—but only if the drywall is securely fastened, free of bumps, and primed with a plaster-specific bonding agent. Never apply plaster directly over painted drywall: the slick surface won’t hold. Sand the drywall surface to 120-grit, wipe clean, then apply two coats of Plaster-Weld. Expect longer drying times due to drywall’s lower porosity.
How do I match the texture of an old plaster wall?
Observe the pattern closely: swirls suggest a hand-troweled finish; fine stippling points to a sponge or brush texture. Replicate using the same tool and moisture level. For swirls, drag a damp trowel in overlapping arcs while the finish is still pliable (about 10–15 minutes after application). Practice on scrap drywall first—you can always scrape and re-do.
Is it safe to repair plaster in a bathroom?
Yes—with caveats. Use only mold-resistant plaster (e.g., USG Structo-Lite with added mildewcide) and ensure the area has consistent ventilation and humidity below 60%. Avoid repairs near shower enclosures unless you’ve confirmed waterproofing integrity behind tile. The U.S. EPA estimates that 14% of household water usage is from leaks—so verify no hidden moisture is compromising the lath first.
Do I need to match the original lime vs. gypsum plaster?
For repairs under 4" in historic buildings (pre-1900), yes—lime plaster allows moisture vapor transmission and won’t trap water against wood lath. Gypsum dries faster but is brittle and incompatible with lime substrates. For post-1920 homes, modern gypsum-based plasters are acceptable and widely available. When in doubt, test a small area: apply both types side-by-side and monitor for cracking or powdering after 7 days.
What’s the fastest way to fix a small hole left by a nail or hook?
For holes under 1/2", skip bonding agent. Clean out dust, dampen the edges, then press in a pea-sized ball of Durabond 90 with your fingertip. Smooth flush with a damp sponge, let set 20 minutes, then prime and paint. This method works because the small size allows capillary action to bond tightly to the surrounding plaster—no lath exposure required.
Plaster repair rewards attention to detail more than speed. Get the prep right, respect the material’s timing, and treat each layer as part of a system—not just filler. Once mastered, you’ll notice fewer callbacks, better paint results, and deeper confidence tackling other legacy-building materials. For related skills, see how to repair drywall and how to install beadboard wainscoting.