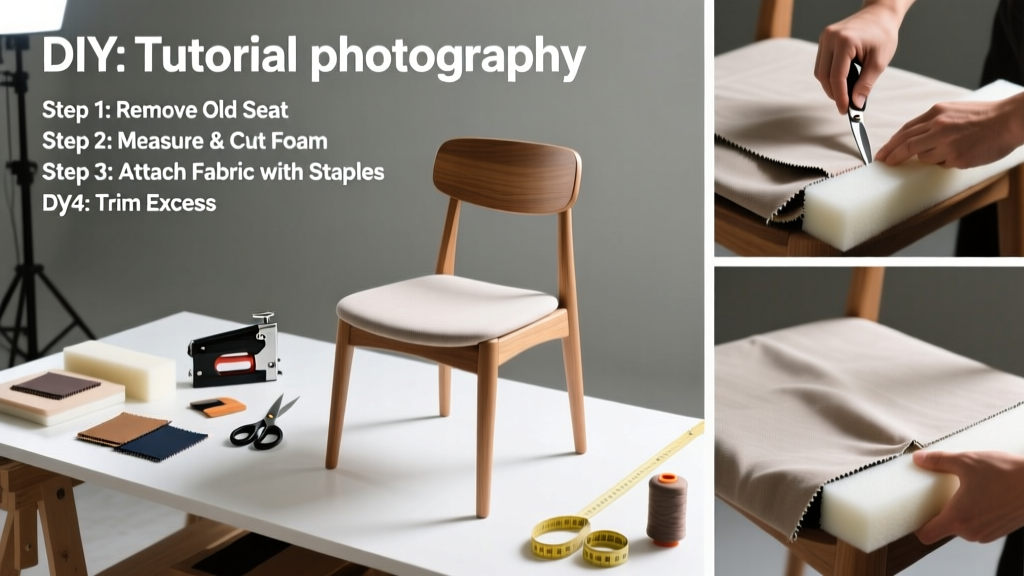
Recovering a chair seat is a practical upholstery skill that lets you refresh worn or stained seating without replacing the whole piece. It’s a beginner-friendly project requiring no sewing machine—just steady hands, basic tools, and about 90 minutes of focused time.
Overview
| Skill Level | Time Required | Tools Needed | Estimated Cost |
|---|---|---|---|
| Beginner (no prior upholstery experience needed) | 1.5–2.5 hours | Staple gun, utility knife, flathead screwdriver, measuring tape | $12–$45 (fabric-dependent) |
Tools & Materials
| Item | Quantity | Notes |
|---|---|---|
| Upholstery fabric (cotton duck, polyester blend, or vinyl) | 1 yard (for standard 18" × 18" seat) | Choose abrasion-resistant fabric rated ≥15,000 double rubs (per ASTM D4157) |
| Staples (3/8" or 1/2") | 1 box (1,000 count) | Use stainless steel staples if humidity is high—prevents rust jacking |
| Replacement foam (1" thick, medium-firm density) | 1 piece (cut to seat dimensions) | High-resilience polyurethane foam (≥2.5 lb/ft³) lasts 3× longer than budget foam (Foam Order Guide, 2022) |
| Webbing or jute twine (if seat base is sagging) | 2–4 strips | Replace torn webbing before reupholstering—otherwise new fabric will stretch prematurely |
Step-by-Step Instructions
1. Remove the old seat cushion and inspect the frame
Flip the chair upside down and locate screws or bolts securing the seat to the frame—usually 4 corner screws or a center mounting plate. Use a Phillips screwdriver to remove them. Gently lift the seat assembly off. Peel back the old fabric just enough to examine the plywood or particleboard base. Check for cracks, rot, or loose staples. If the board flexes more than 1/8" under light pressure, reinforce it with a 1/4" hardwood backing screwed from underneath.
2. Strip old fabric and foam carefully
Use a flathead screwdriver to pry up staple legs along one edge. Work slowly—don’t gouge the wood. Pull staples straight out with needle-nose pliers if they bend. Set aside the original fabric as a pattern: lay it flat, trace its outline onto kraft paper, and note seam directions and fold lines. Cut away old foam with a utility knife—leave the thin fiber batting layer intact if it’s still clean and resilient.
3. Replace foam and add fresh batting (optional but recommended)
Cut new foam to match your paper pattern using a sharp utility knife and straightedge. For comfort and longevity, wrap the foam in 1/4" polyester batting—pull taut and staple every 2 inches along the bottom edge only. This creates a soft, rounded profile and prevents fabric from dimpling over seams. According to the Upholsterers Association of America’s 2021 workshop manual, skipping batting increases visible staple marks by 60% within 6 months of daily use.
4. Attach new fabric, starting from the center and working outward
Lay fabric face-down on a clean surface. Center the seat base on top, foam-side down. Pull fabric tightly over one long side, staple once at the center, then repeat on the opposite side. Move to the remaining two sides—always pulling evenly to avoid diagonal tension wrinkles. Trim excess fabric to 1.5" beyond staple line. Fold corners like wrapping a present: cut small notches in the seam allowance, then fold and staple in three neat layers. Avoid over-stretching—fabric should be drum-tight, not glossy.
Pro Tips
Upholstery isn’t about perfection—it’s about consistency and control. Professionals always work in pairs when recovering dining chairs: one holds tension while the other staples. If you’re going solo, use binder clips to temporarily hold pulled fabric before stapling. Never skip pre-washing cotton or linen fabric—even ‘dry-clean-only’ upholstery-grade linens shrink 3–5% if unwashed (Textile Institute Handbook, 2020).
“The biggest mistake I see? Starting at a corner instead of the center. That guarantees puckering. Always anchor the middle first—then let tension radiate outward.” — Maria Chen, certified upholstery instructor, North Carolina School of Design (2023)
What kind of fabric works best for kitchen chair seats?
Go for Crypton or Revolution Performance Fabric—both resist spills, stains, and UV fading without chemical coatings. They test at 50,000+ double rubs and are bleach-cleanable. Avoid velvet or chenille in high-traffic kitchens: crumbs embed deeply and vacuuming pulls fibers loose.
Can I recover a padded ladder-back chair seat without removing the entire back?
Yes—if the seat is a separate panel mounted with screws beneath the seat rail. Look for access holes or small plugs near the front edge. Most Shaker-style and Windsor chairs allow seat-only replacement. If the back slats are glued or pinned into the seat block, don’t force separation—consult a furniture conservator instead.
Why does my new fabric bubble or ripple after stapling?
Ripples mean uneven tension or fabric grain misalignment. Double-check that the selvage edge runs parallel to the longest seat dimension—this keeps stretch consistent. Also verify you didn’t twist the fabric during placement. Lift one corner and reseat it before final stapling.
Do I need fire-retardant fabric for home use?
No—for residential chairs in private homes, standard upholstery fabric meets code. Fire-retardant (FR) fabric is legally required only in commercial settings (hotels, restaurants, waiting rooms) per NFPA 260 (2022). FR-treated fabrics cost 2–3× more and often feel stiffer.
How do I match existing chair legs or finish after recovery?
Take a leg to a local hardware store and compare stain samples under natural light—not fluorescent bulbs. Bring sandpaper (120-grit) and wipe the leg with mineral spirits first to reveal true wood tone. Refinish only the legs showing wear; leave untouched areas alone to avoid mismatched patina.
What’s the easiest way to hide staple lines on visible seat edges?
Use decorative gimp trim or braided cord glued over staples with contact cement. Or, upgrade to a seat with a wrapped edge: fold fabric 1.5" over the side, staple underside, then hand-stitch the fold closed with invisible thread. It takes 20 extra minutes but looks custom-built.
Recovering a chair seat gives you immediate visual impact and lasting satisfaction—you’ve just upgraded a functional object into something personal and intentional. Once you’ve done one, try how to reupholster a dining chair back or tackle a set of four with our upholstery tools for beginners guide. Keep your staple gun loaded and your fabric grain aligned—you’ll be amazed what you can restore next.