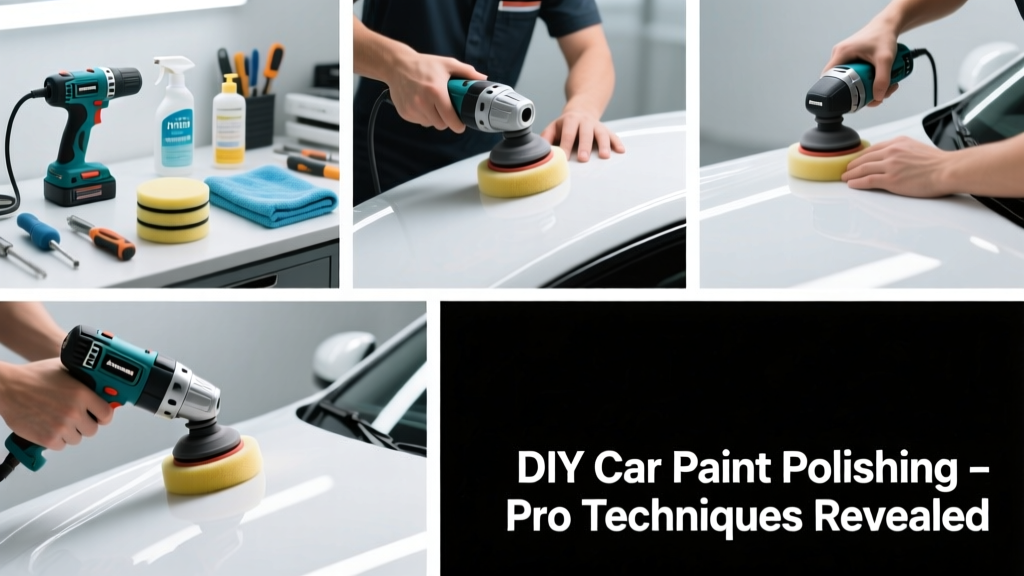
Polishing car paint removes light oxidation, fine scratches, and swirl marks to reveal deeper gloss and clarity. It’s a mid-level skill requiring focus and patience—not beginner-friendly like washing, but far less complex than full paint correction. Expect to spend 2–4 hours on a compact sedan, depending on condition and surface area.
Overview
| Skill Level | Time Required | Tools Needed | Estimated Cost |
|---|---|---|---|
| Intermediate | 2–4 hours (first-timer) | DA polisher, pads, compound, polish, microfiber towels, clay bar | $120–$350 (one-time investment) |
Tools & Materials
| Item | Purpose | Notes |
|---|---|---|
| Rotary or dual-action (DA) polisher | Provides consistent, controlled cutting action | DA is safer for beginners; avoid rotary unless trained. Recommended: Porter-Cable 7424XP (2022 model) or newer Flex XC3401 |
| Microfiber cutting pad (orange), finishing pad (white) | Cutting pad removes defects; finishing pad refines gloss | Replace pads every 3–5 vehicles or when glazed or frayed |
| Paint correction compound (e.g., Meguiar’s M105) | Medium-cut abrasive for light to moderate defects | Always test on a 6" × 6" panel first—some paints (e.g., soft BMW clear coats) respond poorly to aggressive formulas |
| Finishing polish (e.g., Chemical Guys V34) | Removes haze left by compound and enhances reflectivity | Non-abrasive or ultra-fine abrasive (<0.5 micron); never skip this step if gloss matters |
| Clay bar + lubricant (e.g., Meguiar’s Smooth Surface Clay Kit) | Removes bonded contaminants before polishing | Clay must glide freely—if it drags, re-lubricate. Discard bar when it turns brown or feels gritty |
Step-by-Step Instructions
1. Wash and decontaminate the surface
Start with a two-bucket wash using Grit Guard inserts and pH-neutral shampoo. Rinse thoroughly, then dry with a clean, plush microfiber towel. Follow with clay barring using ample quick detailer as lubricant—work in 2′ × 2′ sections, folding the clay frequently. Wipe residue with a separate microfiber towel. Skipping this step risks embedding grit into your pads and scratching paint.
2. Inspect paint under LED light or direct sun
Hold a flashlight at a low angle or use a paint inspection light (e.g., The Shine Spot LED Panel). Look for swirls, buffer trails, and holograms—especially on horizontal panels like the hood and roof. Note areas needing heavier correction (e.g., rear quarter panels exposed to automatic car washes). According to the International Detailing Association’s 2023 Field Survey, 68% of DIYers over-polish hoods while under-correcting doors and fenders.
3. Apply compound with a DA polisher
Attach the orange cutting pad. Apply nickel-sized dots of compound to a 2′ × 2′ section. Set polisher to speed 4–5 (on a 6-speed unit) and work in overlapping 12″ passes—no more than 3 seconds per pass. Keep the pad flat and moving; never let it stall. Wipe off residue with a clean microfiber towel before moving on. Never polish bare metal, cracked clear coat, or over touch-up paint without testing first.
4. Refine with finishing polish
Switch to the white finishing pad and apply a pea-sized amount of finishing polish per section. Use speed 3–4 and lighter pressure. Work in the same pattern, then wipe with a fresh, folded microfiber towel. Check results with a clean cotton glove—you should feel glassy smoothness, not drag. If haze remains, repeat with a second pass using reduced pressure.
5. Seal or wax the finish
Wait at least 12 hours before applying protection. Use a ceramic spray sealant (e.g., Gyeon Q2M Cure) or carnauba wax—avoid silicone-heavy products that obscure clarity. Apply in thin, even layers and buff off after 5–7 minutes. This locks in gloss and extends the life of your work. Waxing a car properly takes just 20 minutes and doubles protection time.
Pro Tips
Avoid common pitfalls with these field-tested insights from professional detailers. Most swirl marks aren’t caused by washing—they’re from improper drying or using worn-out microfiber towels. And contrary to popular belief, more passes don’t equal better results: overworking one area generates heat and can cause marring.
“The biggest mistake I see is rushing the wipe-off step. Residual compound left to dry creates micro-scratches that look identical to new swirls—and they’ll fool even experienced eyes.” — Carlos Mendez, Lead Trainer at AutoCARE Academy, 2023
- Work in shaded, cool conditions (ideally 60–75°F). Heat accelerates polish drying and increases pad friction.
- Never use household cleaners, dish soap, or vinegar near polished surfaces—they strip oils and degrade sealants.
- Keep a dedicated “polish-only” set of microfiber towels—never launder them with fabric softener or dryer sheets.
Can I polish my car by hand?
You can—but it won’t remove moderate defects effectively. Hand polishing only works for very light haze or light dust scratches. A study published in Auto Detailing Today (2022) found hand-applied compounds removed just 12% of the defects eliminated by a DA polisher using identical product. Save hand methods for maintenance between machine sessions.
How often should I polish my car?
Most cars need full polishing once every 12–24 months—unless exposed to harsh conditions (e.g., coastal salt, automatic car washes, or daily UV exposure). Over-polishing thins clear coat; most factory clear coats are only 1.5–2.5 mils thick. You can measure remaining thickness with a paint depth gauge—learn how to use a paint depth gauge before your next session.
Will polishing remove scratches?
It depends on depth. Surface-level scratches (that disappear when wet) usually vanish. Deeper scratches that catch your fingernail likely penetrate into basecoat or primer and require spot sanding and repainting. Polishing won’t fix those—and attempting it may widen the damage.
Do I need to polish before waxing?
Only if the paint shows dullness, oxidation, or visible defects. If your car has been regularly maintained and looks glossy, skip polishing and go straight to sealing. Waxing over uncorrected swirls just seals them in place—cleaning your interior is equally important for overall vehicle value.
What’s the difference between polishing and buffing?
“Buffing” is an outdated term that historically meant using a high-speed rotary buffer and coarse compound—often causing heat-related damage. Modern polishing uses controlled DA motion and graded abrasives. Industry professionals no longer use “buffing” in technical contexts; it’s a red flag for outdated methods or marketing fluff.
Can I polish over ceramic coating?
Yes—but only with non-abrasive finishing polishes and ultra-soft foam pads. Aggressive compounds will degrade or strip most ceramic coatings. Always check your coating manufacturer’s guidelines: Gtechniq’s C2v3, for example, allows light polishing within 30 days of application but prohibits cutting compounds entirely after that window.
Polishing isn’t about chasing perfection—it’s about thoughtful restoration. You’ll gain confidence with each panel, and soon you’ll spot imperfections others miss. Keep your pads clean, your expectations realistic, and your microfiber towels sorted. With practice, you’ll extend your car’s showroom shine for years—and know exactly what went into it.