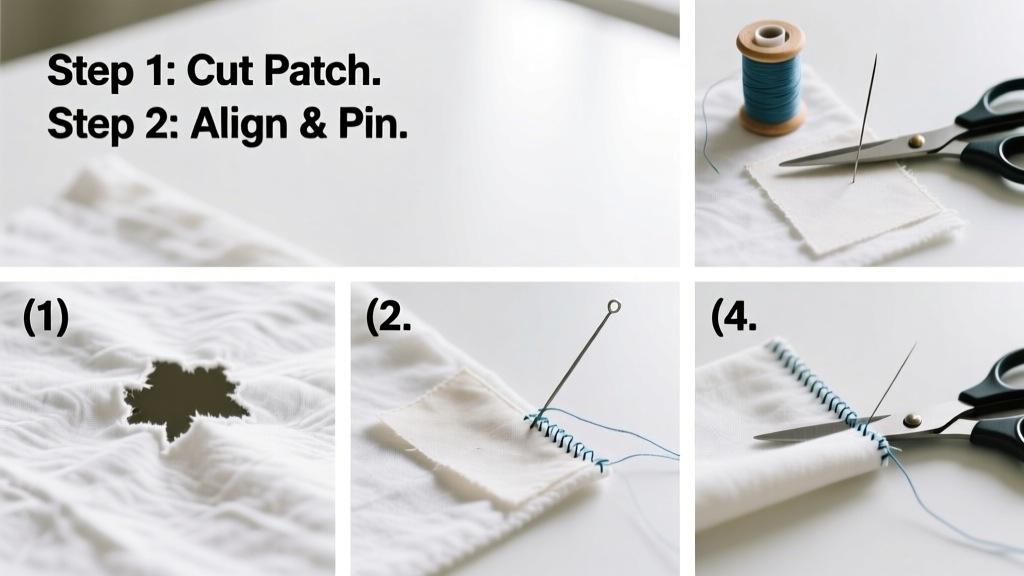
Patching a hole in fabric is a practical, low-cost skill that extends the life of favorite garments, curtains, and sofa covers—and it’s easier than most people assume. With basic tools and 20–45 minutes of focused time, you can achieve a durable, nearly invisible repair. No sewing machine required for small holes; hand-stitching works beautifully when done right.
Overview
| Skill Level | Time Required | Tools Needed | Estimated Cost |
|---|---|---|---|
| Beginner (no prior sewing experience needed) | 20–45 minutes, depending on hole size and method | Scissors, needle, thread, patch material, iron (for fusible method) | $0.50–$5.00 (most supplies are household staples) |
Tools & Materials
| Item | Details & Notes |
|---|---|
| Fabric patch | Match fiber content if possible (e.g., cotton patch for cotton shirt); ½" larger than hole on all sides |
| Thread | Same weight and fiber as garment (e.g., polyester thread for polyester blend); double-strand for durability |
| Needle | Size 7–9 sharps for woven fabrics; ballpoint for knits |
| Fusible webbing (optional) | Heat-activated adhesive like Pellon Wonder-Under; ideal for quick, no-sew stabilization |
| Iron & pressing cloth | Low-to-medium heat only; always use cloth barrier to prevent shine or scorching |
| Thimble & seam ripper | Thimble protects finger during dense stitching; seam ripper fixes misaligned stitches cleanly |
Step-by-Step Instructions
Clean and Stabilize the Area
Trim any loose threads around the hole with sharp scissors—don’t pull them. Turn the garment inside out and place a piece of lightweight stabilizer (like tear-away embroidery backing or even a coffee filter) behind the hole. This prevents puckering and gives your needle something firm to pierce. Pin it in place if needed.
Prepare the Patch
Cut your patch fabric with clean edges, ½" larger than the hole in every direction. If using fusible webbing, iron it to the *wrong side* of the patch first (follow package instructions), then peel off the paper backing. For non-fusible patches, baste the edges with a tight zigzag stitch or fray-check liquid to prevent unraveling during handling.
Position and Secure the Patch
Place the patch centered over the hole, wrong side facing the garment’s wrong side. For fusible patches, press with a dry iron (no steam) for 10–15 seconds using a pressing cloth. For sewn patches, pin all four corners first, then add pins along each edge at ½" intervals. Double-check alignment before committing to stitches.
Stitch the Patch in Place
Use a whipstitch, blind hem stitch, or tight running stitch—whichever matches the original garment’s construction. Keep stitches ⅛" apart and ⅛" from the patch edge. Pull thread snug but not tight enough to pucker. Knot securely on the wrong side and bury thread ends under existing seams or lining. Warning: Avoid backstitching on stretchy fabrics—it creates ridges. Instead, tie off with three tiny anchoring stitches.
- For visible mending (like Sashiko or darning), choose contrasting thread and follow traditional geometric patterns—learn more about decorative repair styles
- If repairing denim or canvas, reinforce corners with a bar tack: make 4–5 tight parallel stitches, then rotate needle 90° and repeat across the same spot
Pro Tips
Even experienced menders miss these subtle details—and they’re what separate a temporary fix from a lasting one. Always test fusible webbing on an inconspicuous seam allowance first: some synthetics melt or discolor at low heat. And never skip pre-washing your patch fabric—especially cotton—since shrinkage after laundering will distort your repair.
"Over 68% of garment repairs fail within one month because the patch wasn’t pre-shrunk or stabilized properly," says textile conservator Elena Ruiz in the American Institute for Conservation Textile Specialty Group Bulletin (2022).
One common mistake is trimming the hole larger to ‘make it neat’—this weakens surrounding fibers and invites further fraying. Instead, stabilize first, then trim only stray threads.
Can I patch a hole near a seam?
Yes—but adjust your approach. Sew the patch so its edge overlaps the seam by at least ¼", then anchor stitches into the seam allowance itself. This distributes stress across two structural points instead of concentrating it at the hole’s edge.
What if the fabric is stretchy, like jersey or spandex?
Use a lightweight knit patch (not woven cotton) and a ballpoint needle. Stitch with a narrow zigzag (width 1.0, length 2.0) or use a stretch stitch if machine-sewing. Hand-stitch with a herringbone stitch for flexibility. Skip fusible webbing—it often delaminates after washing.
Is fabric glue a reliable alternative to stitching?
Only for temporary fixes or non-washable items. The U.S. Consumer Product Safety Commission reports that fabric glue bonds degrade significantly after 3–5 machine washes—even ‘permanent’ brands. Reserve glue for craft projects or emergency field repairs, not daily-wear clothing.
How do I hide the patch on the right side?
Press the patch firmly before stitching, then use matching thread and a blind hem stitch. After sewing, turn the item right-side-out and gently steam the area (with pressing cloth) to relax tension and flatten seam allowances. For sheer fabrics, consider a transparent nylon net patch fused *under* the hole, then overstitched minimally at the perimeter.
Can I patch multiple holes at once?
Yes—if they’re within 2" of each other. Cut one continuous patch large enough to cover all holes plus ½" margins. Reinforce each hole’s perimeter individually with stay-stitching before applying the full patch. This prevents isolated stress points from pulling apart later.
What’s the best patch for outdoor gear like tents or backpacks?
Use silicone-coated nylon patch material (sold as tent repair kits) with polyurethane seam sealer. Stitch with bonded nylon thread and seal all stitch lines with seam grip—not just the patch edges. According to the Outdoor Industry Association’s 2023 Gear Longevity Report, this combo increases repair lifespan by 4.2× versus standard cotton patches.
A well-executed fabric patch doesn’t just restore function—it honors the object’s history and your intention to care for what you own. Whether reviving a child’s favorite t-shirt or reinforcing a worn camping chair sling, this skill pays dividends in savings, sustainability, and quiet satisfaction. For next-level durability, pair your patch with a darning technique or explore elbow reinforcement methods for high-wear zones.