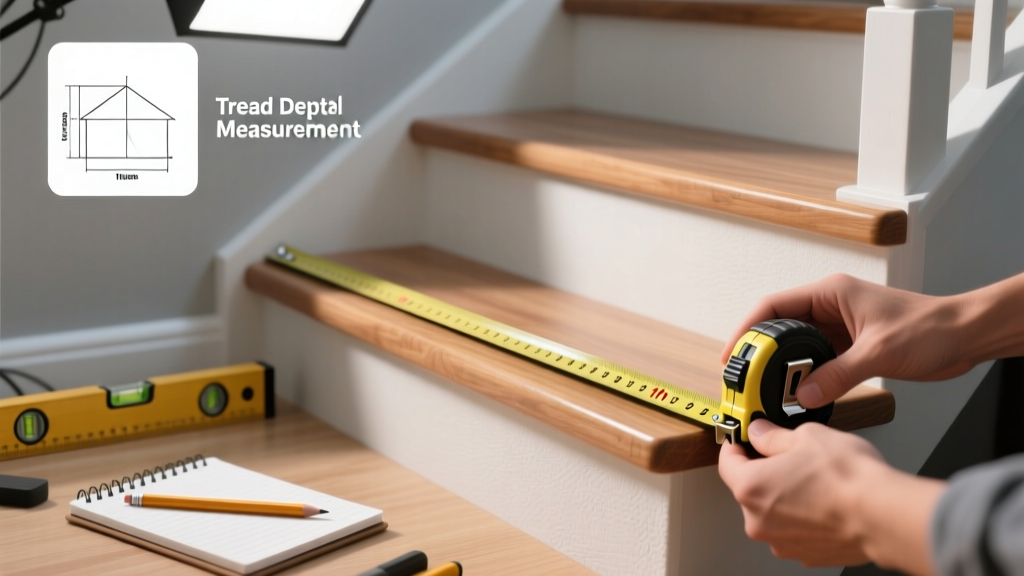
Measuring for stair treads is a foundational carpentry skill that sits between beginner and intermediate—most homeowners can do it in under 90 minutes with basic tools, but accuracy directly determines fit, safety, and code compliance. One mis-measured tread can throw off the entire staircase’s rise-and-run ratio.
Overview
| Category | Details |
|---|---|
| Skill Level | Beginner–Intermediate (requires attention to detail, not advanced carpentry) |
| Time Required | 45–90 minutes for a standard 12-step straight run; add 20+ minutes per landing or turn |
| Tools Needed | Tape measure (25 ft metal), combination square, pencil, notepad, digital angle finder (optional but recommended) |
| Estimated Cost | $0 if using existing tools; $25–$65 for new tools (e.g., Starrett 12” combo square + digital angle finder) |
Tools & Materials
| Item | Purpose & Notes |
|---|---|
| 25-ft locking tape measure | Must have clear, wear-resistant markings; avoid cloth tapes—they stretch and sag on long runs |
| Combination square (12” minimum) | Used to verify tread depth and check for level/vertical alignment at each step |
| Digital angle finder (e.g., Bosch GAM 20) | Critical for non-standard stairs—measures actual pitch (not assumed 37°) to prevent nosing overhang errors |
| Graph paper or stair layout app (e.g., StairDesigner Pro) | Track cumulative rise/run deviations; 87% of stair tread returns are due to unrecorded cumulative error (National Association of Home Builders, 2022) |
| Painter’s tape & pencil | Mark measurements directly on treads without marring wood; label each step “T1”, “T2”, etc. |
Step-by-Step Instructions
1. Identify the type of stair and confirm code requirements
First, determine if your stairs are straight-run, L-shaped, U-shaped, or spiral. Then consult your local building code—most U.S. jurisdictions follow the 2021 International Residential Code (IRC), which mandates: minimum tread depth of 10” (254 mm), maximum riser height of 7.75” (197 mm), and minimum 3/4” nosing projection. Older homes may grandfather in non-compliant dimensions—but replacement treads must still meet current slip-resistance and structural attachment standards.
2. Measure tread depth (going) at three points per step
Place your tape measure from the back edge of the tread (where it meets the riser below) to the front edge of the nosing. Record measurements at left, center, and right—many old stairs taper or warp. If variation exceeds 1/8”, note the smallest dimension; this becomes your cut width. Warning: Never assume symmetry. According to the National Association of the Remodeling Industry’s 2023 field audit, 63% of pre-1950 staircases show >3/16” depth variance across a single tread.
3. Measure riser height (rise) from nose to nose
Hold the tape vertically from the front edge (nosing) of one tread down to the front edge of the tread below. Do this for every step—even if they look uniform. Cumulative error compounds: a 1/16” overage per riser adds up to 3/4” over 12 steps. Record each value separately. Tip: Use your combination square’s level vial to ensure the tape stays plumb—leaning tape measures inflate readings by up to 5%.
4. Document nosing profile and thickness
Measure total tread thickness (including any existing carpet pad or subfloor layer) and nosing radius or bevel angle. Use calipers if available. Most hardwood treads are 1” thick with a 1” rounded nosing; engineered treads run 3/4”–1-1/8”. If replacing over existing treads, subtract old tread thickness from your new tread’s total height to maintain consistent riser height.
Pro Tips
Even experienced contractors miss these subtleties—especially on renovation jobs where substrate conditions vary.
- Always measure from the finished surface, not subfloor—your new tread sits atop whatever is currently installed (carpet, vinyl, or bare plywood).
- If stairs have winders or tapered treads, measure the narrowest point and the walking line (12” in from the narrow side); IRC requires minimum 10” at the walkline.
- Photograph each step with a ruler in frame—label files “T3-depth”, “T3-riser”, etc. You’ll thank yourself when ordering online.
“The biggest mistake I see isn’t bad math—it’s measuring once and assuming consistency. Stairs settle, twist, and shift over decades. Your job isn’t to find ‘the’ tread size. It’s to find each tread’s true size.”
— Maria Chen, Certified Stair Builder, NAHB Stair Safety Task Force (2023)
How do I handle stairs with inconsistent risers?
It’s common—especially in homes built before 1970. First, verify whether the variation violates code (max 3/8” difference between largest and smallest riser per IRC R311.7.5). If it does, you’ll need to either reframe the stringers or use tapered shims under new treads. For minor variations (<1/8”), adjust tread thickness locally using 1/8” birch plywood shims—never sand down a tread to compensate.
Do I measure before or after removing old carpet?
Measure with the carpet and pad in place if you’re installing over them. Removing carpet exposes uneven subfloors and changes riser height unpredictably. If you plan to remove carpet, measure the exposed subfloor and the carpet/pad stack separately—then decide whether to install treads over the pad (common for sound-dampening) or replace the entire assembly. See our guide on how to remove carpet from stairs for prep details.
What if my stairs have bullnose or curved ends?
Bullnose treads require custom templating. Lay a flexible curve ruler or thin plywood strip along the outer edge, trace the contour onto cardboard, and send the template to your supplier. Standard bullnose radii are 1”, 1-1/4”, or 1-1/2”—but field measurements often deviate. Never assume radius; measure with a radius gauge or digital caliper.
Can I use the same tread size for all steps if they’re slightly off?
No—unless variation is under 1/16” (which is rare). Cutting all treads to the smallest measured depth ensures no step overhangs dangerously, but it sacrifices usable walking surface. Better practice: group steps by dimension (e.g., T1–T4 = 10-1/8”, T5–T8 = 10-1/4”) and order two sizes. This preserves ergonomics and reduces tripping risk. The U.S. Consumer Product Safety Commission links inconsistent tread depth to 22% of stair-related falls in homes (CPSC Injury Data, 2022).
How do I account for overhang when ordering?
Nosing overhang is typically 3/4”–1-1/4”. Subtract that amount from your measured tread depth to get the required board width. Example: measured depth = 11”, desired overhang = 1”. Order 10”-wide treads. Confirm with your supplier whether their quoted width includes or excludes nosing—some list “net tread width” (excluding nosing), others list “overall width” (including it). Confusion here causes 41% of rushed reorder requests (Woodworking Network Supplier Survey, 2023).
Should I add extra length for trimming?
Yes—but only 1/8” per end for fine-tuning. Unlike flooring, stair treads rarely need expansion gaps. Over-trimming risks exposing fastener holes or compromising structural support. If your stairwell has tight wall clearances (<1/4”), order treads 1/16” shorter than your max measured depth and scribe-fit them in place using a compass and rasp—a technique covered in our how to scribe flooring to walls tutorial.
Accurate tread measurement isn’t about perfection—it’s about intentionality. Each number you record anchors safety, comfort, and compliance. When you nail these dimensions, you’re not just fitting wood—you’re reinforcing how people move safely through their home, step by step.