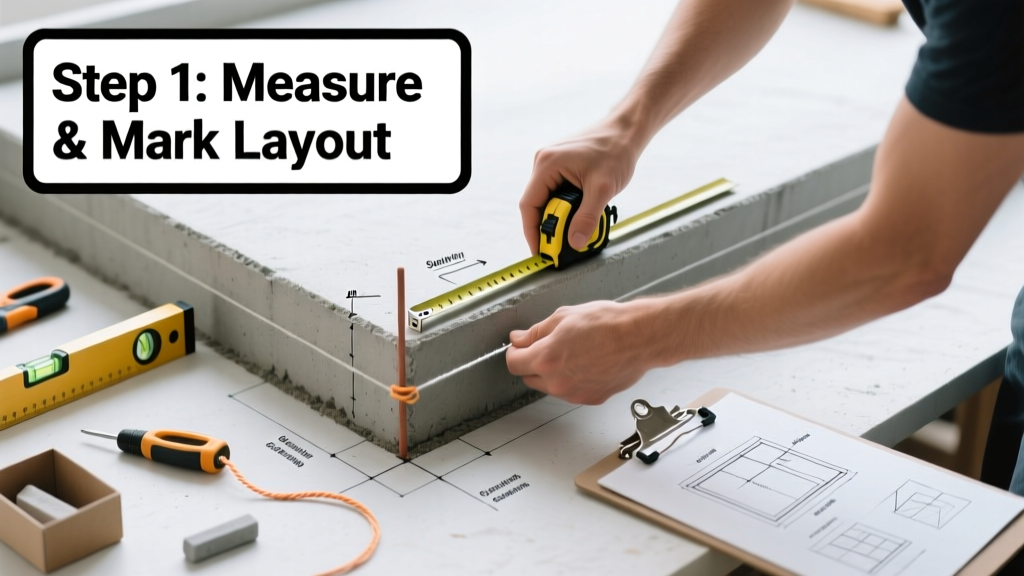
Measuring for concrete is a foundational skill for DIYers building patios, garage floors, foundations, or retaining walls—and it’s easier than most assume once you know the math and avoid common pitfalls. This is a beginner-to-intermediate skill that takes 20–45 minutes per project, depending on layout complexity.
Overview
| Skill Level | Time Required | Tools Needed | Estimated Cost |
|---|---|---|---|
| Beginner (basic math + tape measure) | 20–45 minutes | Tape measure, calculator, pencil, notepad | $0–$5 (if buying a dedicated concrete calculator app) |
Tools & Materials
| Item | Purpose | Notes |
|---|---|---|
| 25-ft fiberglass tape measure | Accurate linear measurement over long distances | Retractable tapes stretch; fiberglass holds true. Avoid cloth tapes for outdoor use. |
| Digital level or string line | Confirming consistent depth across uneven ground | A 4-ft level works for small slabs; string lines help mark grade for footings. |
| Concrete volume calculator (app or online) | Double-checking manual calculations | Try the Concrete Calculator Tool—it converts cubic feet to yards instantly. |
| Graph paper or sketch app | Mapping irregular shapes before calculating | Sketching prevents missed sections—especially around columns or stepped footings. |
Step-by-Step Instructions
1. Sketch the area and break it into rectangles
Draw a rough plan of your pour—whether it’s a 12' × 16' patio or an L-shaped footing. Divide irregular shapes into rectangles or squares. For example, an L-footing becomes two separate rectangles: one 8' × 12" and another 6' × 12". Label each with dimensions in feet and inches.
- Tip: Convert all inches to decimals *before* multiplying (e.g., 6" = 0.5 ft, 9" = 0.75 ft).
- Warning: Don’t forget to subtract column holes or post pockets—they reduce total volume. A 12"-diameter hole 2' deep removes 0.196 cubic yards.
2. Measure length, width, and depth in consistent units
Use feet for all measurements. Measure length and width at multiple points—especially on uneven sites—to catch discrepancies. Depth must reflect *actual* pour thickness, not just form height. For a 4" slab, use 0.33 ft (4 ÷ 12); for a 12" footing, use 1.0 ft.
- Tip: Use stakes and string to mark edges before measuring—prevents misreading boundaries.
- Warning: Never assume depth is uniform. Dig test holes along footing trenches to verify soil consistency and adjust depth as needed.
3. Calculate volume in cubic feet, then convert to cubic yards
Multiply length × width × depth (all in feet) for each rectangle. Add totals. Then divide by 27 to convert cubic feet to cubic yards—the unit suppliers use. Example: 10' × 12' × 0.33' = 39.6 ft³ → 39.6 ÷ 27 = 1.47 yd³.
Always round up: Order 1.5 yd³, not 1.47. Suppliers won’t deliver partial yards, and short pours risk cold joints or delays.
4. Add 5–10% for waste and settling
According to the American Concrete Institute’s Standard Practice for Selecting Proportions for Normal, Heavyweight, and Mass Concrete (2022), 7% extra is standard for residential pours with moderate complexity. For sloped sites or hand-placed concrete, add 10%. So 1.5 yd³ × 1.07 = 1.61 yd³ → round to 1.75 yd³ ordered.
"Overordering by 5–7% is cheaper than a second truck call—and far less disruptive. We see 1 in 4 DIY jobs delay completion due to under-ordering." — Mike R., field estimator at Vulcan Materials, 2023
Pro Tips
Seasoned contractors never rely on a single measurement or skip verification. They also avoid these three mistakes more often than beginners realize.
- Using nominal lumber dimensions (e.g., “2×6” forms are actually 1.5" × 5.5")—always measure the *actual* inside form dimension.
- Forgetting that rebar and wire mesh displace ~0.5% volume—negligible for small pours, but critical in large footings.
- Assuming bagged concrete yields match labels exactly—moisture, mixing method, and aggregate size cause up to 12% variance (per Portland Cement Association, 2021).
When in doubt, cross-check with the How to Pour Concrete guide—it includes yield charts for 60-lb and 80-lb bags.
How do I measure for a concrete driveway with a slope?
Break the driveway into 3–5 cross-sections perpendicular to the slope. Measure depth at top, middle, and bottom of each section. Average those three depths, then multiply by length and width of that section. Repeat and sum. Or use the trapezoidal rule: (depth₁ + depth₂) ÷ 2 × length × width.
What if my footing has varying widths or depths?
Segment it. A T-shaped footing? Treat the stem and base as separate volumes. A stepped footing? Calculate each step individually—don’t average depth across steps. The U.S. Department of Housing and Urban Development’s Residential Structural Design Guide (2020) requires this for permit drawings.
Do I need to account for gravel base when measuring for concrete?
No—gravel is sub-base, not part of the concrete volume. But do measure *form height*, not ground level. If you pour 4" concrete onto 4" gravel, your forms still need to be 4" tall. Gravel compaction affects final elevation—not concrete quantity.
Can I use an online calculator without measuring myself?
You can—but only after you’ve physically verified dimensions. Online tools assume perfect rectangles and uniform depth. One unmeasured bulge in a 20-ft wall form adds nearly 0.1 yd³. Always measure first, calculate second.
How accurate do my measurements need to be?
Within ±¼ inch for depth, ±½ inch for length/width on projects under 10 yd³. On larger jobs (e.g., a 30-yd³ garage floor), ±⅛ inch depth accuracy matters—0.125" error over 24' × 24' adds 0.15 yd³. That’s $45 in wasted concrete at current averages (NRMCA, 2024).
Why does my supplier ask for 'plan view' and 'section view' sketches?
They’re checking for hidden volume: haunches, keyways, or embed plates. A 6"-deep keyway running 10' adds 0.11 yd³. Sketches prevent change orders—and surprise fees. Refer to our Reading Construction Drawings primer if reviewing engineer-stamped plans.
Measuring for concrete isn’t about perfection—it’s about disciplined consistency. Take your time with the tape, double-check conversions, and always build in that buffer. When your pour arrives on time, fills the forms cleanly, and leaves just enough for a few extra sidewalk patches? That’s the quiet satisfaction of measurement done right.