Laying gravel is a foundational outdoor skill—moderately easy for DIYers with basic tools, but unforgiving if rushed. Expect 4–8 hours for a 10' × 12' area (like a backyard path), depending on soil conditions and whether you’re removing sod first.
Overview
| Skill Level | Time Required | Tools Needed | Estimated Cost (10' × 12' area) |
|---|---|---|---|
| Intermediate DIY | 4–8 hours (plus 24–48 hrs settling time) | Shovel, rake, tamper, landscape fabric, measuring tape, string line | $120–$220 (gravel, fabric, edging) |
Tools & Materials
| Item | Quantity/Specs | Notes |
|---|---|---|
| Crushed stone #57 or #67 | 1.5–2 tons | Sharp-edged, compactable—avoids shifting better than pea gravel |
| Landscape fabric (woven polypropylene) | 130 sq ft (10% extra) | UV-stabilized, ≥3 oz/yd² weight; blocks weeds without trapping water |
| Steel or plate tamper | 1 | Manual or rented; essential for compaction—don’t skip this step |
| Galvanized steel or plastic edging | 40 linear ft | Prevents lateral spread; anchors fabric and defines edges |
| Stakes & mason’s line | 6 stakes + 25 ft line | For grading accuracy—critical for drainage |
Step-by-Step Instructions
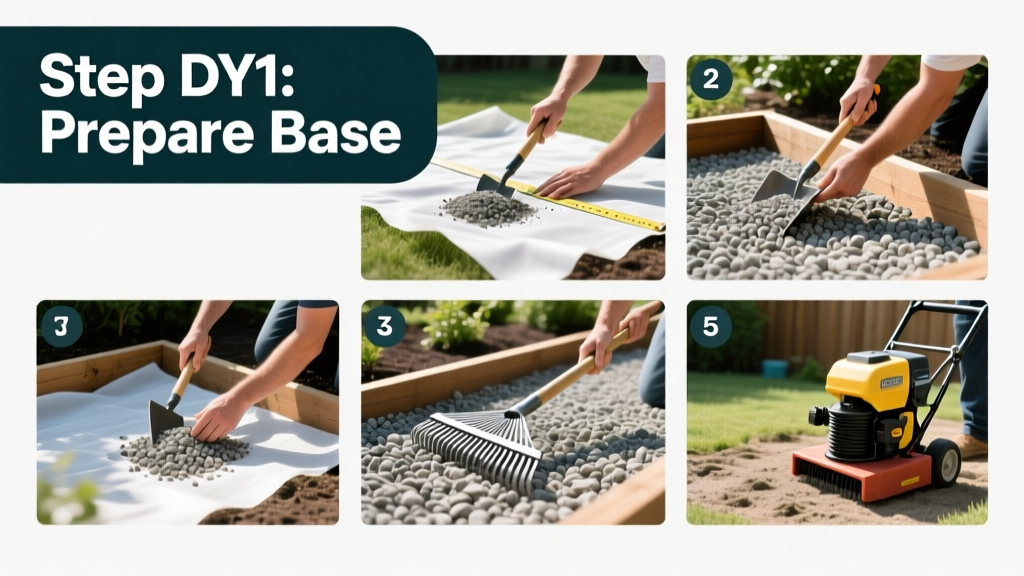
1. Clear and mark the area
Remove all grass, roots, and organic debris down to mineral soil using a flat shovel or sod cutter. Dig 6–8 inches deep—deeper for driveways (10–12 inches). Use stakes and mason’s line to mark level reference points every 4 feet. Warning: Skipping root removal invites regrowth under fabric, lifting your gravel layer in 6–12 months.
2. Install edging and compact the subgrade
Set rigid edging flush with grade, securing every 2–3 feet with 12-inch galvanized spikes. Then, tamp bare soil thoroughly—make 3 passes with overlapping strokes. According to the National Stone, Sand & Gravel Association’s 2022 Field Manual, un-compacted subgrade causes 73% of premature gravel failure.
3. Lay and secure landscape fabric
Unroll woven fabric over the tamped base, overlapping seams by 6 inches. Anchor edges with 6-inch U-shaped pins every 2 feet. Trim excess at borders—but leave 2 inches overlapping edging to prevent wind lift. Tip: Avoid non-woven fabric—it clogs with silt and fails within one season.
4. Spread, level, and tamp the gravel
Pour gravel in 2-inch lifts. Use a 2×4 board as a screed rail to level each layer against guide strings. Tamp each lift separately with firm, even strokes—don’t wait until full depth is poured. Final depth should be 4 inches for foot traffic, 6 inches for occasional vehicle use. Warning: Over-tamping creates fines migration and surface dust; under-tamping leads to rutting.
Pro Tips
Gravel isn’t just dumped—it’s engineered. The right base, fabric, and compaction sequence make the difference between a tidy path and a weedy, sinking mess. Most failures stem from poor drainage prep or skipping the subgrade tamp.
“If your gravel shifts after rain, it’s not the gravel’s fault—it’s the base. Always check slope: 1/4 inch per foot away from structures is minimum.” — Dan Riley, horticultural engineer and author of Drainage First: Foundations for Landscape Success (2021)
- Use crushed limestone (#57) for high-traffic zones—it locks together better than granite or river rock
- Never lay gravel directly on clay soil without a 3-inch sand or gravel sub-base to prevent mud pumping
- Re-tamp lightly every spring—especially after freeze-thaw cycles—to restore density
How deep should gravel be for a walkway?
Aim for 4 inches compacted depth. That delivers stability without excessive cost or material waste. Less than 3 inches washes away in heavy rain; more than 5 inches becomes unstable under foot traffic and hard to maintain.
Can I lay gravel over existing grass?
No—grass will decompose, creating voids and uneven settlement. Worse, roots push up through fabric. Remove sod completely, or use a sod cutter and haul it off-site. For small areas, smothering with cardboard and mulch takes 8–12 weeks and still requires excavation before gravel.
Do I need landscape fabric under gravel?
Yes—if you want lasting weed suppression and separation from soil. Skip it only on commercial-grade geotextile sub-bases (e.g., road construction). In gardens or patios, 92% of fabric-free gravel installations show significant weed penetration by year two (University of Vermont Extension, 2020).
What’s the best gravel for driveways?
Crushed stone #67 (¾” minus) or #411 (a mix of #57 and fines) provides interlock and load-bearing capacity. Avoid pea gravel—it rolls and migrates under tires. See our guide on best gravel for driveway use for side-by-side performance charts.
How do I stop gravel from washing away on slopes?
Install perforated edge restraints (like corrugated steel edging) and add cross-trenches every 4–6 feet filled with coarse sand. On slopes >5%, use a grid paver system under the gravel—this holds material in place during runoff.
Can I lay gravel over concrete or asphalt?
You can—but only if the underlying surface is sound, well-drained, and sloped correctly. Clean oil stains first with degreaser, then apply a bonding agent or coarse sand layer before gravel. Without prep, moisture trapped beneath causes delamination and puddling.
A well-laid gravel surface lasts 10–15 years with minimal upkeep—far longer than most assume. It’s not about dumping and walking away. It’s about building layers that work together: stable base, clean separation, precise depth, and smart compaction. Once you’ve done it right once, every future project gets faster and more confident.