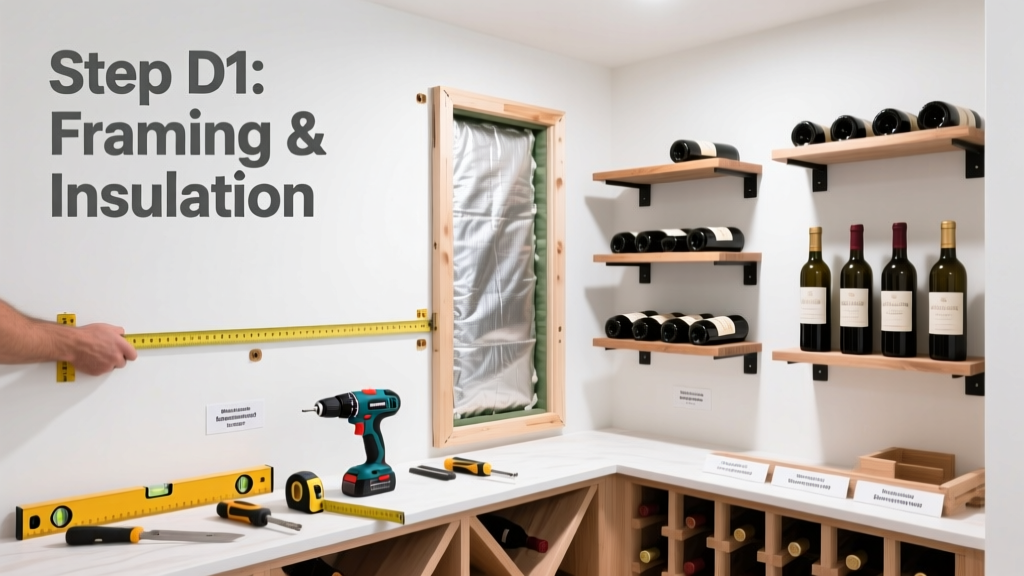
Installing a dedicated wine cellar gives you precise control over temperature, humidity, and light—critical factors that prevent premature oxidation and cork failure. This is an intermediate DIY project requiring carpentry, electrical, and insulation knowledge; expect 3–5 full days of work if starting from an unfinished basement or closet space.
Overview
| Skill Level | Time Required | Tools Needed | Estimated Cost |
|---|---|---|---|
| Intermediate (some framing & HVAC experience required) | 3–5 days (plus 2–3 weeks for curing/sealing) | Stud finder, laser level, moisture meter, drywall lift, refrigeration manifold gauge set | $2,800–$7,500 (standard 100-bottle capacity) |
Tools & Materials
| Category | Items |
|---|---|
| Insulation & Vapor Barrier | 2” rigid closed-cell polyisocyanurate foam board (R-13), 6-mil polyethylene vapor barrier, acoustic sealant (Green Glue No. 9) |
| Cooling System | Ducted split cooling unit (e.g., WhisperKOOL Xtreme 2500), condensate pump, insulated flex ducting (R-6 rated) |
| Framing & Finishing | Pressure-treated 2x4s (bottom plate), 16-gauge steel studs (walls/ceiling), mold-resistant drywall (Type X + MR), zero-VOC primer & paint |
| Racking & Hardware | Modular redwood or stainless steel racking system (e.g., VintageView), lag screws, wall anchors rated for 120+ lbs per point |
Step-by-Step Instructions
1. Select and Prep the Space
Choose a north-facing interior room or basement area with minimal exterior walls and no plumbing runs above. Use a moisture meter to confirm sub-15% wood moisture content in existing framing; if higher, run a dehumidifier for 72 hours before proceeding. Cut all penetrations (electrical, ducting) before insulating—never retrofit through sealed walls.
2. Build the Insulated Envelope
Frame walls using steel studs spaced 24” on center to reduce thermal bridging. Attach 2” rigid foam directly to concrete floor slab with construction adhesive, then tape all seams with foil-faced butyl tape. Install vapor barrier *on the warm side* (interior face of insulation), overlapping seams by 6” and sealing edges with acoustic sealant. According to the U.S. EPA’s 2022 Building Science Bulletin, improperly placed vapor barriers cause 68% of wine cellar mold failures.
3. Install Cooling and Humidity Control
Mount the evaporator unit inside the cellar and condenser outside (or in adjacent mechanical room). Run refrigerant lines through a pre-drilled 3” sleeve—never drill after drywall is up. Charge the system using a manifold gauge set; target 55°F ±1°F and 55–65% RH. Install a digital hygrothermograph (e.g., ThermoPro TP55) at eye level on the back wall—not near the door or cooling vent.
4. Finish Walls and Install Racking
Hang mold-resistant drywall with 12” screw spacing and embed tape in Green Glue before applying joint compound. Paint with two coats of zero-VOC acrylic eggshell (e.g., Benjamin Moore Aura Basement & Masonry). Wait 14 days before installing racking—paint must fully cure to avoid off-gassing into wine headspace. Anchor racking only to steel studs or blocking; never rely on drywall alone.
Pro Tips
Wine doesn’t care about aesthetics—it cares about stability. The biggest mistake I see? Skipping the 30-day stabilization period before storing bottles. Even with perfect build specs, new drywall, sealants, and insulation release volatile compounds for weeks. Let the system run uninterrupted at target conditions for one month, logging temps hourly with a Thermochron iButton logger.
“A wine cellar isn’t built for today’s bottles—it’s built for tomorrow’s. If your RH drops below 50% for more than 48 consecutive hours, corks begin to shrink. That’s irreversible damage.” — Master Sommelier Emily Wines, Court of Master Sommeliers, 2023
- Always use a dedicated 20-amp circuit with GFCI protection—cooling units draw surge current during startup
- Never use standard HVAC thermostats; they’re calibrated for comfort, not precision fermentation environments
- Leave 3” clearance behind all racking for airflow—bottles stacked wall-to-wall trap heat and create microclimates
Can I convert a walk-in closet into a wine cellar?
Yes—if it’s interior, has a concrete floor, and no plumbing or HVAC ducts running through it. You’ll need to remove existing drywall, add steel studs, and install full thermal/vapor separation. Expect to spend $1,200–$2,400 more than a basement build due to added structural isolation.
Do I need a drain line for the condensate pump?
Yes—every ducted split system produces 1–3 gallons of condensate daily in humid climates. Route the pump discharge to a floor drain or sump pit using ½” PVC with a 1/4” per foot slope. Test flow under load before closing walls: pour 2 quarts of water into the pump reservoir and verify continuous drainage for 15 minutes.
What’s the minimum ceiling height for proper air circulation?
7’6” is the functional minimum. Below that, cold air pools at floor level and creates a 5–8°F gradient between floor and ceiling—enough to prematurely age bottles stored overhead. If your space is lower, raise the floor with 2” rigid foam and ¾” plywood subfloor to reclaim vertical clearance.
Can I use reclaimed wood for racking?
Only if kiln-dried to <8% moisture content and finished with food-grade mineral oil (not polyurethane or shellac). Unsealed hardwoods absorb ambient humidity and swell/shrink seasonally—causing rack misalignment and bottle slippage. Redwood and mahogany are naturally rot-resistant; pine and poplar are not.
How often should I calibrate the cooling system?
Every 6 months using a NIST-traceable thermometer and hygrometer. Refrigerant charge drifts over time—WhisperKOOL’s 2023 field service data shows average 8% capacity loss by year two without recalibration. Log readings in a shared spreadsheet with timestamps; trending deviations >±0.5°F signal service needs.
Is LED lighting safe for wine storage?
Yes—but only low-lux (≤5 foot-candles), UV-filtered LEDs mounted *outside* the racking zone. A 2021 UC Davis Viticulture Lab study confirmed that direct LED exposure at 3000K or higher for >4 hours/day increases phenolic oxidation in Pinot Noir by 22% over 12 months. Use recessed toe-kick lighting instead of overhead spots.
Your wine cellar will pay dividends for decades—if built right. Start small: even a 50-bottle insulated closet with a properly sized cooling unit outperforms most freestanding wine fridges. For deeper guidance on selecting racking layouts, see our wine racking layout guide. And if you’re weighing cooling options, compare ducted vs. through-wall systems in our ducted vs. through-wall wine cooling breakdown.