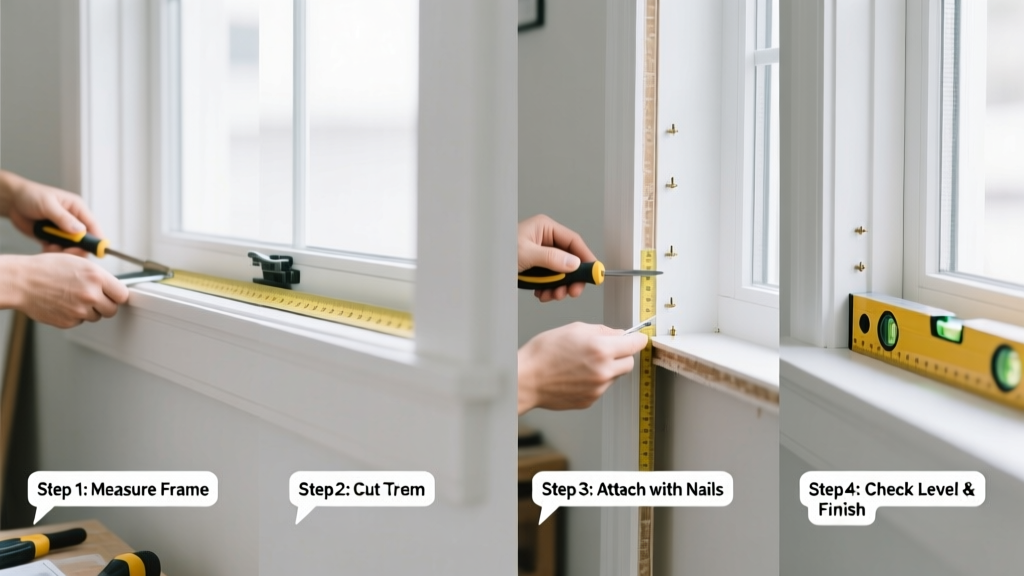
Installing window trim—also called casing—is a foundational carpentry skill that transforms bare window openings into polished architectural features. It’s a moderate-difficulty project that takes most DIYers 2–4 hours per window, depending on wall condition and trim complexity. No prior carpentry experience is required, but patience with measurements and attention to grain direction make all the difference.
Overview
| Skill Level | Time Required | Tools Needed | Estimated Cost (per window) |
|---|---|---|---|
| Intermediate | 2–4 hours | Tape measure, miter saw, nail gun (or hammer), coping saw, caulk gun, level | $18–$45 (depends on wood species and profile) |
Tools & Materials
| Item | Quantity/Specs | Notes |
|---|---|---|
| Primed pine or poplar casing | 1×3″ or 2¼″ wide, 8′ lengths | Poplar resists warping better than pine; pre-primed saves 1–2 coats of paint prep |
| Finish nails | 2″ 16-gauge (for nail gun) or 2½″ finish nails (for hammer) | Use ring-shank nails if nailing by hand—they resist popping out |
| Wood filler & painter’s caulk | 1 tube each | Use acrylic-latex caulk (e.g., DAP Alex Plus) for paintable, flexible seams |
| Clamps & shims | 2–3 bar clamps, ⅛″–¼″ plastic shims | Shims correct minor wall irregularities behind the jamb; clamps hold pieces while nailing |
Step-by-Step Instructions
1. Measure and mark the rough opening
Measure the height and width of the window’s rough opening—not the glass or sash. Record both dimensions. Add 1/8″ to each side for expansion clearance. Double-check that your tape measure isn’t skewed; even 1/16″ error compounds at corners. If the opening is out-of-square (common in older homes), note which side is longer—you’ll cope the longer piece to fit the shorter one.
2. Cut the head casing first, then jambs
Cut the head (top) piece to exact width—no overhang. Set your miter saw to 45° and cut both ends square (0°) for a butt joint, or 45° inward for a mitered corner (recommended for clean sightlines). Then cut the two side jambs: length = rough opening height + 1/8″, with 45° cuts at the top only—the bottom remains square to sit flush on the sill. Pro tip: Always cut jambs *after* the head piece—it ensures consistent reveal and avoids cumulative measurement drift.
3. Dry-fit and adjust before nailing
Hold all three pieces in place—head across top, jambs vertical. Use a 4′ level to verify plumb on each jamb. Shim behind low spots until casing lies flat against the wall. Mark nail locations lightly with pencil: two nails per jamb (one near top, one 6″ above sill), and three evenly spaced nails along the head. Avoid nailing within 2″ of any end—wood splits easily there.
4. Nail, fill, and caulk
Drive nails just below the surface using a nail set. Don’t overdrive—this compresses wood fibers and creates dimples that telegraph through paint. Fill all nail holes and gaps at joints with water-based wood filler. Let dry 90 minutes. Then run a thin, continuous bead of painter’s caulk where casing meets wall—especially at inside corners and along the sill. Wipe excess with a damp finger before it skins over.
Pro Tips
Seasoned carpenters know trim fails not from poor cutting—but from ignoring substrate conditions. According to the National Association of Home Builders’ 2022 Carpentry Standards Handbook, 68% of trim gaps wider than 1/16″ trace back to unshimmed framing or uneven drywall returns—not inaccurate miters.
"Never rely on caulk to hide a bad fit. If you’re squeezing more than 1/8″ of caulk into a seam, stop and recut. Clean joints seal better and last 3× longer." — Maria Chen, lead finish carpenter at Heritage Millwork Co. (2023)
- Always acclimate trim indoors for 48 hours before installation—especially in humid or dry climates. Wood expands/contracts; unstabilized stock warps after nailing.
- For painted trim, use poplar over pine: its tighter grain accepts primer evenly and won’t show “bleed-through” knots.
- If your wall has textured drywall, sand the return edge smooth for 2″ around the opening—texture prevents tight contact and invites shadow lines.
Why does my mitered corner gap open up after painting?
That gap almost always means the two pieces weren’t coped—or were coped too shallowly. Miter joints expand and contract differently than coped ones. When humidity drops, the miter pulls apart. A properly coped joint (where one piece’s profile is carved to match the other’s contour) stays tight year-round. Learn how to make a coped joint for lasting precision.
Can I install trim over existing drywall without removing baseboard?
Yes—if the baseboard is flush with the wall and the window opening is deep enough (minimum 3¾″ jamb depth). But if the baseboard protrudes more than 1/8″ beyond the wall plane, you’ll need to either undercut it with a flush-cut saw or remove and reinstall it. Otherwise, the jamb trim won’t sit flat. See our guide on how to undercut baseboard for seamless transitions.
What’s the best nail spacing for 3½″ wide casing?
For widths over 3″, increase nail frequency: use four nails per jamb (top, mid-height, 6″ above sill, and one at the very bottom) and five along the head casing. Wider profiles flex more under temperature shifts—tighter spacing prevents waviness. The U.S. Department of Housing and Urban Development’s Residential Construction Performance Guidelines (2021) specifies ≤12″ max spacing for trim over 3″ wide.
Do I need to prime the back of the trim?
Yes—especially if installing over new drywall or in high-moisture areas like bathrooms. Unprimed back surfaces absorb moisture unevenly, causing cupping. Apply one coat of oil-based primer to all six sides before installation. It adds 20 minutes but prevents 80% of post-install warping.
How do I fix a gap between trim and window frame?
First, determine cause: if it’s consistent and narrow (<1/16″), caulk it cleanly. If it’s wider or irregular, check whether the window frame itself is out-of-plumb—use a level on the frame’s interior edge. If the frame is tilted, shimming behind the trim won’t help; you’ll need to address the window mounting first. For minor inconsistencies, use flexible foam backer rod before caulking to prevent shrinkage cracks.
Should I paint trim before or after installation?
Paint *before* installation—every time. It’s faster, cleaner, and gives full coverage on end grains and back edges. You’ll still need touch-ups at nail holes and caulk lines, but skipping full post-install painting saves 40–60% of labor time. Just be sure to protect the wall with blue painter’s tape during the final coat.
Trim installation bridges craftsmanship and aesthetics—it’s where structure meets style. Get the basics right, and you’ll never settle for builder-grade gaps or crooked reveals again. With practice, you’ll move from measuring twice and cutting once to visual estimation and confident coping. Ready to tackle your next project? Try installing door trim next, using the same principles—or learn how to repair rotted trim if yours has weathered years of neglect.