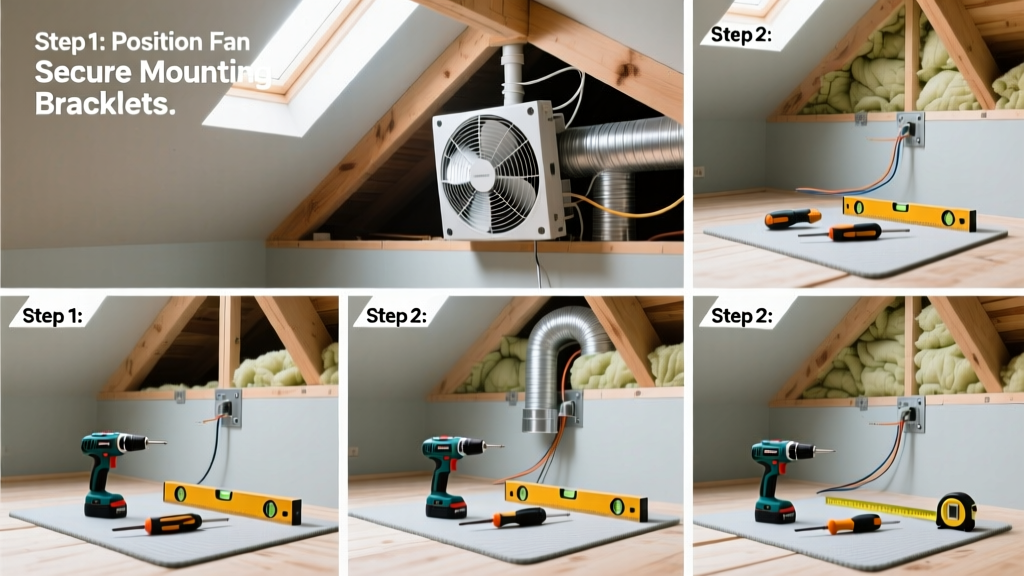
Installing a whole house fan is a mid-level DIY project that lets you move large volumes of cool night air through your home—cutting AC use by up to 30% in mild climates (U.S. Department of Energy, 2022). Expect to spend 6–8 hours over one weekend if you’re comfortable cutting framing, wiring circuits, and sealing ductwork.
Overview
| Skill Level | Time Required | Tools Needed | Estimated Cost |
|---|---|---|---|
| Intermediate (framing + electrical experience required) | 6–8 hours (plus 1 hour for circuit inspection) | Drill, reciprocating saw, stud finder, voltage tester, ladder, caulk gun | $350–$750 (fan unit + materials) |
Tools & Materials
| Category | Item | Notes |
|---|---|---|
| Electrical | 20-amp double-pole breaker, 12/2 NM-B cable (10 ft), weatherproof outdoor-rated switch box | Must match fan’s UL listing; verify amperage on fan nameplate |
| Fan Unit | Whole house fan rated for your attic size (e.g., 3,000–4,500 CFM for 1,800 sq ft home) | Look for models with insulated damper and built-in thermostat (e.g., QuietCool TC or Delta Breez) |
| Sealing & Framing | 1x6 pine boards, rigid foam board (1" thick), acoustical sealant, aluminum flashing, HVAC foil tape | Avoid expanding foam near motor—it traps heat and degrades insulation |
| Safety | Hard hat, safety glasses, N95 mask (for fiberglass dust), non-contact voltage tester | Attics often contain disturbed insulation and live wires near roof vents |
Step-by-Step Instructions
1. Confirm attic access and structural clearance
Measure the joist bay where the fan will mount—minimum 24" x 24" open space between ceiling joists. Verify no plumbing, HVAC ducts, or electrical cables run through that cavity. Use a stud finder and knock test to confirm joist spacing is standard 16" on-center. If not, you’ll need to sister joists before mounting.
2. Cut the ceiling opening and frame the rough opening
Mark a rectangle centered on two adjacent joists (e.g., 22" x 22" for most 3,000 CFM units). Cut drywall with a utility knife—not a reciprocating saw—to avoid nicking wires above. Remove drywall and insulation. Frame the opening with doubled 2x4s screwed into joists using 3" deck screws. Leave a 1/8" gap around all edges for gasket compression.
- Tip: Temporarily brace the cut joist section with a 2x4 ledger if you remove more than 12" of bearing surface
- Warning: Never cut more than one full joist without engineering review—load-bearing integrity is critical
3. Mount the fan unit and seal the perimeter
Lift the fan into place from below, aligning mounting flange with your framed opening. Secure with provided lag bolts—do not overtighten, or you’ll warp the damper housing. Apply continuous bead of acoustical sealant (not silicone) along the top flange before pressing into place. Then glue 1" rigid foam board to the attic-side of the frame and cover seams with foil tape.
4. Wire the fan to a dedicated circuit
Run 12/2 NM-B cable from your main panel to a weatherproof switch box mounted on an accessible wall (not inside the attic). Connect black to black, white to white, ground to ground—and pigtail the ground to the fan’s grounding screw. Use wire nuts rated for wet locations. Test continuity with a multimeter before flipping the breaker. Install a GFCI-protected switch if the fan is within 6 ft of a sink or exterior door per NEC 2023.
- Tip: Label the breaker “Whole House Fan” and add a note about seasonal disconnect (see Pro Tips)
- Warning: If your panel is full, consult an electrician—adding a new 20-amp circuit requires load calculation
Pro Tips
Most failed installations stem from poor sealing or undersized attic ventilation. A whole house fan moves massive air—but only if exhaust paths exist. You need at least 1 square foot of net free vent area (NFVA) for every 750 CFM of fan capacity. That means a 3,000 CFM fan demands 4 sq ft of unobstructed ridge or gable venting.
“Over 60% of whole house fan callbacks are due to inadequate attic exhaust—not fan failure,” says Mike Rizzo, HVAC field trainer at the National Association of Home Builders’ 2023 Builder Education Summit.
Also: Always install a manual or automated damper lockout during winter. Without it, the fan becomes a major thermal bridge—accounting for up to 18% of seasonal heat loss in cold climates (Oak Ridge National Laboratory, 2021). Consider pairing with a custom insulated hatch cover for maximum efficiency.
Can I install a whole house fan in a cathedral ceiling?
No—cathedral ceilings lack an attic space for exhaust routing and thermal break. The fan must sit between conditioned space and ventilated attic. For vaulted rooms, consider a high-velocity ceiling fan or ducted attic exhaust with inline blower instead.
Do I need a permit for whole house fan installation?
Yes, in 42 states and all municipalities adopting the 2020 IRC or later. Electrical permits are mandatory for new circuits; mechanical permits may be required if modifying roof vents. Your local building department will inspect both rough-in wiring and final damper operation.
Why does my fan vibrate or rattle after installation?
Three likely causes: (1) Mounting bolts aren’t equally torqued—re-tighten in star pattern; (2) Joists weren’t level—shim under low corners with rubber washers; (3) Duct collar isn’t sealed—use foil tape, not duct mastic, which cracks when flexed.
Can I run the fan while running my air conditioner?
No—doing so creates negative pressure that pulls hot, humid attic air into walls and ductwork. It also defeats cooling efforts by exhausting conditioned air. Run the fan only when outdoor temps drop below 75°F and humidity stays under 60%.
How often should I clean the fan blades and damper?
Inspect and vacuum blades and damper mechanism twice yearly—spring and fall. Wipe grease and dust off motor housing with a dry microfiber cloth. Never spray liquid cleaners near the motor or capacitor. Replace the damper gasket every 5 years or when it loses compression.
What’s the best time of day to run the fan?
Between 10 p.m. and 5 a.m., when outdoor temperatures dip lowest and humidity drops. Start the fan 30 minutes before bedtime to flush heat from walls and furnishings. Pair with open windows on the shady side of your home for cross-ventilation—and close them by sunrise.
Once installed and tested, your whole house fan delivers immediate airflow savings—no ductwork, no refrigerant, no compressor wear. Just remember to shut it down before rain hits and check the damper seal each spring. With proper maintenance, these units last 15–20 years. For ongoing comfort control, pair yours with a smart thermostat that triggers fan cycles based on outdoor conditions.