Installing a transfer switch lets you power essential circuits during outages without backfeeding your utility lines—a dangerous and illegal practice. This is an intermediate-to-advanced electrical task requiring knowledge of panel layout, load calculations, and local permitting. Plan for 6–10 hours of hands-on work if you’re experienced; first-timers should budget a full weekend and consult a licensed electrician before energizing.
Overview
| Skill Level | Time Required | Tools Needed | Estimated Cost |
|---|---|---|---|
| Intermediate (NEC-certified wiring knowledge required) | 6–10 hours (plus permit review time) | Multimeter, torque screwdriver, fish tape, non-contact voltage tester, insulated tools | $250–$1,200 (switch + materials; excludes generator) |
Tools & Materials
| Category | Item | Notes |
|---|---|---|
| Electrical | UL-listed manual transfer switch (e.g., Reliance Controls 30-Amp) | Must match generator output and main panel amperage |
| Wiring | 10/3 NM-B cable (for 30A) or 8/3 for 50A | Length: measured from panel to transfer switch location + 3 ft extra |
| Hardware | Mounting screws, knockout seals, strain relief clamps | Use listed fittings—no plastic bushings in metal conduit runs |
| Safety | Class 0 rubber gloves, arc-flash rated safety glasses | Required per NFPA 70E when working inside live panels |
| Permitting | Completed electrical permit application, load calculation sheet | Most jurisdictions require both; check with your AHJ before purchase |
Step-by-Step Instructions
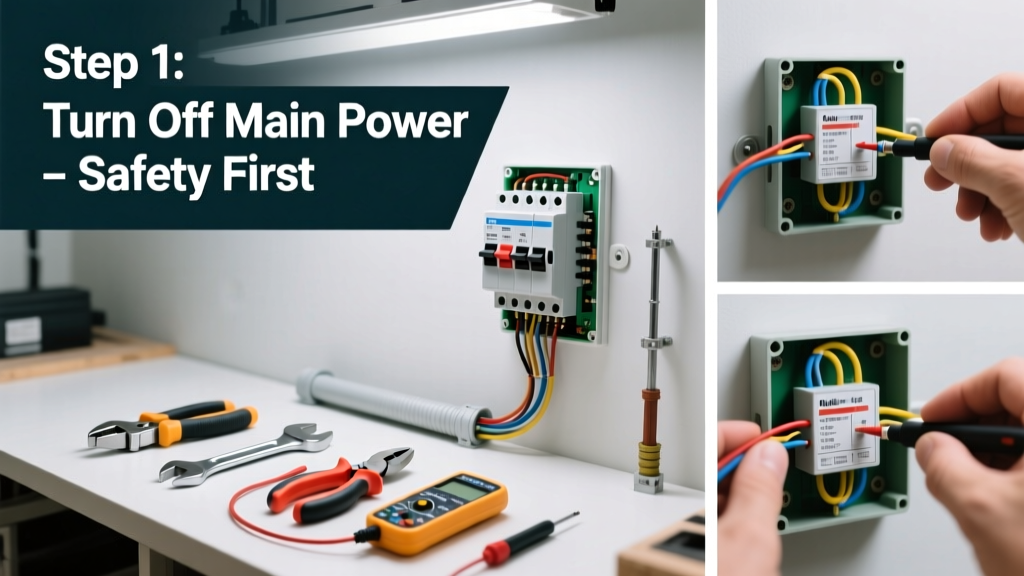
1. Turn Off Power & Verify De-Energization
Shut off the main breaker. Use a non-contact voltage tester on all bus bars and lugs—then confirm with a multimeter set to AC voltage (read 0V phase-to-phase and phase-to-ground). Tag the main breaker with “DO NOT ENERGIZE” tape. Never assume the panel is dead—even with the main off, utility-side lugs remain live unless the meter is pulled by the utility.
2. Calculate Load & Select Circuits
Identify which 4–8 circuits you’ll power (e.g., fridge, sump pump, furnace, lights). Add nameplate ratings (not breaker sizes): a 1/3 HP sump pump draws ~9A, not 15A. Total must stay under 80% of the transfer switch’s continuous rating. According to the National Electrical Code (NEC) Article 702.4, you cannot exceed the generator’s rated output—or the switch’s ampacity.
- Fridge: 1.5–2.0A (compressor running)
- Gas furnace blower: 3.5–5.0A
- LED lighting (10 fixtures): ~0.8A total
- Wi-Fi router & modem: ~0.3A
3. Mount the Transfer Switch & Run Feeder Cable
Install the switch within 3 ft of your main panel (reduces voltage drop and simplifies conduit routing). Drill a 1¼" knockout hole, secure with a threaded connector and locknut. Pull 10/3 NM-B through ENT or EMT—never run Romex outside or in damp locations. Secure cable every 4.5 ft and within 12 in of the panel and switch.
4. Wire the Switch Connections
Follow the manufacturer’s diagram exactly. Connect line-side (utility) wires to the “LINE” terminals using 10 AWG THHN in conduit or 10/3 NM-B. Connect load-side wires to “LOAD” terminals—these go to your selected breakers. Torque all lugs to spec: 50 in-lbs for 10 AWG per UL 489. Double-check that neutral and ground are isolated per NEC 250.30(A)(1)—the transfer switch neutral bar must *not* be bonded to ground.
- Warning: Reversing LINE and LOAD terminals creates a backfeed hazard—even with the switch in “OFF.”
- Tip: Label each circuit wire with heat-shrink tubing before termination (e.g., “Fridge,” “Sump”).
Pro Tips
Most failed DIY installations stem from misapplied load calculations or improper grounding. A 2023 study by the Electrical Safety Foundation International found that 68% of generator-related home fires involved incorrect transfer switch wiring or missing permits.
“Never use a ‘generator inlet box’ without a transfer switch—it’s a code violation and puts linemen at risk. The switch isn’t optional; it’s your legal and physical barrier between utility and generator.”
— Mike Rasmussen, Master Electrician & NEC Code Trainer, IAEI Journal 2022
Always submit load calculations with your permit. If your main panel is full, install a subpanel fed by the transfer switch instead of adding breakers to the main. And never power GFCI or AFCI breakers through a transfer switch unless the device is specifically listed for generator use—many trip unpredictably under modified sine wave output.
Can I install a transfer switch myself if I’m not licensed?
Yes—but only if your jurisdiction allows owner-permitted work and you follow NEC Article 702 and local amendments. In Massachusetts and Vermont, for example, homeowner permits require pre-approval of load calc sheets. In contrast, Texas allows self-permitting but mandates third-party inspection before energizing. Always call 811 before digging for any underground feeder runs.
What’s the difference between manual and automatic transfer switches?
A manual switch requires you to physically flip a lever during an outage—ideal for portable generators and tight budgets. An automatic switch (ATS) senses utility loss and starts your standby generator within 10–30 seconds. ATS units cost $1,000–$3,500 and require dedicated control wiring, battery backup, and often a service upgrade. Both must be sized to your generator’s continuous output—not peak wattage.
Do I need a separate grounding electrode for the transfer switch?
No. Per NEC 250.30(A)(5), the transfer switch does not require its own grounding rod. Its grounding conductor must land on the same grounding electrode system as your main service—typically the ground rod(s) connected to your main panel’s ground bar. Bonding the neutral *only* at the main service disconnect prevents objectionable neutral current on grounding paths.
Can I use the same transfer switch for both portable and standby generators?
Only if it’s rated for both applications. Most manual switches (like Generac’s GP series) accept either, but verify compatibility with your generator’s outlet type (L14-30 vs. L14-50) and voltage regulation. Standby generators often output cleaner voltage and may require a switch with built-in surge suppression—check UL listing details.
Why does my transfer switch hum or get warm during operation?
A slight warmth (<90°F surface temp) is normal. But audible humming or >110°F indicates loose connections, overloaded circuits, or harmonic distortion from LED drivers or variable-speed motors. Shut down immediately and re-torque all lugs. If humming persists, test voltage balance across legs with a multimeter: more than 3V difference suggests a failing utility transformer or internal switch contact wear.
What size generator do I need for my transfer switch?
Match generator continuous output (kW) to your calculated load—not breaker totals. For example, a 5,500W generator supports ~23A at 240V, so a 30A transfer switch is appropriate. Oversizing causes inefficient fuel burn and wet stacking in standby units; undersizing trips breakers or damages sensitive electronics. Use our generator sizing calculator to cross-check your list against real-world draw.
Once installed and inspected, test the switch monthly: turn off the main, start the generator, and verify all selected circuits power up without flicker or delay. Keep your GFCI outlets and breaker tripping guide handy for troubleshooting downstream issues. A properly installed transfer switch adds resilience—and peace of mind—every time the lights go out.