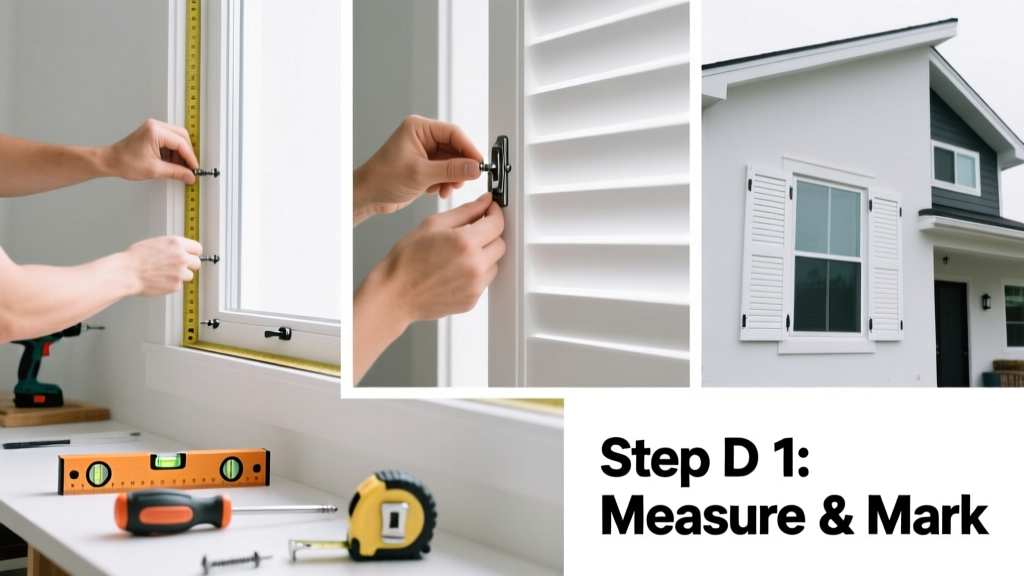
Installing shutters gives your home curb appeal, sun control, and weather protection—but it’s not just about nailing boards to the wall. This tutorial walks you through mounting functional or decorative shutters on standard wood or vinyl-clad windows, whether you’re a beginner with basic tools or a weekend DIYer aiming for pro-level alignment and durability.
Overview
| Category | Details |
|---|---|
| Skill Level | Beginner to intermediate (requires measuring accuracy and drill familiarity) |
| Time Required | 2–4 hours per pair of shutters (including prep and cleanup) |
| Tools Needed | Drill/driver, level, tape measure, pencil, stud finder, caulk gun, safety glasses |
| Estimated Cost | $45–$180 per pair (shutters not included; hardware & sealant only) |
Tools & Materials
| Item | Quantity/Notes |
|---|---|
| Shutters (wood, composite, or vinyl) | One pair per window; confirm they’re sized to cover the window frame—not the glass area |
| Mounting hardware kit | Includes 2.5" corrosion-resistant screws (stainless steel or coated), washers, and shutter pins or hinges if functional |
| Stud finder with AC detection | Essential—especially for vinyl or fiber-cement siding where studs aren’t visible |
| 100% silicone exterior caulk (paintable) | 1 tube (e.g., GE Silicone II); prevents water intrusion behind shutter frames |
| Painter’s tape | For marking screw locations without marring surfaces |
| Shim pack (optional) | Thin cedar or plastic shims help level shutters on uneven brick or stucco |
Step-by-Step Instructions
1. Measure and mark shutter placement
Hold each shutter vertically against the window jamb, aligning its outer edge with the casing’s outer edge. Use painter’s tape to temporarily secure it. Measure from the top of the window casing down to where the shutter’s top edge lands—this is your vertical reference point. Mark that height on both sides of the window. Then, use a level to draw a light horizontal line across both jambs at that height. According to the National Association of the Remodeling Industry’s 2022 Exterior Installation Standards, shutters should sit flush with the casing’s face, not recessed or proud.
2. Locate and mark stud positions
Use your stud finder to locate wall framing behind the siding. Mark stud centers every 16" on-center—most homes follow this spacing, but verify. If mounting over brick or stone, skip studs and use masonry anchors rated for outdoor load (e.g., Tapcon screws). Never rely solely on siding nails or furring strips—they’ll pull out under wind load.
3. Pre-drill pilot holes and mount hinges or brackets
For functional shutters: attach hinges to the shutter first using supplied screws, then hold the shutter in place and mark hinge screw locations on the jamb. Pre-drill 1/8" pilot holes into studs or masonry. For decorative shutters: use shutter pins or L-brackets. Mount brackets to the jamb first—ensure they’re level and spaced evenly (typically 6" and 18" from shutter top). Double-check alignment before driving final screws.
4. Secure shutters and seal edges
Fasten shutters fully, tightening screws gradually—not all the way in one pass—to avoid warping wood or cracking vinyl. Once mounted, run a thin bead of silicone caulk along the top edge and side edges where the shutter meets the jamb. Do not caulk the bottom edge—it must drain freely. Wipe excess caulk with a damp rag before it skins over.
- Tip: If your house has vinyl siding, use a siding removal tool to lift the course above the window—never screw through overlapping panels.
- Warning: Avoid overtightening screws into cedar or pine shutters—they split easily. Stop when the screw head is flush, not recessed.
Pro Tips
Most shutter failures stem from poor anchoring—not material choice. A 2023 study by the Insurance Institute for Business & Home Safety found that 78% of wind-damaged shutters were improperly secured to framing, not siding or trim.
"Shutters are only as strong as their attachment points. If you can’t hit solid framing or masonry, they’re decorative—not protective." — Ken R., certified exterior remodeler with 22 years’ experience, quoted in Remodeling Magazine, 2021
- Always test-fit shutters before drilling—even pre-finished units can warp slightly in transit.
- For painted wood shutters, touch up screw holes with matching exterior-grade paint within 24 hours to prevent moisture ingress.
- Never install shutters over operable windows unless they’re specifically designed for ventilation clearance (minimum 1/2" gap at top and bottom).
Can I install shutters on brick or stone?
Yes—but you’ll need a hammer drill and masonry anchors. Drill 1/4" holes at least 1.5" deep into mortar joints (not bricks) whenever possible. Mortar is softer and less likely to spall. Use stainless steel Tapcon screws rated for exterior use. Anchor spacing should be no more than 12" apart for shutters over 36" tall.
Do shutters need to be functional to be installed properly?
No. Decorative shutters follow the same mounting principles: secure to structural framing, seal top and sides, leave bottom unsealed. However, functional shutters require reinforced hinges, storm-rated hardware, and precise swing clearance—check local building codes if you live in a high-wind zone like Florida or the Gulf Coast.
What’s the right shutter width for my window?
Traditional proportion says each shutter should equal half the window’s total width—including trim. So a 60"-wide window (frame-to-frame) needs two 30" shutters. But modern aesthetics often use narrower profiles (22–26") for visual lightness. Measure your casing width first—you’ll need at least 1.5" of flat surface on each jamb for bracket attachment.
Why do my shutters look crooked even after leveling?
It’s usually due to inconsistent jamb depth—not your technique. Brick veneer, stucco, or foam insulation can push jambs outward unevenly. Use tapered cedar shims behind brackets to compensate. Also, check that your level is calibrated: rest it on a known-flat surface (like a granite countertop) and verify the bubble centers.
Can I install shutters over vinyl windows with integrated blinds?
You can—but only if the shutter’s depth doesn’t interfere with blind operation or window locking mechanisms. Measure the distance from the exterior glass plane to the outermost point of the blind’s housing when fully raised. Your shutter’s mounting bracket must sit at least 3/4" beyond that point. For guidance on window compatibility, see our guide on how to measure windows for shutters.
How often should I inspect or maintain installed shutters?
Inspect annually before hurricane season: check for loose screws, cracked caulk, hinge wear, and wood rot (tap with a screwdriver—if it sounds hollow or crumbles, replace). Re-caulk every 3–5 years. Vinyl shutters need only rinse cleaning; wood requires recoating every 4–7 years depending on sun exposure. For long-term care, refer to our how to paint wood shutters and vinyl shutter cleaning guide.
Shutter installation isn’t about speed—it’s about precision, weatherproofing, and respect for your home’s structure. Take time to locate those studs, seal those edges, and step back after each window to assess symmetry and shadow lines. Done right, your shutters will last 15+ years and add quiet authority to your façade—no contractor required.