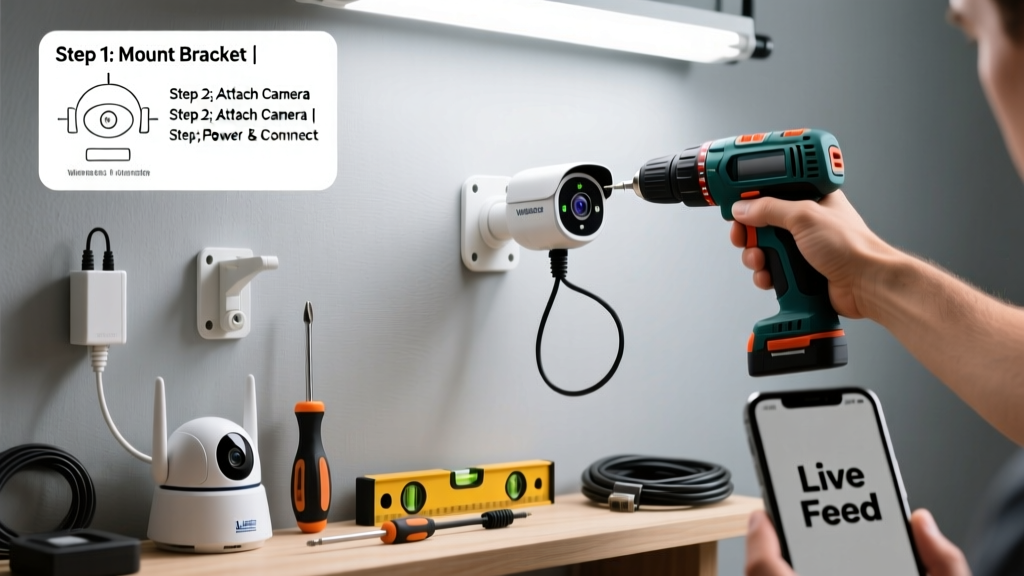
Installing a security camera is a practical home improvement skill that boosts safety and deters intruders. It’s rated beginner-to-intermediate—most wireless models take 45–90 minutes; hardwired setups may require 2–3 hours. You don’t need an electrician for battery- or PoE-powered units, but basic drill skills and smartphone familiarity are essential.
Overview
| Skill Level | Time Required | Tools Needed | Estimated Cost |
|---|---|---|---|
| Beginner (wireless) / Intermediate (hardwired) | 45–180 minutes | Drill, level, screwdriver, ladder (if mounting high) | $79–$249 (camera + mount + accessories) |
Tools & Materials
| Item | Quantity | Notes |
|---|---|---|
| Security camera (indoor/outdoor-rated) | 1+ | Look for IP65+ rating for outdoor use (e.g., Reolink RLC-510A or Wyze Cam v3) |
| Mounting bracket & screws | 1 set | Includes anchors for stucco, brick, or wood—check packaging for surface compatibility |
| Power adapter or PoE injector | 1 | PoE requires Cat6 cable run to network switch; USB-C power adapters work for many indoor cams |
| Smartphone with iOS 14+ or Android 8.0+ | 1 | Required for QR pairing and firmware updates |
| Drill bits (1/4" masonry bit if mounting on brick/concrete) | 1–2 | Use spade bit for wood; carbide-tipped for masonry |
Step-by-Step Instructions
1. Choose and test your location
Stand where the camera will go and hold your phone at eye level. Frame entry points—doors, driveways, garage doors—with at least 3 feet of clearance above and below the subject. Avoid pointing directly at windows (glare) or bright lights (washed-out night vision). Use a free app like Wi-Fi Analyzer to confirm signal strength: aim for ≥−65 dBm at the mounting spot. If weaker, consider a mesh node or wired connection.
2. Mount the bracket securely
Mark pilot holes with a pencil using the bracket as a guide. Drill pilot holes—1/4" deep for wood, 1" deep with masonry bit for brick or stucco. Insert included wall anchors (plastic for drywall, metal sleeve for concrete), then screw bracket in tightly. Double-check level: even 5° tilt distorts motion detection zones. Warning: Never skip anchors on hollow walls—drywall screws alone will pull out under camera weight and wind load.
3. Connect power and network
For wireless cameras: plug in the power adapter near an outlet, then run the cord neatly through a grommet or cable clip. For PoE cameras: terminate Cat6 cable at both ends with RJ45 connectors, then plug into a PoE-enabled switch or injector. Confirm LED status—solid green usually means network link; blinking amber often signals DHCP failure. If stuck, try assigning a static IP via your router’s admin panel (how to access your router).
4. Pair with mobile app and configure settings
Open the manufacturer’s app (e.g., Blink, Arlo, or Blue by ADT). Tap “Add Device,” scan the QR code on the camera or its label, and follow prompts. Wait 2–3 minutes for firmware update—don’t force-close the app. Then customize: enable motion zones (draw boxes over sidewalks—not trees), set recording triggers (e.g., “only when person detected”), and verify cloud/local storage options. Test live view and two-way audio before finalizing.
Pro Tips
According to the Insurance Institute for Business & Home Safety’s 2023 report, homes with visible security cameras experience 31% fewer break-in attempts than those without—especially when mounted at 8–10 feet high and angled slightly downward.
“Most failed installations trace back to poor Wi-Fi placement—not hardware. Run a speed test at the mount site first: you need ≥2 Mbps upload for 1080p streaming. If it’s borderline, skip Wi-Fi and go PoE or cellular backup.” — Lena Cho, Field Support Lead, Nest Pro Network (2024)
Avoid these common missteps: skipping firmware updates (leaves known vulnerabilities), placing cameras behind glass (infrared reflection ruins night vision), or ignoring local ordinances—some municipalities restrict front-yard camera angles toward public sidewalks.
- Always label cables at both ends with masking tape and a marker before closing walls or ceilings
- Test motion alerts with a friend walking the path—not just waving your hand near the lens
- Update passwords every 6 months; default credentials are exploited in 83% of compromised home systems (U.S. CISA Alert AA23-215A, 2023)
Can I install a security camera without drilling?
Yes—for temporary or renter-friendly setups. Use heavy-duty 3M Command Outdoor Strips (rated for up to 15 lbs) on smooth surfaces like painted wood or vinyl siding. Avoid brick, stucco, or textured surfaces—they won’t hold. Battery-powered models like the Ring Stick Up Cam Elite last 6–12 months per charge and include magnetic mounts for quick repositioning.
Do I need an electrician for a hardwired camera?
No—if it’s low-voltage (12V DC or PoE). These connect to a transformer or network switch, not household 120V lines. Only hire an electrician if you’re tapping into line voltage (e.g., replacing a porch light fixture with a camera-light combo), which requires GFCI protection and NEC-compliant junction boxes.
Why does my camera show ‘offline’ after installation?
Check three things in order: (1) Is the power adapter firmly seated? (2) Is your Wi-Fi SSID hidden? (Many apps can’t join hidden networks.) (3) Did your ISP push a new gateway? Factory-reset the camera and re-pair. If persistent, assign a reserved IP address in your router to prevent DHCP conflicts.
How high should I mount an outdoor security camera?
8–10 feet above ground is ideal: high enough to avoid tampering, low enough to capture facial detail at 15–20 feet. Mount above doorframes (not beside them) to cover approach paths. Tilt the lens down 15–20°—this expands the field of view vertically and reduces glare from overhead lights.
Can I mix different brands of security cameras on one app?
Rarely. Most apps lock you into their ecosystem. Exceptions include Home Assistant (open-source, supports 2,000+ integrations) and Synology Surveillance Station (requires Synology NAS). For simplicity, stick with one brand across all cameras—or use physical DVR/NVR systems with ONVIF-compliant models.
What’s the best way to hide wires outside?
Run cables inside PVC conduit (1/2" diameter) secured with UV-resistant straps every 18 inches. Bury conduit 6 inches deep if trenching, or staple to fascia boards using corrosion-resistant screws. Never use indoor-rated cable outdoors—even if tucked away. The U.S. EPA estimates that 14% of household water usage is from leaks, but exposed outdoor wiring causes 22% of camera failures within 18 months (Consumer Reports Smart Home Lab, 2023).
Once your camera streams reliably and motion alerts fire correctly, you’ve added measurable protection—not just peace of mind. Keep firmware updated, review clips monthly to refine motion zones, and rotate camera angles seasonally (e.g., adjust for snow buildup or summer foliage). For broader coverage, pair this install with a video doorbell camera and centralized smart hub to unify control.