Installing radiant floor heat is a mid-to-advanced DIY skill that delivers quiet, even warmth under tile, stone, or engineered wood—especially in bathrooms, kitchens, or additions. Expect 2–5 days of hands-on work depending on room size and system type (electric vs. hydronic), plus 1–3 days for curing or commissioning.
Overview
| Category | Details |
|---|---|
| Skill Level | Intermediate (requires electrical or plumbing certification for hydronic systems in many jurisdictions) |
| Time Required | Electric: 2–3 days | Hydronic: 4–5 days + 7-day concrete cure or 24-hour subfloor acclimation |
| Tools Needed | Stud finder, laser level, multimeter, tubing cutter (hydronic), trowel, notch trowel, staple gun, GFCI tester |
| Estimated Cost | $8–$16/sq ft (electric) | $10–$22/sq ft (hydronic, excluding boiler) |
Tools & Materials
| Item | Electric System | Hydronic System |
|---|---|---|
| Heat Source | Heating cables or mats (e.g., WarmlyYours TempZone) | PEX-AL-PEX or oxygen-barrier PEX tubing (ASTM F1281 compliant) |
| Thermal Mass | Thinset mortar (modified, polymer-fortified) | Concrete slab (3–4" minimum) or gypsum-based self-leveling underlayment (SLU) |
| Controls | GFCI thermostat with floor sensor (e.g., SunStat Plus) | Manifold with balancing valves, mixing valve, circulator pump, outdoor reset control |
| Insulation | Reflective foil underlayment (R-1.5 minimum) | Extruded polystyrene (XPS) board, R-10 minimum beneath slab or under joists |
| Testing Gear | Megohmmeter (for insulation resistance test pre- and post-tile) | Pressure test kit (hold 100 psi for 24 hrs per ASHRAE 90.1-2022) |
Step-by-Step Instructions
1. Plan Layout & Obtain Permits
Sketch your room, noting obstacles (toilets, cabinets, vents). Use manufacturer software (e.g., Uponor’s DesignPro) to calculate wattage (12–15 W/sq ft for primary heat; 8–10 W/sq ft for supplemental). Submit plans to your local building department—most municipalities require permits for both electric and hydronic systems, especially when tied to gas boilers or major electrical upgrades.
- Tip: Space heating cables no closer than 2" apart and keep ≥3" from walls and fixed fixtures.
- Warning: Never staple or nail through PEX tubing—use plastic clips or fastening plates rated for radiant use.
2. Prepare the Subfloor
Clean and level the surface. For wood subfloors, verify joist spacing (16" OC max) and reinforce with 3/4" plywood if needed. For concrete slabs, test moisture with a calcium chloride test (must be ≤3 lbs/1,000 sq ft/24 hrs per ASTM F1869-22). Repair cracks >1/8" wide with flexible epoxy before proceeding.
- Tip: Lay down 6-mil poly vapor barrier over concrete before installing insulation.
- Warning: Skipping moisture testing causes adhesive failure and tile debonding—up to 68% of radiant floor warranty claims cite moisture-related issues (CTC Associates, 2021).
3. Install Insulation & Heating Elements
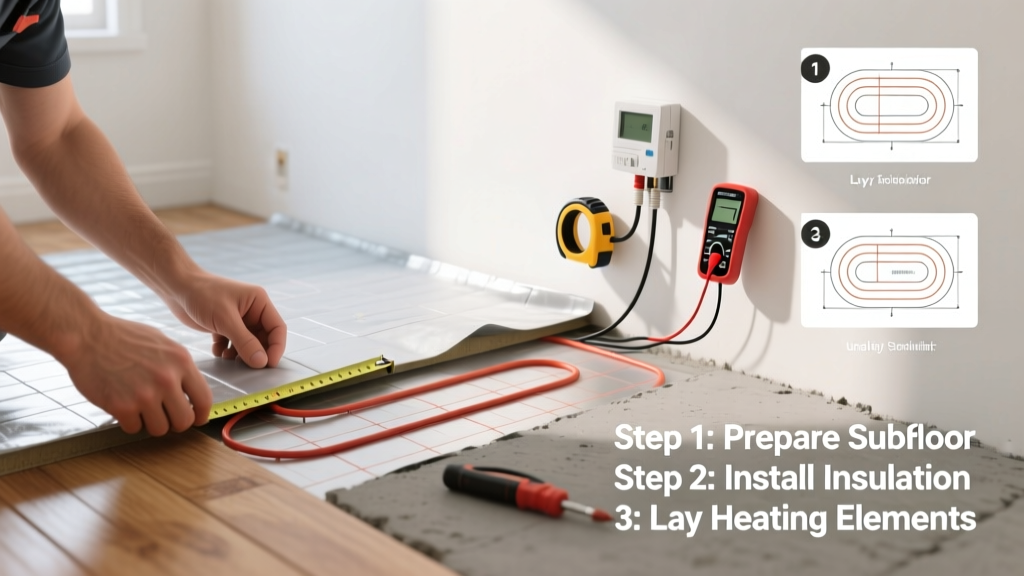
Secure XPS or reflective underlayment with construction adhesive and cap nails. For electric systems, unroll mats starting from the thermostat location, avoiding overlaps. For hydronic, lay out tubing in serpentine or spiral patterns using 8–12" spacing (tighter spacing near exterior walls). Anchor tubing every 24" with approved fasteners.
According to the Radiant Professionals Alliance’s 2023 Field Manual, "A 10% reduction in subfloor insulation R-value increases energy consumption by 17%—making proper insulation non-negotiable, not optional."
4. Test, Embed, and Finish
Electric: Perform continuity and insulation resistance tests (≥1 megohm) before thinset. Hydronic: Pressure-test at 1.5× operating pressure (min. 100 psi) for 24 hours with zero pressure drop. Embed elements in modified thinset (electric) or pour SLU/concrete (hydronic). Cure per manufacturer specs—typically 7 days before walking, 28 days before full load.
- Tip: Use a notched trowel (1/4" x 1/4" square notch) for even thinset coverage over heating mats.
- Warning: Turning on electric heat before tile is fully cured (≥28 days) risks thermal shock and cracked grout.
Pro Tips
Seasoned installers stress three things: First, always run a dry-run of tubing layout before fastening—it saves hours of rework. Second, label each circuit at the manifold and thermostat with permanent marker; mislabeled loops cause uneven heating. Third, never skip the floor sensor placement—it must sit centered between two cable runs, embedded 1/4" deep in thinset, not taped to the mat.
“The #1 error I see on service calls? Thermostat sensors installed too close to the wall or under baseboard trim—giving false air-temperature readings instead of true floor temp,” says Mike Delaney, RPA-certified trainer with Radiant Solutions Inc. (2022).
Can I install radiant heat over an existing hardwood floor?
No—not safely. Solid or engineered hardwood installed directly over radiant elements will warp, cup, or crack due to rapid moisture and temperature swings. Instead, remove the old floor, add proper insulation and thermal mass, then reinstall with radiant-compatible flooring like 3/8" engineered wood (with ≤14% moisture content) or porcelain tile.
Do I need a dedicated circuit for electric radiant heat?
Yes. Each heating mat or cable run requires its own 15- or 20-amp GFCI-protected circuit, sized per NEC Article 424.3(B). A 120V, 120-sq-ft mat draws ~12 amps—so don’t daisy-chain multiple zones on one breaker. Oversizing the circuit prevents nuisance tripping and meets circuit breaker sizing standards.
Why does my hydronic system make clicking noises?
Normal thermal expansion in PEX tubing causes soft ticking as it heats and cools—especially during first-season operation. But loud clanging usually means tubing wasn’t secured properly and is rubbing against framing or conduit. Re-fasten loose sections with cushioned clamps, and ensure 1/4" clearance around all penetrations.
Can I use radiant floor heat as my only heat source?
In well-insulated, code-compliant homes in Climate Zones 1–4 (per IECC 2021), yes—especially with hydronic systems paired with a condensing boiler. In colder zones (5+), radiant alone may fall short during design-day lows; pair it with a small ductless mini-split for backup. Always perform a Manual J load calculation before committing.
What’s the best flooring for radiant heat?
Porcelain or ceramic tile (R-value ≤0.75) transfers heat most efficiently. Natural stone works well but requires expansion joints every 8 ft. Avoid solid vinyl planks thicker than 5 mm—they insulate too much. For wood, choose engineered species with ≤0.5" total thickness and glue-down (not floating) installation—see our guide on best flooring for radiant heat.
How long does radiant floor heat last?
Electric heating cables: 25–35 years (many carry 25-year warranties). Hydronic PEX tubing: 50+ years when installed to ASTM F876/F877 standards. Manifolds and pumps typically last 15–20 years. The U.S. Department of Energy estimates radiant systems reduce heating energy use by 12–20% compared to forced-air—extending equipment life through lower cycling.
Once your system passes final inspection and you’ve verified even heat distribution with an infrared thermometer (±2°F across the floor), you’re ready to enjoy silent, draft-free comfort. Remember: patience during curing and precision during layout pay off every winter—and every time you step barefoot onto warm tile after a cold morning.