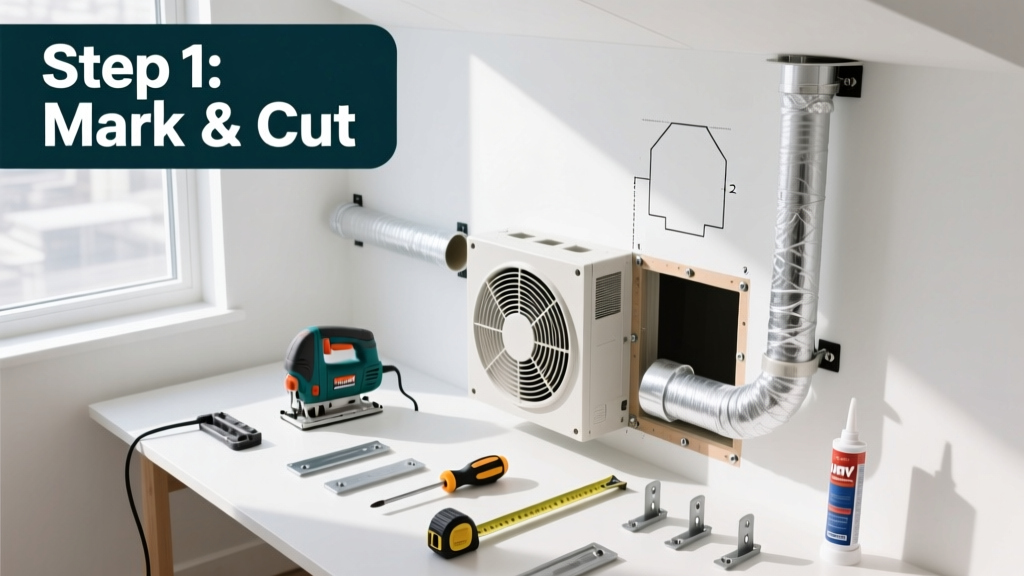
Installing a heat recovery ventilator (HRV) is an intermediate-level HVAC project that typically takes 6–10 hours for a skilled DIYer or HVAC technician working alone. It requires electrical knowledge, ductwork experience, and comfort cutting into exterior walls and drywall—but it’s far more manageable than replacing your entire ventilation system.
Overview
| Skill Level | Time Required | Tools Needed | Estimated Cost |
|---|---|---|---|
| Intermediate (HVAC familiarity required) | 6–10 hours (plus 1–2 hours for commissioning) | Drill, reciprocating saw, stud finder, level, multimeter, screwdrivers, caulk gun | $1,200–$2,800 (unit + materials; labor adds $500–$1,200 if hired) |
Tools & Materials
| Category | Items |
|---|---|
| HRV Unit | Energy Star–certified unit (e.g., Venmar EKO 2.5, Fantech HRV-100); verify CFM rating matches your home’s square footage and ASHRAE 62.2 requirements |
| Ductwork | 4” rigid insulated flex duct (UL 181B-FX rated), 4” aluminum transition collars, foil tape (not duct tape), mastic sealant |
| Electrical | 14/2 NM-B cable (if hardwiring), GFCI outlet (if plugging in), junction box, wire nuts, strain relief clamp |
| Mounting & Sealing | 2×4 framing lumber, 3” corrosion-resistant screws, closed-cell foam backer rod, polyurethane caulk (e.g., OSI Quad), exterior-rated flashing |
Step-by-Step Instructions
1. Select the location and confirm structural clearance
Choose an interior wall near an exterior wall—ideally on the north or east side to avoid solar heat gain on the fresh-air intake. Verify no plumbing, wiring, or structural headers occupy the planned 16” × 24” rough opening. Use a stud finder and inspect from attic and basement. Mark centerline of unit (typically 48” AFF) and outline cutout with painter’s tape.
2. Cut the exterior wall opening and install the intake/exhaust hood
From outside, drill pilot holes at corners of marked area. Use a reciprocating saw with a metal-cutting blade to remove siding and sheathing. Install the manufacturer’s insulated hood kit with integrated rain hood and insect screen—seal all perimeter joints with polyurethane caulk and integrate step flashing under siding per IRC Section R703.1. Never mount hoods directly on brick or stucco without proper anchoring and weep screed.
3. Mount the HRV unit and connect ducts
Secure the HRV chassis to interior wall studs using supplied mounting brackets and 3” screws. Attach supply and exhaust ducts to their respective ports using aluminum collars and foil tape—then seal seams with mastic. Keep duct runs as short and straight as possible: maximum 25 ft total length, with no more than two 90° elbows. Slope condensate drain lines 1/4” per foot toward floor drain or condensate pump.
4. Wire the unit and configure controls
Run 14/2 NM-B cable from nearest 15A circuit (dedicated if required by local code). Connect line/load wires to terminal block per wiring diagram—never bypass the internal transformer for fan speed control. Install the wall-mounted thermostat or smart controller (e.g., Honeywell Home RTH9580WF) per manual; set minimum run time to 20 minutes/hour to prevent moisture buildup. Test airflow with an anemometer: supply and exhaust should match within ±10 CFM.
Pro Tips
Most failed HRV installations trace back to poor sealing or undersized ductwork—not the unit itself. According to the U.S. Department of Energy’s Residential Ventilation Handbook (2022), 68% of field-measured HRVs underperform due to duct leakage exceeding 15%—a threshold that voids Energy Star certification.
“If your ducts sweat in winter or frost up in sub-zero temps, you’ve got either insufficient insulation or unbalanced static pressure. Always measure external static pressure with a manometer before finalizing duct connections.”
— James L., NATE-certified HVAC trainer, HVAC Excellence, 2023
- Never use flexible duct longer than 5 ft between collar and rigid transition—turbulence kills efficiency.
- Label every duct with permanent marker: “SUPPLY IN,” “EXHAUST OUT,” etc.—you’ll thank yourself during commissioning.
- Run a 24-hour test cycle before drywall repair: monitor humidity (target 30–45% RH), CO₂ (<800 ppm), and noise (<2.5 sones at 3 ft).
Why does my HRV freeze up in cold weather?
Freezing occurs when exhaust air moisture condenses and refreezes in the core—usually due to low exhaust airflow, blocked condensate drain, or missing defrost sensor calibration. Check the unit’s manual for forced-defrost override procedure and verify outdoor sensor is mounted away from direct wind or snow drifts.
Can I install an HRV in a home with existing ductwork?
Yes—but only if your furnace blower can handle added static pressure (typically ≤0.5” WC). Use a duct calculator like the ACCA Manual D app to verify total system resistance. Most retrofit installations tie into the return plenum and add dedicated 4” supply ducts to bedrooms and living areas—balancing those ducts is essential.
Do I need a permit for HRV installation?
In 47 states, yes—especially if you’re modifying electrical circuits or exterior walls. Permits trigger mandatory third-party inspection of duct sealing, electrical bonding, and combustion air safety (critical if gas appliances share the same space). Contact your local building department before ordering equipment; some require pre-approval of make/model.
What’s the difference between HRV and ERV?
An HRV transfers sensible heat only (temperature), while an ERV transfers both sensible and latent heat (moisture). In cold, dry climates (e.g., Denver or Minneapolis), HRVs prevent excessive drying. In humid climates (e.g., Atlanta or Portland), ERVs help control summer humidity. For mixed climates like Chicago, choose an HRV with optional enthalpy core upgrade—see our full comparison.
How often should I clean or replace the core and filters?
Wash aluminum or polymer cores every 6 months with warm water and mild detergent—never bleach or high-pressure spray. Replace MERV-13 filters every 3 months (or monthly during wildfire season). Log maintenance in a physical binder or digital tracker: units with documented upkeep last 18–22 years versus 11–14 for neglected systems (per BPI National Retrofit Database, 2023).
Can I integrate my HRV with a smart home system?
Yes—if your model supports BACnet MS/TP, Modbus, or Wi-Fi (e.g., Zehnder ComfoAir Q600 or Ultimate Air RecoupAerator). Use a hub like Hubitat Elevation or Home Assistant with a compatible integration. Avoid cloud-dependent apps unless your internet uptime exceeds 99.5%; local control ensures ventilation never stops during outages.
A properly installed HRV pays for itself in energy savings within 5–7 years—especially in homes with tight envelopes and high natural gas costs. More importantly, it eliminates stale air, reduces window condensation in winter, and cuts airborne allergen loads by up to 40% (per independent IAQ testing). Take your time on sealing and balancing—this isn’t a race, but a long-term investment in health and efficiency.