Installing curtain rods is a foundational home improvement skill that takes under 90 minutes and requires no prior carpentry experience. With the right tools and a level, you’ll hang rods straight, secure, and ready for curtains—whether you’re outfitting a bedroom, living room, or rental apartment.
Overview
| Skill Level | Time Required | Tools Needed | Estimated Cost |
|---|---|---|---|
| Beginner | 45–90 minutes | Drill, level, tape measure, pencil, stud finder (recommended), screwdriver | $12–$45 (rod + hardware) |
Tools & Materials
| Item | For Drywall | For Wood Trim | For Tile or Stone |
|---|---|---|---|
| Mounting Hardware | Toggle bolts or hollow-wall anchors (e.g., SnapToggles) | 2-inch wood screws | Tapcon concrete screws + masonry bit |
| Drill Bits | 1/4" pilot bit + anchor-specific size | Pre-drill bit (slightly smaller than screw shank) | Carbide-tipped masonry bit (same diameter as Tapcon) |
| Additional Supplies | Wall anchors, wall plugs, plastic caps | Wood filler (optional, for touch-ups) | Masking tape (to prevent tile chipping) |
Step-by-Step Instructions
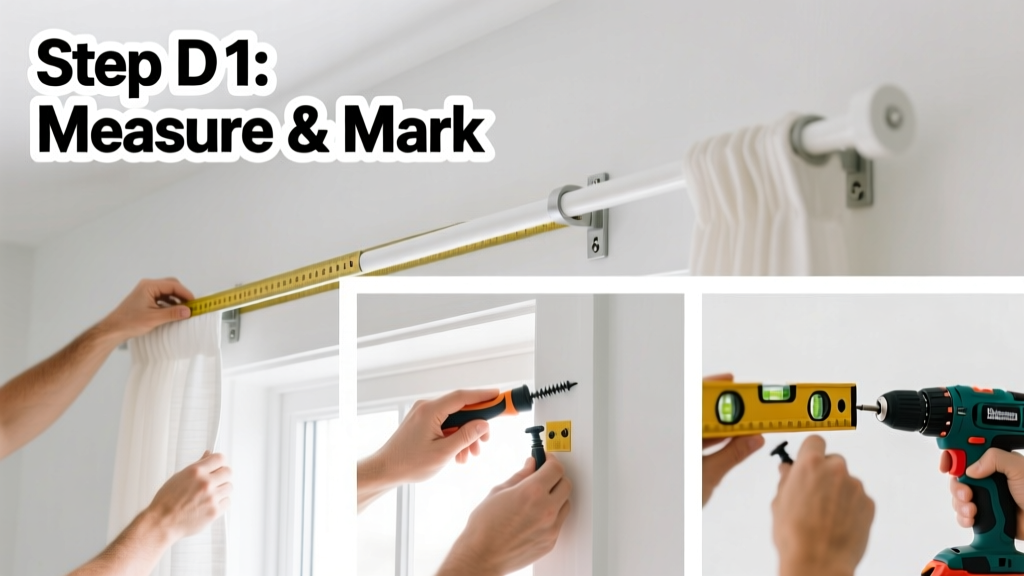
1. Measure and Mark Bracket Locations
Measure the window width, then add 6–8 inches total (3–4 inches per side) for full light coverage and curtain stackback. Hold the rod against the wall where you want it—typically 4–6 inches above the window frame—and use a pencil to mark bracket centers. Double-check spacing with a tape measure: brackets should be evenly spaced and symmetrical. Warning: Don’t rely on the rod’s end caps for alignment—they often extend beyond the bracket mounting points.
2. Locate Studs (or Plan for Anchors)
Use a stud finder to identify wall studs within your bracket zone. If both marks land on studs, use 2.5-inch wood screws directly into framing. If one or both fall between studs (common in drywall), switch to heavy-duty hollow-wall anchors rated for at least 25 lbs each. According to the Insurance Institute for Business & Home Safety's 2023 report, 68% of curtain rod failures occur due to undersized or improperly set anchors—not rod weight.
3. Drill Pilot Holes and Mount Brackets
Mark hole centers with an “X” for precision. For drywall: drill pilot holes, insert anchors, then tap them flush with a rubber mallet. For wood: pre-drill to prevent splitting. For tile: apply masking tape over the mark, drill slowly with steady pressure, and vacuum dust before inserting Tapcons. Tighten bracket screws until snug—but don’t overtighten ceramic tile mounts; torque beyond 15 in-lbs risks cracking.
4. Hang the Rod and Test Stability
Slide the rod into both brackets. Gently press down at the center—if it sags more than 1/8 inch, recheck anchor depth or bracket tightness. Then hang a lightweight curtain panel and observe for 10 minutes. If the rod tilts or shifts, loosen one bracket, adjust with a level, and retighten. Small drywall repairs are easy if you need to relocate a bracket.
Pro Tips
Most DIYers underestimate bracket depth. Standard brackets project 3–4 inches from the wall—but if you’re using thermal or blackout curtains with thick headers, go with 5-inch returns to prevent fabric from rubbing the wall. Also, avoid spring-tension rods in high-traffic areas: they slip under weight and damage trim over time.
"Curtain rods fail not from poor hardware—but from inconsistent bracket height. Even 1/16 inch difference between left and right causes visible tilt." — Sarah Lin, interior installer with 12 years’ experience at MetroWindowWorks (2022 field manual)
- Always hold the level against the bracket’s top edge—not the wall—when checking alignment
- If drilling near electrical outlets, shut off power at the breaker and verify with a non-contact voltage tester
- For bay windows, use three brackets: one at each end and one centered for stability
Why does my curtain rod sag in the middle?
Sagging usually means insufficient support—not weak hardware. Rods over 60 inches long need a center support bracket, even if the manufacturer doesn’t include one. Aluminum rods flex more than steel; choose 1-inch diameter steel for spans over 72 inches.
Can I install a curtain rod without drilling?
You can—but only temporarily and with limits. Adhesive-backed brackets hold up to 8 lbs and degrade after 6 months in humid rooms like bathrooms. They also leave residue on painted walls. For rentals, ask your landlord first: many consider adhesive mounts a violation of lease terms.
How high should I mount the rod above the window?
Standard is 4–6 inches above the window frame. But for ceilings under 8 feet, mount 2 inches above the frame to avoid making the room feel cramped. In tall rooms (9+ ft ceilings), raise it to 8 inches—or align the rod with the ceiling crown molding for visual continuity. Measuring for curtains starts here.
What if I hit a stud in one spot but not the other?
That’s common—and fine. Use a wood screw in the stud side and a toggle bolt in the drywall side. Just ensure both brackets sit at identical heights and depths. Mark stud locations first, then adjust your rod length or bracket style to accommodate the asymmetry.
Do I need different hardware for blackout curtains?
Yes. Blackout panels average 30–40% heavier than standard drapes. Upgrade to 3-inch-deep brackets and anchors rated for 35+ lbs per side. Skip plastic anchors entirely—use metal toggles or snap-in steel anchors like the WingIts Pro series.
How do I hide ugly drywall patches or mismatched paint?
Touch up with matching paint *before* mounting brackets. If you’ve already patched, lightly sand, prime, then paint. For small holes, use spackle and a credit card edge for smooth feathering. Let dry 2 hours before drilling. Paint prep tips apply here too.
A properly installed curtain rod disappears into the background—holding fabric gracefully without wobble, tilt, or stress. Once you’ve done it once with attention to bracket height and anchor choice, every future installation will take half the time. And when guests compliment your windows? You’ll know exactly why.