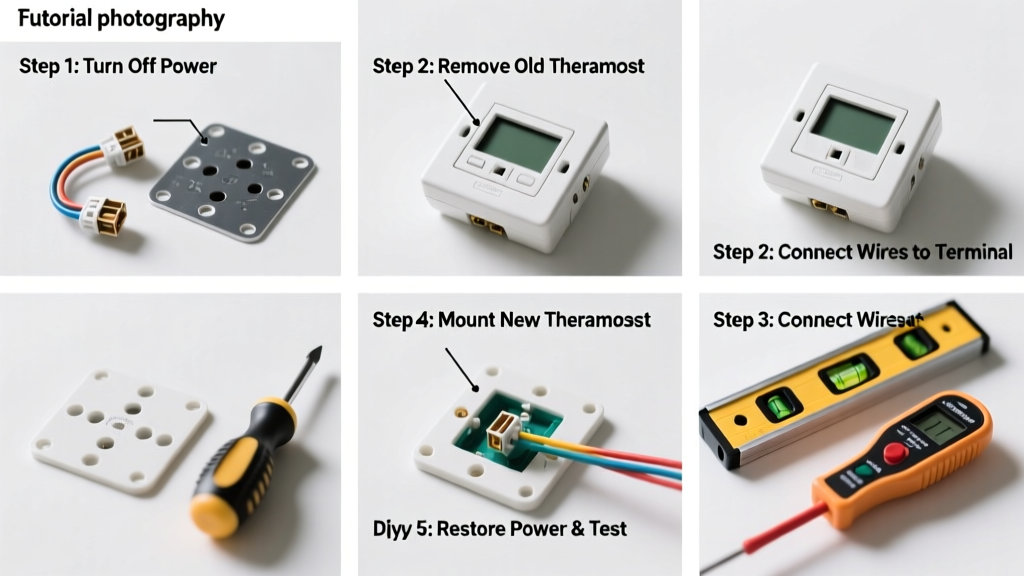
Installing a thermostat is a manageable DIY project for most homeowners with basic electrical awareness—it’s rated medium difficulty because of low-voltage wiring safety and compatibility checks, not complexity. Plan for 45–90 minutes, depending on wall conditions and whether you’re replacing an older unit or adding one where none existed.
Overview
| Skill Level | Time Required | Tools Needed | Estimated Cost |
|---|---|---|---|
| Intermediate (no electrician license needed) | 45–90 minutes | Screwdriver, level, drill (if mounting new base), phone charger cable (for some smart models) | $25–$250 (thermostat only; no labor) |
Tools & Materials
| Item | Notes |
|---|---|
| Digital or smart thermostat (e.g., Nest, Ecobee, Honeywell T9) | Verify compatibility with your HVAC system (gas furnace, heat pump, dual-fuel, etc.) before purchase |
| Phillips and flathead screwdrivers | Use insulated handles—critical for low-voltage safety |
| Wire strippers (22–18 AWG) | Most thermostats use 18-gauge wire; stripping too deep exposes copper and risks shorting |
| Level and pencil | Ensures accurate, plumb mounting—especially important for touchscreens and motion sensors |
| Labeling tape or small sticky notes | Label each wire *before* disconnecting the old thermostat (R, W, Y, G, C, etc.) |
| Smartphone (for setup) | Required for Wi-Fi pairing, geofencing, and firmware updates on smart units |
Step-by-Step Instructions
1. Turn off power to your HVAC system
Go to your main electrical panel and switch off the breaker labeled “HVAC,” “Furnace,” or “Air Handler.” Don’t rely on the thermostat’s off switch—this only interrupts the control signal, not power to the transformer. Use a non-contact voltage tester at the thermostat wires to confirm zero voltage before proceeding. According to the National Fire Protection Association’s 2023 NFPA 70E Handbook, 62% of low-voltage HVAC incidents occur due to assumed de-energization without verification.
2. Remove the old thermostat faceplate and base
Gently pry off the display unit (most snap on). Unscrew the mounting base from the wall. Carefully pull it away—don’t yank—to expose the wires. If wires retract into the wall, insert a straightened paperclip into the wall cavity behind the base to hook and hold them out. Take a photo of the wiring before disconnecting anything. Label each wire with tape matching its terminal (e.g., “R” for red, “C” for blue) using your photo as backup.
3. Check for a C-wire—and add one if missing
The C-wire (common wire) provides continuous 24V AC power. Look for a spare blue, black, or brown wire capped off in the bundle. If absent, you have options: use a C-wire adapter (like the Add-a-Wire kit), repurpose the G-wire (fan) with fan control limitations, or run new 18/8 or 18/5 thermostat cable from the furnace. The U.S. Department of Energy estimates that 40% of homes built before 2005 lack a C-wire—making this the #1 cause of smart thermostat setup failure.
4. Mount the new thermostat base and connect wires
Hold the new base against the wall, level it, and mark screw holes. Drill pilot holes if needed (especially into studs or masonry). Secure with included screws. Insert each labeled wire into its corresponding terminal on the new base—match colors *and* labels. Tighten screws firmly but don’t over-torque; stripped threads or bent pins cause intermittent failures. Double-check that no stray copper strands are touching adjacent terminals.
5. Attach the display and restore power
Click the faceplate onto the base until it locks. Return to the electrical panel and turn the HVAC breaker back on. Wait 30 seconds—some thermostats boot slowly. If the screen stays blank, recheck the C-wire connection and breaker status. Once powered, follow on-screen prompts for language, time zone, and HVAC type. For smart models, open the companion app and pair via Bluetooth or Wi-Fi. Verify heating and cooling stages activate by manually triggering them in setup mode.
Pro Tips
Seasoned HVAC technicians emphasize one thing above all:
“If your thermostat works but your system cycles erratically—or won’t hold temperature—the issue is almost always incorrect wiring or a missing C-wire, not the thermostat itself.” — James L. Ralston, NATE-certified trainer, HVAC Excellence, 2022Common missteps include skipping the C-wire check, misidentifying the O/B terminal (reversing heat pump reversing valve logic), and assuming color coding is universal (it’s not—always verify with your furnace’s wiring diagram). Also, avoid mounting near windows, exterior doors, or supply vents—temperature swings there fool sensors and waste energy. For best results, consult your furnace manual’s terminal chart, not just thermostat instructions.
What if my wires aren’t color-coded?
Strip ¼ inch of insulation and test continuity with a multimeter: set to ohms, touch one probe to the wire end and the other to the corresponding terminal at the furnace. Trace R (24V hot), W (heat), Y (cool), G (fan), and C (common). Some older systems use orange for O/B or brown for C—label based on function, not color.
Can I install a smart thermostat with a boiler system?
Yes—but verify compatibility first. Most modern smart thermostats support millivolt (standing pilot) and electronic ignition boilers. You’ll likely need a relay (like a Taco ZVC) if your boiler uses a 24V transformer and lacks a C-wire. Check the thermostat’s compatibility checker tool (e.g., Ecobee’s or Nest’s online guides) before ordering.
Why does my new thermostat keep losing Wi-Fi?
Weak signal is the usual culprit—thermostats often sit inside walls or metal boxes that block 2.4 GHz. Move your router closer, install a Wi-Fi extender, or switch to a mesh system. Also, ensure your thermostat’s firmware is updated; outdated versions struggle with newer router security protocols like WPA3.
Do I need a permit to replace a thermostat?
No. Thermostat replacement is exempt from electrical permitting in all 50 states per the 2023 International Residential Code (IRC E3601.1), since it operates under 30 volts and connects only to existing low-voltage HVAC wiring. Permits apply only when running new circuits or modifying line-voltage components.
My heat pump runs constantly after install—what’s wrong?
Check the O/B wire setting. Heat pumps require either “O” (de-energized to cool, energized to heat) or “B” (opposite logic) depending on manufacturer. Wrong selection causes the reversing valve to stay in one mode. In your thermostat’s installer settings menu, toggle between O and B—test both and observe outdoor unit behavior.
How do I test if the C-wire is live?
Set your multimeter to AC voltage. Place the black probe on the C terminal and the red probe on R. You should read 24–29 VAC. If it reads 0, the C-wire isn’t connected at the furnace or the transformer is faulty. Trace it back to the air handler or furnace control board and verify the wire is secured under the correct terminal screw.
Thermostat installation rewards attention to detail—not speed. Getting it right means reliable comfort, lower utility bills, and smoother integration with home automation. If you hit a snag with wiring diagrams or multi-stage systems, refer to your furnace’s service manual or consult a local HVAC technician for a 15-minute diagnostic call. And once it’s up and running? You’ve just upgraded your home’s intelligence—and saved $150+ on what would’ve been a service visit.