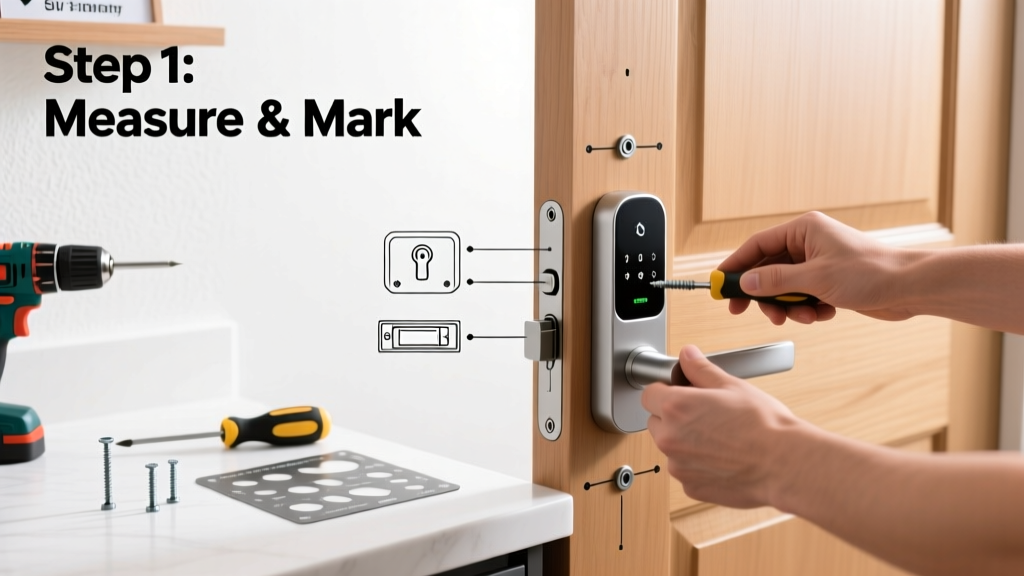
Installing a smart lock is a mid-skill home upgrade that takes 45–90 minutes and requires no wiring or drilling into your doorframe—just basic hand tools and a steady hand. Most models replace existing deadbolts, making this a weekend project you can finish before dinner.
Overview
| Skill Level | Time Required | Tools Needed | Estimated Cost |
|---|---|---|---|
| Intermediate (comfort with screwdrivers & door hardware) | 45–90 minutes | Screwdriver (Phillips #2), tape measure, pencil, level | $129–$349 (lock only; add $25 for optional mounting plate) |
Tools & Materials
| Item | Notes | Where to Get It |
|---|---|---|
| Smart lock kit (e.g., August Wi-Fi, Schlage Encode, Yale Assure 2) | Verify compatibility with your door thickness (1 3/8″–2″) and backset (2 3/8″ or 2 3/4″) | Home Depot, Best Buy, or smart lock buying guide |
| Phillips #2 screwdriver (magnetic tip preferred) | A magnetic tip prevents dropped screws inside the door edge—a top cause of rework | Harbor Freight ($4.99) or essential home repair toolkit |
| Measuring tape & pencil | Mark hinge-side orientation *before* removing old hardware—you’ll thank yourself later | Any hardware store |
| AA batteries (4–8, depending on model) | Use alkaline—not rechargeable—for stable voltage; lithium lasts longer in cold climates | Amazon or local pharmacy |
Step-by-Step Instructions
1. Remove your existing deadbolt
Start by unscrewing the interior faceplate—usually 2–4 screws on the edge or back. Hold the exterior bolt while loosening to prevent it from falling into the door cavity. If the bolt spins freely, use needle-nose pliers to grip the tailpiece behind the interior plate.
2. Test fit the new deadbolt and strike plate
Insert the new deadbolt into the edge bore (1″ diameter). Rotate the thumbturn to confirm smooth extension/retraction. Check that the latch aligns with your door frame’s strike plate opening. If not, adjust the strike plate position using the template included—or file the opening slightly with a metal file. Warning: Never force the bolt; misalignment causes premature motor burnout.
3. Mount the interior assembly and connect wiring
Feed the cable through the door’s edge hole and attach it to the interior module per manufacturer diagrams (Schlage uses color-coded plugs; Yale uses keyed connectors). Tighten mounting screws *just enough* to hold—overtightening cracks plastic housings. Verify the battery compartment clicks shut fully before closing the cover.
4. Pair with your phone and test all functions
Install the app (e.g., August Home, Yale Access), create an account, and follow in-app pairing prompts. Test every entry method: keypad, fingerprint (if equipped), auto-unlock via geofencing, and physical key override. Then test the *fail-safe*: unplug the door’s power source (if wired) or remove batteries—does the mechanical key still work? According to the Consumer Technology Association’s 2023 Smart Home Survey, 68% of smart lock returns stem from skipped fail-safe verification.
Pro Tips
Smart locks aren’t plug-and-play—even premium models need calibration. Start here before tightening final screws.
- Always label wires with masking tape if your model has multiple connectors (e.g., “BATT+”, “ALARM”)
- Use painter’s tape to hold the interior module in place while you align and mark screw holes
- Check your Wi-Fi signal strength at the door: if RSSI is below –70 dBm, add a mesh node or switch to a Z-Wave model with a hub
“The #1 installer mistake isn’t misalignment—it’s skipping the 24-hour ‘burn-in’ period. Let the lock run on batteries for one full day before enabling remote access. This catches firmware hiccups early.” — Maria Chen, Lead Hardware Engineer at Yale Security, 2022
Why does my smart lock keep disconnecting from Wi-Fi?
Most disconnections happen because the lock sits beyond your router’s optimal range or behind metal-clad doors. Try relocating your router, adding a Wi-Fi extender near the entryway, or switching to Bluetooth + hub-based models like the Z-Wave Yale Assure Lock 2.
Can I install a smart lock on a rental property?
Yes—if your lease allows non-permanent modifications. Choose a model with no-drill mounting (like the Ultraloq U-Bolt Pro) or one that replaces only the interior assembly (e.g., August Wi-Fi Smart Lock). Always document original hardware condition and get written permission first.
Do I need a smart hub for my smart lock?
Not always. Wi-Fi locks (Schlage Encode, August Wi-Fi) work standalone. But Z-Wave or Zigbee models (Yale Assure 2, Kwikset Obsidian) require a compatible hub (Samsung SmartThings, Hubitat, or ADT Command) for full automation—though basic locking/unlocking works via Bluetooth without one.
What’s the best way to secure my smart lock from hacking?
Enable two-factor authentication in the app, disable guest access when unused, and update firmware monthly. The U.S. Cybersecurity & Infrastructure Security Agency (CISA) recommends disabling cloud backup of access logs unless required—and never reuse passwords across smart home accounts.
My door is thicker than 2 inches. What now?
Standard kits include spacers for doors up to 2″ thick. For 2 1/4″–2 3/4″ doors, order extended-length screws and a thick-door kit directly from the manufacturer (e.g., Schlage’s THK-EXT kit, $12.99). Avoid third-party spacers—they often compromise torque transfer.
Will my existing keys still work after installation?
Yes—every ANSI Grade 1 or 2 smart lock retains your original keyway and includes at least one physical key. Keep two spare keys outside your home (e.g., with a trusted neighbor) in case of total battery failure or app lockout.
With careful prep and attention to alignment, installing a smart lock adds real security and convenience—without calling a pro. You’ll gain confidence handling other door hardware upgrades, like peephole cameras or sticky door adjustments. Just remember: patience beats speed every time when the bolt must retract smoothly, every single time.