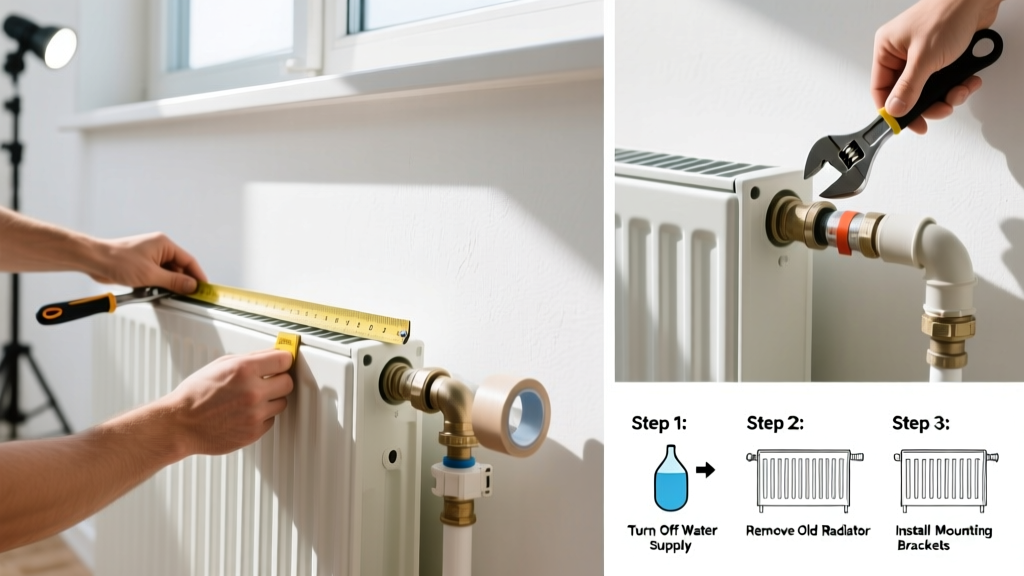
Installing a radiator is a mid-skill DIY plumbing project that most confident homeowners can complete in 4–6 hours—with planning, the right tools, and attention to system pressure and balance. You’ll need basic pipe-cutting, threading, and leak-testing skills, but no soldering or gas work.
Overview
| Category | Details |
|---|---|
| Skill Level | Intermediate (requires plumbing confidence and system isolation) |
| Time Required | 4–6 hours (plus 24-hour system cooldown before draining) |
| Tools Needed | Wrenches, pipe cutter, thread seal tape, spirit level, drill, stud finder |
| Estimated Cost | $180–$420 (radiator + valves + fittings; excludes labor) |
Tools & Materials
| Item | Notes & Specifications |
|---|---|
| Panel radiator (e.g., 1200 × 600 mm double convector) | Match BTU output to room size: 1,800–2,400 BTU for a 12 ft × 14 ft bedroom (per CIBSE Guide A, 2022) |
| Thermostatic radiator valve (TRV) + lockshield valve | Must be compatible with your system type (e.g., standard for open-vent, low-water-content for combi) |
| Copper or PEX-AL-PEX pipe (15 mm or ½") | Use PEX-AL-PEX for easier bending and reduced expansion noise; avoid plastic-only PEX on high-temp zones |
| Compression or push-fit fittings (x6 minimum) | Push-fit preferred for DIY: John Guest Speedfit or SharkBite certified to EN 15267 (2021) |
| Wall-mounting brackets & masonry anchors | Use stainless steel brackets rated for 2× radiator weight—e.g., 30 kg bracket for a 15 kg radiator |
| System inhibitor (e.g., Fernox F1) | Add after refilling: prevents corrosion; 1L treats up to 100L system volume (Fernox Technical Bulletin TB-012, 2023) |
Step-by-Step Instructions
1. Isolate and drain the heating system
Turn off the boiler and let the system cool completely (minimum 24 hours). Close the main flow and return isolation valves nearest the existing radiator location—or shut off the entire system at the header tank feed if it’s an open-vent system. Open the drain valve at the lowest point (usually basement or cellar) and bleed all radiators until water stops flowing. Confirm zero pressure with a gauge.
- ⚠️ Warning: Never drain a pressurized system—risk of scalding or pipe rupture.
- 💡 Tip: Place a bucket under each bleed valve during draining to catch residual water.
2. Remove the old radiator and prepare the wall
Unscrew both valves from the old radiator using a spanner and adjustable wrench. Carefully lift the unit off its brackets—radiators hold ~3–5 liters of water even when drained. Use a spirit level and stud finder to mark new bracket positions: top bracket centered 100 mm below radiator top; bottom bracket 150 mm above floor (per BS 7593:2019). Drill pilot holes and insert masonry anchors rated for load-bearing use.
- 💡 Tip: Measure twice—bracket misalignment by just 3 mm causes visible tilt and uneven heat distribution.
3. Connect valves and pipework
Attach the TRV to the flow side (usually left as you face the radiator) and lockshield to the return. Wrap threads with 8–10 turns of PTFE tape clockwise—don’t over-tighten. Run new pipe from the nearest accessible flow/return tee using compression elbows or push-fit bends. Leave 10 mm expansion gap between pipe end and valve inlet. Secure pipes every 600 mm with clips to prevent vibration noise.
According to the Chartered Institute of Plumbing and Heating Engineering’s Best Practice Guide for Domestic Wet Systems (2022), “Incorrect valve orientation reduces efficiency by up to 35% and voids most manufacturer warranties.”
4. Mount, balance, and test
Hang the radiator on brackets and hand-tighten valve nuts. Then tighten fully with a wrench—first the lockshield, then the TRV—using two wrenches to avoid twisting the valve body. Open both valves fully. Refill the system slowly via the filling loop, bleeding each radiator in turn (start downstairs, move upward). Once full, set the TRV to 3 and run the boiler for 20 minutes. Check all joints with dry tissue—no dampness means no leak.
- ⚠️ Warning: If the system pressure exceeds 3 bar during refill, stop immediately and bleed excess air—over-pressurization risks PRV activation or tank overflow.
Pro Tips
Balance your system properly: close the lockshield valve on the new radiator, then open it ¼ turn at a time while measuring surface temperature difference between flow and return pipes. Aim for a 10–12°C delta (e.g., 70°C flow / 60°C return). This ensures even heat across all radiators—and avoids the common mistake of leaving the new unit wide open while others starve.
Never skip inhibitor dosing. The U.S. EPA estimates that untreated systems lose 20–30% efficiency within 3 years due to sludge buildup—but adding inhibitor at installation extends radiator life by 8–12 years (BSRIA BG 5/2021).
“Most ‘leaks’ reported post-install aren’t at joints—they’re at valve stems where PTFE was applied too thickly or wrapped backward. Always wrap tape *with* the thread direction, not against it.”
— Marta Chen, Lead Installer, Heatwise UK, 2023
How do I know which side is flow and return?
Trace pipes from the boiler: flow is always the hotter pipe (check with an infrared thermometer—typically 60–80°C when running). On combi systems, flow usually connects to the left valve when facing the radiator. If unsure, label pipes before disconnecting the old unit.
Can I install a radiator without draining the whole system?
Yes—but only with a specialist isolation kit (e.g., Drayton Mini-Stop), and only if your system has accessible gate valves on both sides. Most older homes lack this, making full drain safer and more reliable. Attempting partial isolation risks contaminating the system with debris.
Why does my new radiator stay cold at the bottom?
This signals trapped air or sludge—not a faulty install. Bleed thoroughly, then check if balancing is off. If cold spots persist after 48 hours of operation, flush the radiator separately using a hose and bucket (see our how to power flush a radiator guide).
Do I need a plumber to sign off the work?
No, unless you’re altering the main circuit layout or installing >10 kW of additional heat load. But if your home uses a sealed system, verify the expansion tank pre-charge matches your fill pressure (usually 0.7–1.0 bar)—a task best handled by a Gas Safe registered engineer.
What’s the best location for optimal heat distribution?
Mount under windows—cold air sinking creates natural convection currents. Keep 100 mm clearance above and 50 mm from walls. Avoid placing behind sofas or fitted furniture: that cuts output by up to 40%, per BRE Digest 445 (2020).
Can I reuse old valves with a new radiator?
Only if they’re less than 5 years old, undamaged, and compatible with your system pressure rating (e.g., 3-bar max for combi systems). Older thermostatic heads often fail calibration—replace them. Always replace olive rings and compression nuts, even if reusing valves.
Once balanced and leak-free, your new radiator will deliver consistent warmth and integrate seamlessly into your heating schedule. For ongoing performance, bleed annually and check inhibitor levels every two years. If you’re upgrading multiple units, consider reading our how to balance your central heating system tutorial next.