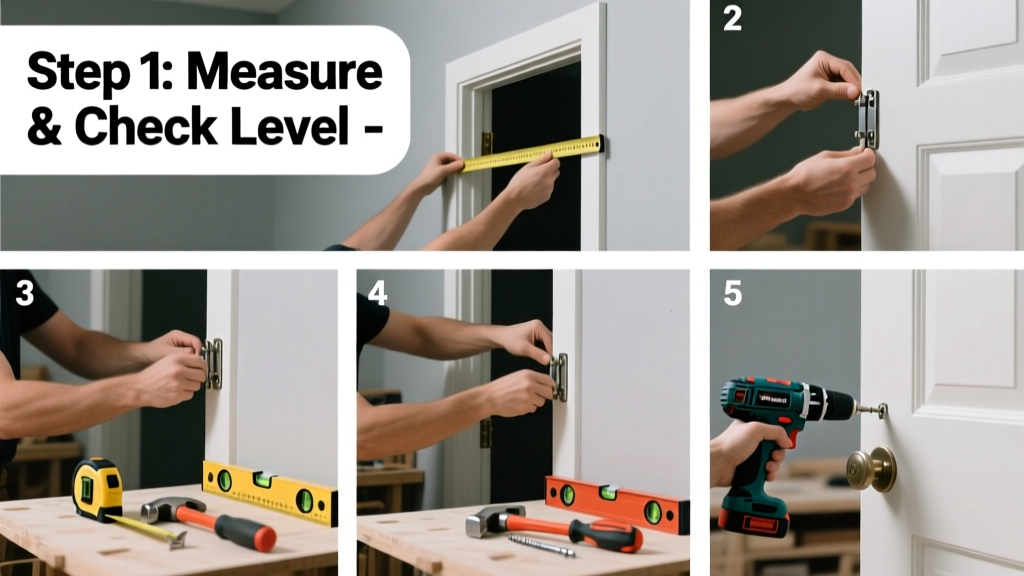
Installing a prehung door is a mid-skill carpentry task that most confident DIYers can complete in 3–5 hours—with no prior door-hanging experience required. It’s significantly faster and more forgiving than hanging a slab door, since the jamb, hinges, and latch prep are factory-assembled and square. But skip the fine-tuning steps, and you’ll end up with gaps, binding, or a door that won’t latch.
Overview
| Category | Details |
|---|---|
| Skill Level | Intermediate (requires basic framing and measuring skills) |
| Time Required | 3–5 hours (plus 30 minutes for drywall patching if trimming exterior casing) |
| Tools Needed | Level, drill/driver, shims, nail set, utility knife, caulk gun, tape measure, stud finder |
| Estimated Cost | $120–$320 (prehung door unit + fasteners + sealant; excludes trim or paint) |
Tools & Materials
| Item | Notes |
|---|---|
| Prehung interior or exterior door unit | Verify rough opening size matches door specs (e.g., 30" door needs 32-1/2" x 82-1/4" rough opening per International Residential Code 2021, Table R602.3(1)) |
| 3-inch exterior-grade screws (for exterior doors) | Use stainless steel or coated screws; avoid drywall screws—they snap under torque |
| 2-1/2-inch finish nails or 2-inch screws (for casing) | For interior doors: 16-gauge finish nails work best with a nail set |
| Composite or cedar shims (not wood) | Wood shims compress over time; composite holds shape and resists moisture (per NAHB Research Center, 2022) |
| Weatherstripping (exterior only) | Include kerf-mounted vinyl bulb or silicone gasket—don’t rely on door sweep alone |
| Mineral wool or low-expansion foam sealant | Never use high-expansion foam—it bows jambs. Use Great Stuff Pro Gaps & Cracks (low-expansion, ASTM E283-compliant) |
Step-by-Step Instructions
1. Prep the rough opening
Remove old door and casing. Check for level, plumb, and square: measure diagonals (they must match within 1/8") and verify header and sill are level. If out of spec by more than 1/4", shim or plane the sill before proceeding. Cut away any protruding insulation or drywall that blocks jamb contact.
2. Dry-fit and mark hinge locations
Set the prehung unit into the opening without fastening it. Use a 4-foot level to check plumb on both jambs and level across the head. Shim temporarily at hinge points and strike side. Mark hinge locations on the stud with pencil—then remove the unit. Drill pilot holes through the hinge mortises into the stud (two per hinge, top and bottom screws).
3. Secure the hinge jamb first
Reinsert the unit. Drive one 3-inch screw through each hinge into the stud—do not fully tighten yet. Recheck plumb with level. Then drive second screw in each hinge, tightening gradually while verifying plumb stays true. Leave hinge screws slightly loose until strike jamb is secured.
4. Shim and secure the strike jamb
Insert shims behind the strike jamb at three points: top, middle, and bottom—just behind the latch plate location. Tap shims gently until the door closes smoothly and latches without pressure. Nail or screw through the jamb into the shims and stud (one fastener per shim location). Do not overdrive—this distorts the jamb.
5. Insulate and finish
Fill gaps between jamb and framing with low-expansion foam—only in the top and sides, never behind hinge or latch areas. Let cure 1 hour. Install casing using 2-inch finish nails spaced every 12 inches. Caulk exterior casing joints and head jamb with silicone-acrylic sealant (ASTM C920 Type S).
"Most prehung door failures trace back to skipping the dry-fit and relying solely on the hinge-side plumb. Always check clearance at the top, bottom, and strike side *before* nailing—especially with older homes where floors settle unevenly." — Mike Torres, 28-year residential carpenter and NAHB Certified Graduate Builder (2023)
Pro Tips
Avoid these common missteps: forcing the door closed during shimming (causes hinge bind), over-shimming the latch side (creates gap at top corner), and forgetting to remove shipping spacers from the hinge knuckles (they’re often taped inside the hinge barrel). Also, never use construction adhesive in place of mechanical fasteners—IBC Section 2304.10.2 requires direct fastener attachment to structural framing.
- Test latch engagement with door closed: the deadbolt should extend fully and retract smoothly with no grinding
- Check swing clearance: minimum 1/8" gap at top and latch side, 3/16" at bottom for interior doors (per ADA guidelines for accessibility)
- If installing an exterior door, verify threshold slope directs water away from the house—use a 1/8" per foot minimum pitch
Why does my prehung door rub at the top corner?
This almost always means the strike jamb is out of plumb or over-shimmed near the latch. Loosen strike-side fasteners, re-shim just below the latch, and recheck door swing with a credit card slipped between door and jamb at the rubbing point.
Can I install a prehung door in a load-bearing wall?
Yes—but only if the header was properly sized during original framing. Never cut or modify a header without engineering review. Confirm header depth and species match IRC Table R602.3(1); for a 36"-wide opening, you’ll typically need a double 2×10 or LVL header.
Do I need a permit to replace an interior prehung door?
Generally no—but check with your local building department. Some jurisdictions require permits for any structural modification, including replacing fire-rated doors in multi-family dwellings (per 2021 IBC Section 716.1.2).
What’s the right gap between door and frame?
Interior doors: 1/8" at top and latch side, 3/16" at bottom (allows for carpet or flooring transition). Exterior doors: 1/8" all around, plus a 1/4" gap beneath the threshold for weatherstripping compression.
How do I fix a sagging prehung door after installation?
Sagging usually stems from hinge screws pulling loose in soft framing or undersized hinges. Remove hinge screws, fill holes with wooden toothpicks and glue, let dry, then re-drive longer screws (3-1/2" for interior, 4" for exterior) into solid stud material. Avoid adding weight like heavy hardware until hinges are secure.
Can I reuse the old prehung door frame?
Rarely—and never for exterior doors. Jamb warping, hinge mortise wear, and compromised weatherstripping make reuse unreliable. Interior jambs may be salvageable if perfectly square and undamaged, but replacement costs have dropped: basic prehung units start at $99 at major suppliers like Lowe’s and Home Depot.
Once the casing is nailed, caulked, and the door swings freely, test it for a full week—especially after temperature swings—to catch subtle binding early. If you’re tackling multiple doors, apply lessons from the first install to speed up the next: mark stud locations before drywall, keep shims labeled by thickness, and store doors flat—not leaning—until ready to hang. For related techniques, see our guides on how to hang a sliding barn door and how to install door hardware.