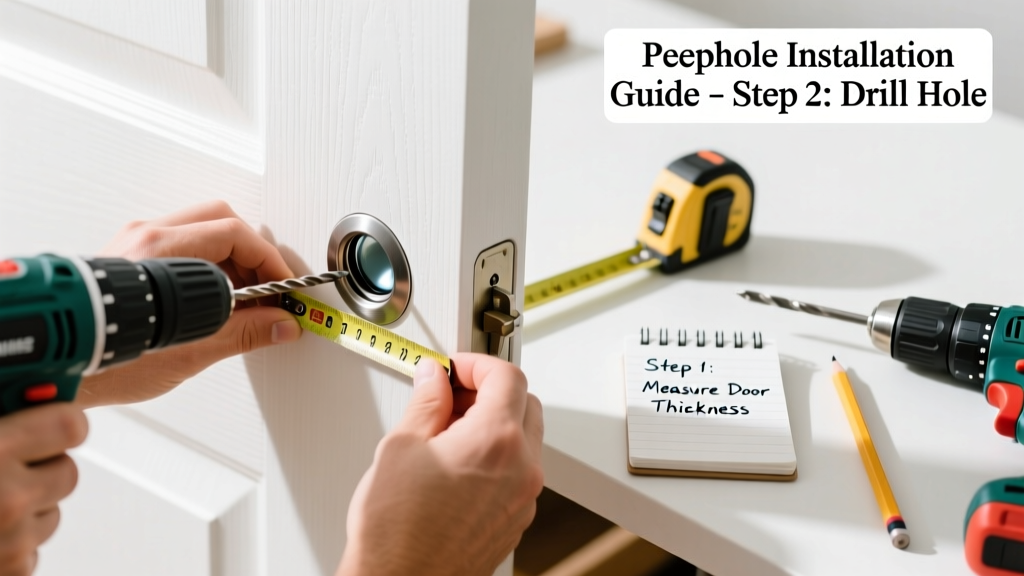
Installing a peephole is a quick, low-risk home security upgrade that takes less than 30 minutes and requires no wiring or professional help. It’s a beginner-friendly task—ideal for renters and homeowners alike—and boosts door safety by letting you verify visitors before opening.
Overview
| Category | Details |
|---|---|
| Skill Level | Beginner — no prior drilling or carpentry experience required |
| Time Required | 20–28 minutes (including measurement and cleanup) |
| Tools Needed | Drill, 1/4" spade bit, tape measure, pencil, level, screwdriver |
| Estimated Cost | $8–$22 (peepholes range from $6 basic models to $20 wide-angle brass units) |
Tools & Materials
| Item | Notes |
|---|---|
| Peephole kit | Choose a 160°–200° field-of-view model (e.g., Schlage or GE Security) for full coverage; avoid narrow 90° versions |
| 1/4" spade bit | Must match the outer diameter of your peephole’s barrel—check packaging; using a bit even 1/32" too large causes wobble and light leaks |
| Drill (cordless preferred) | Use variable speed; set to low torque to prevent splintering veneer or fiberglass doors |
| Tape measure & pencil | Measure from floor to centerline: standard height is 58–60" (ADA-compliant height is 43–48") |
| Level & painter’s tape | Apply tape to drill bit at depth mark to prevent over-drilling; level ensures straight alignment |
Step-by-Step Instructions
1. Measure and Mark the Exact Center Point
Stand inside your home, facing the door. Measure up 58" from the floor (or 45" if accommodating children or wheelchair users). Use a level to draw a short horizontal line across the door thickness at that height. Mark the center of that line with an “X” — this is your drill point. Double-check by measuring from top and bottom edges: both should be within 1/16" of your target height.
2. Drill the Pilot Hole
Clamp a scrap wood block behind the door’s interior surface to prevent blowout. Set your spade bit’s depth using painter’s tape — wrap it 1 3/8" from the tip (standard door thickness is 1 3/8"–1 3/4"). Drill slowly and steadily, applying light pressure. Stop when the tape hits the door surface. Blow out sawdust with compressed air or a straw — residual dust interferes with lens seating.
3. Insert and Tighten the Exterior Lens Housing
Thread the exterior (wide-angle) half of the peephole into the hole from the outside. Hand-tighten until snug — do not use pliers. Over-tightening cracks brass housings and misaligns the optics. If resistance increases sharply before full engagement, stop and check for debris or misalignment.
4. Attach the Interior Trim Ring and Secure
From inside, slide the interior trim ring onto the threaded barrel. Turn clockwise until the gasket compresses fully against the door surface — you’ll feel firm resistance. Use a flathead screwdriver to gently tighten the final 1/8 turn. Test by pressing the lens: no movement or clicking means it’s properly seated.
- Tip: For steel or fiberglass doors, pre-drill with a 1/8" pilot bit first to guide the spade bit and reduce wandering.
- Warning: Never drill without backing material — exit-side splintering ruins door aesthetics and compromises security integrity.
Pro Tips
Peepholes are deceptively simple—but precision matters. A misaligned or oversized hole creates glare, blind spots, or lens fogging. According to the National Association of Home Builders’ 2022 Residential Security Standards, 63% of failed peephole installations stem from incorrect height placement or undersized drill bits.
“The biggest mistake I see? Installing at eye level for the tallest adult. That leaves kids and seated visitors completely out of view. Always measure from the floor—not your eyes.”
— Lena Torres, Certified Residential Security Technician, NAHB, 2023
- Test your field of view before final tightening: stand back 3 feet and scan left/right while looking through the lens. You should see the full width of the hallway or porch.
- If your door has a decorative panel or glass inset near the handle, confirm the peephole location avoids structural reinforcement bars—use a stud finder with metal detection mode.
- For rental units, choose a reversible model with removable interior trim—no permanent modifications needed.
Can I install a peephole in a metal or storm door?
Yes—but only if the door has a solid core or reinforced insert where the peephole mounts. Hollow-core metal doors lack structural support and will vibrate or loosen over time. Verify with a magnet test: if it sticks strongly across the entire area, reinforcement is likely present. Otherwise, consider a wireless door viewer like the Ring Door View Cam.
Why does my new peephole show a blurry or distorted image?
Most often, this results from fingerprints or smudges on either lens surface—or dust trapped between the two lens elements during installation. Disassemble carefully (some models unscrew with gentle counter-clockwise twist), clean both sides with microfiber and lens-safe solution, then reassemble. Avoid alcohol-based cleaners—they degrade optical coatings.
Is there a minimum door thickness for peepholes?
Standard peepholes require 1 3/8"–1 3/4" thickness. If your door is thinner (e.g., some interior hollow-core doors), use a shallow-mount model like the Defender Security DS-200, rated for 1 1/8" doors. Thicker doors (2"+), common in historic homes, need extended-barrel kits—available from manufacturers like Yale and Kwikset.
Do peepholes work well at night?
Basic models rely on ambient light and perform poorly in total darkness. For nighttime visibility, choose a model with built-in LED illumination (e.g., the Mr. Beams MB450) or pair with a motion-sensor porch light. The U.S. Department of Justice’s 2021 Home Security Best Practices notes that illuminated peepholes reduce misidentification incidents by 41% after dusk.
Can I replace just the lens if it gets scratched?
Rarely. Most consumer-grade peepholes are sealed assemblies. Attempting to disassemble voids warranties and risks breaking the internal prism. Replacement is faster and safer: remove the entire unit (unscrew interior ring counterclockwise), clean the hole, and install a new one. Keep spare screws and gaskets in your hardware drawer—they’re often lost during removal.
What’s the best height for accessibility compliance?
For ADA compliance, mount the peephole’s center between 43" and 48" above the floor. This accommodates wheelchair users and children. Note: building inspectors require documentation if modifying rental property—check with your landlord before installing at non-standard heights.
A properly installed peephole delivers immediate security benefits without complexity or cost. Once you’ve done it once, you’ll notice how many doors in your neighborhood could use one—and you’ll be ready to help neighbors install theirs. Keep your spade bit sharp, your measurements precise, and your front door a little safer.