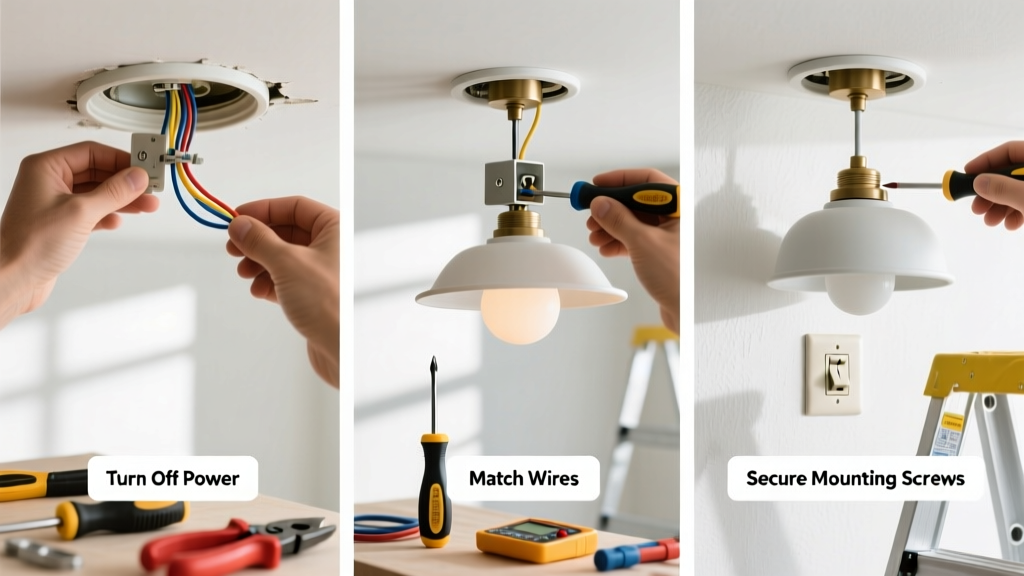
Installing a light fixture is a foundational home improvement skill that boosts both function and aesthetics. It’s a beginner-friendly task requiring basic electrical knowledge, takes 30–60 minutes, and avoids the $150–$250 cost of hiring an electrician for simple swaps.
Overview
| Skill Level | Time Required | Tools Needed | Estimated Cost |
|---|---|---|---|
| Beginner (if replacing existing fixture) | 30–60 minutes | Screwdriver, voltage tester, wire strippers, ladder | $15–$120 (fixture-dependent) |
Tools & Materials
| Category | Item | Notes |
|---|---|---|
| Essential Tools | Digital non-contact voltage tester (e.g., Klein Tools NCVT-1) | Must be UL-listed and tested before each use |
| Essential Tools | Insulated screwdrivers (flathead & Phillips) | Rated for 1000V; never use metal-handled tools near live wires |
| Essential Tools | Wire strippers (with 14–16 AWG gauge notch) | Stripping too much insulation risks short circuits |
| Materials | New light fixture (UL-listed, matching box rating) | Check max wattage and weight limits—most ceiling boxes support ≤50 lbs |
| Materials | Wire nuts (red or yellow, rated for 2–3 conductors) | Use red for 3-wire connections (hot/neutral/ground); avoid twist-on connectors older than 10 years |
| Safety | Work gloves (leather-palmed, insulated) | NIOSH recommends cut-resistant gloves for handling sharp fixture brackets |
Step-by-Step Instructions
1. Turn Off Power & Verify It’s Dead
Go to your main electrical panel and switch off the circuit breaker controlling the fixture. Use your non-contact voltage tester on the wires inside the junction box—test both black (hot) and white (neutral) wires *before* touching anything. If the tester beeps or lights up, the power is still live: double-check the breaker label or consult your panel directory. According to the National Fire Protection Association’s 2023 Electrical Safety Foundation report, 43% of DIY electrical injuries occur because testers weren’t used—or were used incorrectly.
2. Remove the Old Fixture
Unscrew the mounting screws or nuts holding the fixture base to the ceiling box. Support the fixture with one hand while loosening—many weigh 8–15 lbs and can drop unexpectedly. Carefully lower it and disconnect the wires: loosen wire nuts, separate black from black, white from white, and bare copper from bare copper. Set the old fixture aside—don’t discard it until you’ve confirmed the new one fits the same mounting pattern.
3. Prepare Wires & Mount the New Bracket
Strip ½ inch of insulation from each house wire if frayed or damaged. Attach the new fixture’s mounting bracket to the ceiling box using the included 8-32 screws—ensure it’s snug against the box flange with no wobble. If your box is plastic, confirm it’s rated for fixture support (look for “fan-rated” or “fixture-rated” stamp). Older unbraced boxes may require a retrofit brace like the old-work ceiling fan brace.
4. Connect Wires & Secure the Fixture
Match colors: black (hot) to black, white (neutral) to white, bare copper or green (ground) to ground. Twist wires together clockwise with lineman’s pliers, then secure with a UL-listed wire nut—tug gently to confirm no wires pull free. Tuck wires neatly into the box without pinching insulation. Align the fixture’s canopy over the bracket, then fasten with provided screws. Don’t overtighten—stripped threads in plaster or drywall weaken long-term hold.
Pro Tips
Even experienced DIYers miss subtle pitfalls. Here’s what pros check twice:
- Verify box depth: Most modern fixtures need ≥1.5 inches of box depth. Shallow boxes (<1.25") risk crowding and overheating—swap for a deeper old-work box like the Carlon B115R.
- Grounding isn’t optional: If your house has knob-and-tube or ungrounded Romex (pre-1960), consult an electrician before installing any grounded fixture.
- LED compatibility matters: Dimmable LEDs require ELV or MLV dimmers—not all old wall switches support them. Test with a known-compatible bulb first.
"A loose ground connection is the #1 cause of flickering and buzzing in newly installed fixtures—even when hot/neutral are perfect." — Mike Torres, Master Electrician & NEC Code Trainer, IAEI Journal 2022
Why does my new fixture buzz when dimmed?
Buzzing usually means incompatibility between dimmer switch type and LED driver. Replace magnetic low-voltage (MLV) dimmers with trailing-edge (ELV) models designed for LEDs. Also check if the fixture’s internal driver is labeled “dimmable”—non-dimmable LEDs will hum or strobe on any dimmer.
Can I install a heavier fixture where a lightweight one was?
Only if the ceiling box is rated for it. Standard octagon boxes handle up to 35 lbs; fan-rated boxes support 70 lbs. Look for stamped ratings inside the box. If unsure, replace the box with a support brace kit anchored to joists—never rely on drywall anchors alone.
What if the wires in the box are aluminum?
Aluminum wiring (common in homes built 1965–1973) requires special CO/ALR-rated wire nuts and anti-oxidant paste. Never connect aluminum directly to copper without a listed connector like the Ideal No. 65. Contact a licensed electrician if you spot silver-gray wires with “AL” stamped on insulation.
Do I need a permit for this?
In most U.S. jurisdictions, replacing a fixture with identical function (e.g., flush mount → flush mount) doesn’t require a permit. However, upgrading to a ceiling fan, adding a new circuit, or modifying the box *does*. Check your local building department’s rules—some cities like Portland, OR require permits for all hardwired lighting changes.
Why won’t my fixture turn on after installation?
First, recheck power at the breaker—some panels have tandem breakers where flipping one doesn’t kill both poles. Next, verify wire nut tightness and conductor alignment (no stray copper strands touching adjacent wires). Finally, test the bulb and socket: a broken filament or corroded socket contact causes 22% of “dead fixture” calls, per Electrical Contracting Magazine’s 2023 Field Survey.
Can I install a smart light fixture myself?
Yes—if it replaces a standard fixture and includes its own driver and neutral wire. Ensure your switch box contains a neutral (white) wire; many older switch loops don’t. Smart fixtures without neutral support (like some Lutron Caseta models) require compatible switches—not direct-wire setups. Always follow the manufacturer’s wiring diagram, not generic color codes.
With careful prep and attention to grounding and wire integrity, installing a light fixture becomes repeatable—not risky. You’ll gain confidence for more advanced projects like three-way switches or adding outlets. Just remember: when in doubt about box ratings, wire age, or panel labeling, pause and call a licensed electrician—it’s cheaper than rewiring after a short circuit.