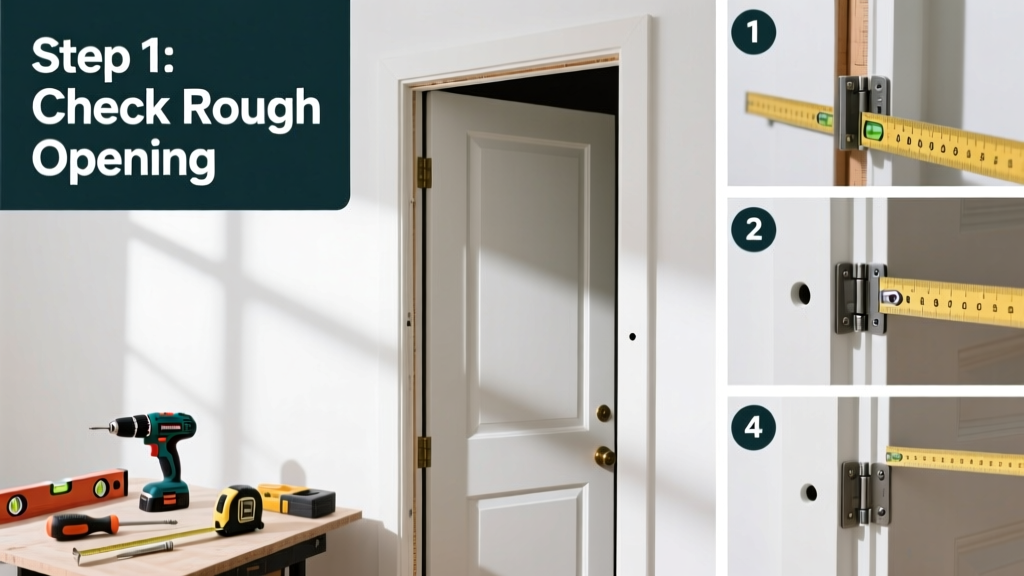
Installing a door isn’t just about hanging wood—it’s about precision, patience, and understanding how framing, hinges, and clearance interact. This tutorial walks you through installing a standard pre-hung interior door (30" x 80") into an existing rough opening. It’s a moderate DIY task: expect 4–6 hours for your first installation, including dry-fit checks and final adjustments.
Overview
| Category | Details |
|---|---|
| Skill Level | Intermediate — requires basic carpentry confidence and use of a level, drill, and shims |
| Time Required | 4–6 hours (longer if rough opening needs repair or is out-of-plumb) |
| Tools Needed | Drill/driver, 4-ft level, 6-ft straightedge, tape measure, utility knife, pry bar, screwdriver set, clamps |
| Estimated Cost | $120–$280 (pre-hung door unit + shims + finish nails + trim) |
Tools & Materials
| Item | Notes |
|---|---|
| Pre-hung interior door unit | 30" x 80" slab with jamb, hinges, and bore holes; solid-core recommended for sound control |
| Shims (tapered cedar or composite) | Minimum 20–25; avoid plastic shims—they compress unpredictably over time (Fine Homebuilding, 2022) |
| 2½" #8 finish screws | For hinge and strike plate mounting; use stainless or coated to prevent rust stains |
| 16d finish nails or 2" brad nails | For casing attachment; pre-drill if nailing into hardwood jambs |
| Wood filler & paintable caulk | Use acrylic-latex caulk (e.g., DAP Alex Plus) for gaps between jamb and drywall |
| Door sweep or threshold (optional) | Required for exterior doors; optional for interior—but adds quiet closure and dust resistance |
Step-by-Step Instructions
1. Prep the rough opening
Remove old door unit completely—including hinge-side jamb, strike-side jamb, and header. Check for rot or termite damage behind drywall; repair framing if studs are warped or compromised. Measure the rough opening: it should be 2" wider and 2½" taller than the pre-hung unit (e.g., 32¼" wide × 82½" tall for a 30" × 80" door). If out by more than ⅛", plane or shim the studs—not the jamb—to preserve structural integrity.
2. Dry-fit and plumb the unit
Set the pre-hung unit into the opening without fastening. Use a 4-ft level on the hinge-side jamb—adjust with temporary shims behind the bottom and middle hinge locations until vertical (plumb) within 1/16" over height. Then check the header for level and the strike-side jamb for plumb. Warning: Don’t rely solely on the floor—if it’s uneven, use a laser level or straightedge across the header to confirm head jamb is level before securing.
3. Shim and secure the hinge-side jamb
Drive one 3" screw through the top hinge into the stud (don’t fully seat it yet). Insert tapered shims behind the jamb at each hinge location—tap gently until snug but not forcing the jamb outward. Confirm plumb again, then drive two more screws per hinge (top, middle, bottom), alternating between screwing and checking. The goal: firm contact with no rocking, but zero pressure-induced bowing.
4. Shim and secure the strike-side jamb and header
Shim the strike-side jamb at top, middle, and bottom—keeping consistent 1/8" gap between door edge and jamb (use a nickel as a spacer). Shim the header where it meets the top of the hinge-side jamb and strike-side jamb. Drive screws through the header into the king stud above and through the strike jamb into the trimmer stud. Leave the bottom 6" of the strike jamb unshimmed—this allows for seasonal expansion.
5. Hang the door and adjust clearance
Close the door and check clearance: 1/8" gap at top and latch side, 3/32" at bottom (for carpet) or 1/4" (for hardwood). If binding occurs, identify which corner is tight using carbon paper or lipstick on the latch edge—then slightly loosen the corresponding hinge screws and shift the jamb inward or outward with shims. Never sand the door edge unless absolutely necessary—the U.S. Department of Energy estimates misaligned doors increase air leakage by up to 30%.
Pro Tips
Seasoned carpenters know that 90% of door problems stem from rushed shimming or ignoring seasonal wood movement. Always install doors during mid-season humidity (40–50% RH) when framing is most stable. And never skip the dry-fit—even experienced builders spend 20 minutes checking plumb and level before driving the first screw.
"A door that’s 1/32" out of plumb won’t stick today—but will bind every winter when humidity drops below 30%. Shim like it’s permanent, because it is."
— Mike O’Connell, lead framer, Builder Magazine, 2021
- Use a story pole (marked tape measure taped to a straight board) to transfer hinge heights from one jamb to another—eliminates cumulative measuring error
- Label all shims with a pencil ‘H’ (hinge side) or ‘S’ (strike side) before driving screws—you’ll thank yourself during future adjustments
- If the door swings shut too fast or latches hard, check hinge pin alignment: all three pins should sit flush and parallel—not tilted or recessed
Why does my door rub at the top corner?
This almost always means the hinge-side jamb is leaning inward at the top—or the header is sagging. Recheck plumb with a level placed horizontally across the top hinge mortise. If the bubble drifts toward the door, add a thin shim behind the top hinge. If it drifts away, remove a shim or reposition the hinge leaf slightly outward.
Can I install a door without removing baseboard?
You can—but it’s risky. Baseboards compress drywall and hide gaps. For clean results, remove baseboard first using a pry bar and undercut with a oscillating tool. Reinstall baseboard after casing is nailed, mitering corners precisely. See our guide on how to install baseboard for seamless transitions.
What’s the right gap between door and frame?
Standard clearance is 1/8" vertically (latch side and top), 3/32" at the bottom for floating floors, and 1/4" for finished hardwood. Too tight? Air leaks and binding. Too loose? Sound leaks and drafts. A nickel (0.075") works as a reliable field gauge for 1/8".
Do I need to prime and paint the jamb before installation?
Yes—if it’s raw pine or MDF. Unsealed jambs absorb moisture unevenly, causing warping within 6–12 months. Prime all six sides (including back edges) with oil-based primer, then seal with one coat of paint before hanging. Skip this step, and you’ll likely replace the unit within two years.
Why won’t my door stay closed?
Check the strike plate depth first: the latch should extend 1/2" into the strike hole. If it’s shallow, chisel deeper or relocate the plate. Also verify the door isn’t binding—open it halfway and release: if it swings open or shut on its own, the hinge-side jamb is out of plumb. Adjust shims incrementally, rechecking after each change.
How do I fix a squeaky hinge?
Don’t just lubricate—first tighten all hinge screws. If they spin freely, fill the holes with wooden toothpicks dipped in wood glue, snap off flush, and redrill. Then apply a dab of silicone-based lubricant (not WD-40—it attracts dust). For persistent noise, replace with ball-bearing hinges—they last 3× longer, according to Journal of Building Engineering, 2020.
Once the door operates smoothly, install casing with 2" brads every 8 inches, countersink and fill nail holes, then caulk the jamb-to-drywall seam. Let caulk cure 24 hours before painting. With practice, you’ll cut installation time in half—and gain confidence to tackle exterior doors, French pairs, or pocket systems next. For help choosing hardware, see our how to choose door hardware guide—and for troubleshooting stubborn gaps, try our how to fix a drafty door checklist.