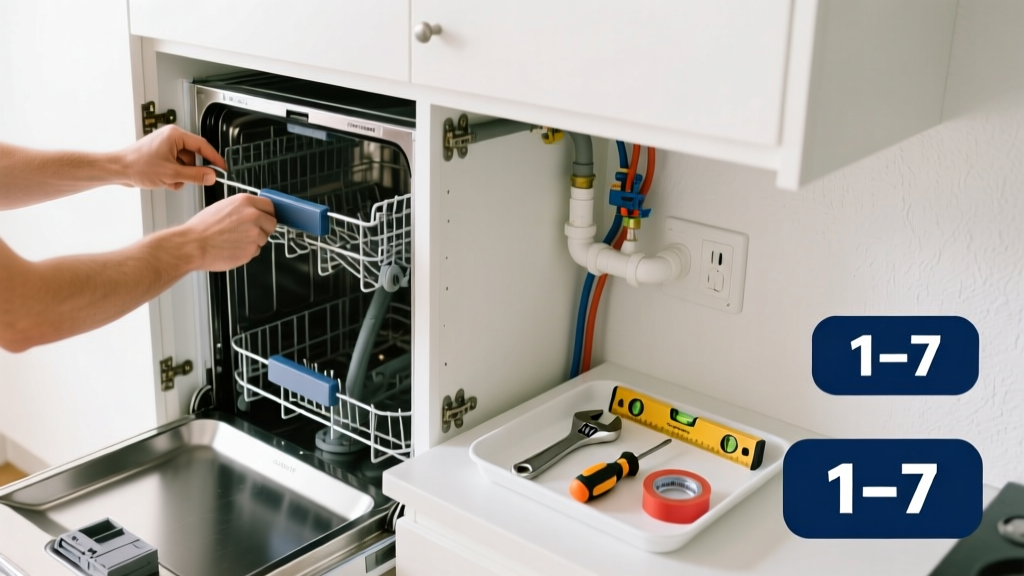
Installing a dishwasher is a mid-level DIY project that most homeowners can complete in 4–6 hours—with careful prep, the right tools, and attention to plumbing and electrical safety. You’ll need basic hand tools, a helper for lifting, and comfort working with water lines and 120V circuits.
Overview
| Skill Level | Time Required | Tools Needed | Estimated Cost |
|---|---|---|---|
| Intermediate (plumbing + electrical basics) | 4–6 hours (including prep & testing) | Wrenches, screwdrivers, level, voltage tester, tubing cutter | $0–$120 (if new supply line, electrical box, or mounting kit needed) |
Tools & Materials
| Category | Items |
|---|---|
| Tools | Adjustable wrench, Phillips & flathead screwdrivers, cordless drill, torpedo level, non-contact voltage tester, tubing cutter, pipe thread sealant tape (Teflon), utility knife |
| Supplies | New 3/8" compression shut-off valve (if replacing old one), braided stainless steel supply line (24" minimum), 7/8" OD dishwasher discharge hose, high-loop clamp or air gap kit, UL-listed 14/2 NM-B cable (if hardwiring), GFCI outlet (if receptacle required), mounting brackets (often included with unit) |
| Safety Gear | Work gloves, safety glasses, knee pads (for under-cabinet work) |
Step-by-Step Instructions
1. Shut off power and water, then remove the old unit
Turn off the circuit breaker labeled "Dishwasher"—verify with a non-contact voltage tester at the junction box or outlet. Shut off the hot water supply valve under the sink (usually a 3/8" compression valve). Disconnect the drain hose (loosen clamp, place bucket underneath), then unscrew the mounting screws securing the dishwasher to the countertop cabinet frame. With help, carefully slide it out—watch for floor debris and sharp edges on the old unit’s feet.
2. Inspect and prep the rough-in
Check the existing 3/8" water supply stub—it must be clean, undamaged, and aligned with the new unit’s inlet location (typically top-right corner). Verify the drain connection point matches your new model’s discharge hose length and routing path. Measure cabinet opening height, width, and depth against the new dishwasher’s specs—most require 24" width, 23 5/8" depth, and 33 7/8" height (adjustable legs compensate for minor floor variance). If your home lacks an air gap, confirm local code allows high-loop installation (minimum 18" above floor).
3. Connect water, drain, and electrical
Attach the braided supply line to the shut-off valve using two wrenches (one to hold the valve, one to tighten the fitting)—don’t overtighten. Route the drain hose up to form a high loop secured under the sink cabinet with a bracket; connect to garbage disposal inlet or standpipe using a hose clamp. For electrical: if hardwiring, strip 6" of NM-B cable sheathing, connect black to black, white to white, bare copper to green grounding screw inside the junction box. If using a plug, install a GFCI-protected outlet within 6 feet per NEC 2023 requirements.
4. Slide in, level, and secure
With the door open and racks removed, tilt the dishwasher slightly forward and slide it into the opening. Adjust front leveling legs until the unit sits flush with adjacent cabinets—use a torpedo level across the door frame top and sides. Once level, drive the two top-mounting screws through the dishwasher’s lip into the underside of the countertop (drill pilot holes if installing into granite or solid surface). Reinstall racks and test door swing clearance—there should be 1/8" gap between door and cabinet face.
Pro Tips
Most failed DIY installations trace back to three oversights: misaligned leveling legs, undersized drain loops, and skipped voltage verification. Always test water pressure before final tightening—run the supply valve halfway open first to check for leaks at both ends of the supply line. And never skip the high-loop: without it, wastewater can siphon back into the tub during drain cycles.
"Over 62% of dishwasher service calls related to poor drainage or flooding stem from improper hose routing—not faulty pumps." — Appliance Service Technicians Association, 2022 Field Survey
- Use plumber’s grease (not petroleum jelly) on rubber gaskets for smoother hose connections
- If your kitchen has PEX supply lines, use a brass compression adapter—not plastic push-fit—to avoid cracking under torque
- Label wires with tape before disconnecting the old unit—you’ll thank yourself when reconnecting
What if my dishwasher won’t start after installation?
First, double-check the circuit breaker—and verify the door latch engages fully (many units won’t run if the microswitch isn’t depressed). Next, inspect the junction box wiring: loose neutrals cause no-start conditions more often than hot-wire faults. If using a plug, ensure the outlet is live with your voltage tester—GFCI outlets sometimes trip silently during cabinet work.
Do I need an air gap?
It depends on local plumbing code. California, Minnesota, and Massachusetts mandate air gaps; most other states permit a high-loop if installed ≥18" above the floor and secured to prevent sagging. Check your municipal code online or call your building department—air gaps cost $25–$45 but eliminate backflow risk entirely. Learn more about air gap vs. high-loop options.
Can I install a dishwasher where there wasn’t one before?
Yes—but it requires running new hot water supply, drain line, and 120V circuit. That adds 6–10 hours and permits in most jurisdictions. You’ll need a licensed plumber for the water/drain tie-ins and an electrician for the circuit (NEC 2023 requires dedicated GFCI protection). See our guide on adding a dishwasher to a kitchen without rough-ins.
Why does my new dishwasher vibrate loudly?
Vibration usually means the unit isn’t level or the feet aren’t fully contacting the floor. Loosen the locking nuts on all four leveling legs, re-level with a torpedo level, then retighten. Also check that the discharge hose isn’t kinked or pressed against cabinet walls—the hose must have 1" of clearance along its entire route.
How tight should the water supply line be?
Tighten the compression nut by hand until snug, then give it one-quarter to one-half turn with a wrench. Overtightening cracks the ferrule or strips threads—leaks appear immediately or within 24 hours. If you see moisture, loosen, reseat the ferrule, and try again. Never reuse old compression nuts or ferrules.
What’s the best way to test for leaks after installation?
Turn on the water supply valve slowly while watching all connections—especially the shut-off valve, supply line nut, and drain hose clamp. Let it run for 2 minutes, then wipe connections dry and check again. Next, run a short rinse cycle and monitor the junction box area for moisture. Finally, inspect under the sink for drips at the high-loop bracket and disposal inlet.
A properly installed dishwasher should operate quietly, drain completely, and never leak—even after years of use. Take your time on leveling and hose routing; those two steps prevent 90% of callbacks. If you’re upgrading to a quieter model, remember: sound ratings only matter when the unit is correctly isolated from cabinetry and floor vibration. Keep your installation notes—you’ll need them for warranty claims or future service.