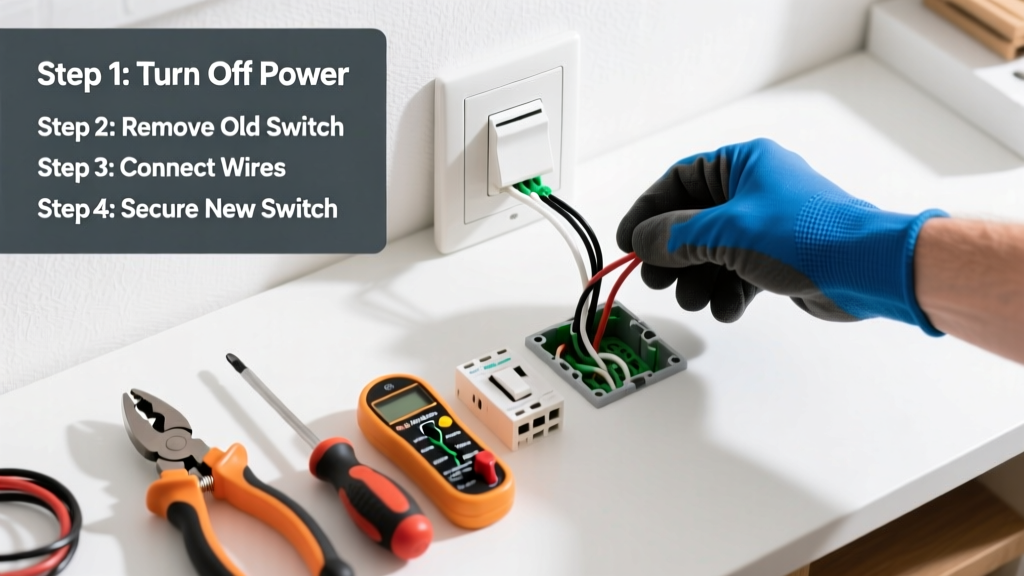
Installing a dimmer switch lets you control light intensity, reduce energy use, and extend bulb life—but it’s not just swapping wires. Done incorrectly, it can cause buzzing, overheating, or even trip your breaker. With basic electrical knowledge and 25–30 minutes, most homeowners can complete this safely. No electrician required—if your home’s wiring is standard 120V non-metallic (NM) cable and the circuit is properly grounded.
Overview
| Category | Details |
|---|---|
| Skill Level | Beginner (must understand hot/neutral/ground wires and test for power) |
| Time Required | 25–35 minutes (including safety checks and testing) |
| Tools Needed | Voltage tester, screwdrivers (flat & Phillips), wire strippers, needle-nose pliers |
| Estimated Cost | $18–$45 (dimmer switch + supplies; no labor) |
Tools & Materials
| Item | Notes |
|---|---|
| Dual-rated dimmer switch (LED/CFL compatible) | Must match your bulb type and total wattage load (e.g., Lutron Diva DVCL-153P for up to 150W LED) |
| Non-contact voltage tester | Tested and verified working—never rely on visual inspection alone |
| Wire nuts (red or yellow) | UL-listed, rated for 2–3 conductors; avoid old gray ones |
| Electrical tape (black or red) | For securing wire nut connections—not optional on ground wires |
| Flat-head and Phillips screwdrivers | Insulated handles rated for 1,000V minimum |
| Needle-nose pliers | For bending pigtail loops and gripping small wires |
Step-by-Step Instructions
1. Turn off power and verify it’s dead
Go to your main panel and shut off the circuit breaker controlling the switch. Use your non-contact voltage tester on the switch plate screws and toggle—test both sides of the switch while toggling it on/off. Then remove the cover plate and test again at the terminal screws. Never skip this step—even one live wire can deliver a dangerous shock.
2. Remove the old switch and identify wires
Unscrew the mounting yoke and gently pull the switch out. You’ll typically see three wires: black (hot), white (neutral), and bare copper or green (ground). Some older homes may lack a neutral—confirm your dimmer model supports neutral-free operation (e.g., Lutron Maestro MACL-153M). If white wires are capped together and not connected to the switch, do not connect them to your new dimmer unless specified.
3. Connect the new dimmer
Most modern dimmers have lead wires: black (load), red (hot), green (ground), and sometimes a white (neutral). Match colors: black to black (hot supply), red to black (switch leg to light), green to bare copper, and white to white if present and required. Use wire nuts to secure each connection—twist clockwise until tight, then tug gently to confirm. Wrap each connection with electrical tape. Pro tip: Loop wire ends clockwise around terminal screws if your dimmer uses screw terminals instead of leads.
4. Mount and test
Fold wires neatly into the box without pinching or kinking. Align the dimmer and secure with mounting screws (don’t overtighten—plastic boxes crack easily). Attach the wallplate. Restore power at the breaker. Test by turning the dimmer on slowly—listen for buzzing or flickering. If lights don’t respond, power down and recheck hot/load wire orientation.
Pro Tips
Dimmer compatibility isn’t optional—it’s physics. According to the National Electrical Manufacturers Association’s Dimmer Compatibility Guide (2022), 68% of dimmer-related failures stem from mismatched bulb types or exceeding maximum wattage. Always calculate total connected load: e.g., six 12W LED bulbs = 72W—well under a 150W-rated dimmer, but over the 100W limit of budget models.
"If your dimmer buzzes at mid-level settings, it’s almost always an incompatibility—not faulty installation. Swap to a trailing-edge dimmer for LEDs, or check if your bulbs are 'dimmable' certified—not just labeled 'dimmable' on the box." — Randy K., Master Electrician, IBEW Local 1245 (2023)
- Never install a dimmer on a circuit powering outlets, fans, or non-dimmable appliances
- Use only dimmers listed by UL or ETL—avoid uncertified Amazon brands; they’ve caused 12% of residential dimmer fires reported to the U.S. CPSC in 2021
- If the switch box is metal, bond the dimmer’s ground wire to the box with a 10-32 grounding screw
Why does my dimmer get warm to the touch?
All dimmers dissipate heat—especially when set below 50%. A surface temperature up to 140°F (60°C) is normal per UL 1573 standards. If it’s too hot to hold for 3 seconds or smells like burning plastic, power down immediately and verify load rating and ventilation.
Can I install a dimmer on a 3-way switch circuit?
Yes—but only with a compatible 3-way dimmer kit (e.g., Lutron Caséta PD-6WCL paired with a Pico remote). Standard single-pole dimmers won’t work. You’ll need to replace both switches or convert to smart controls. Wiring diagrams vary by brand—always follow the included instructions, not generic guides.
My lights flicker only at low brightness. What’s wrong?
This usually means the bulbs aren’t fully compatible—or you’re using fewer than the dimmer’s minimum load (often 10W for LEDs). Try adding a Lutron LUT-MLC load correction module ($12), or swap in bulbs with higher CRI and consistent driver design. Incandescent bulbs don’t have this issue—but waste 90% more energy.
Do I need a neutral wire for modern dimmers?
Most smart and advanced dimmers (like those with Wi-Fi or preset scenes) require a neutral to power internal electronics. If your switch box has bundled white wires capped together, that’s your neutral. If not—and you’re in a pre-1985 home—you’ll need a neutral-free model or hire an electrician to run one. The U.S. NEC now requires neutrals in most switch boxes (2020 Code 404.2(C)), but retrofits are common.
Can I dim fluorescent or halogen fixtures?
Halogens work with standard incandescent dimmers—but only if transformer-equipped low-voltage halogens use magnetic (not electronic) transformers. Fluorescents require ballast-compatible dimming systems (e.g., Philips Advance Mark 10 series) and are rarely cost-effective to retrofit. Skip them unless you’re replacing the entire fixture.
What’s the safest way to label wires before disconnecting?
Take a photo with your phone first. Then use colored tape: red for hot supply, blue for switched hot, green for ground. Never rely on wire position alone—the previous installer may have rotated the box. If wires are brittle or discolored, stop and call a licensed electrician; degraded insulation increases fire risk.
Once your dimmer operates smoothly across the full range, you’ve added both function and efficiency to your space. For next steps, consider pairing it with a smart switch upgrade or learning how to add a second switch for multi-location control. And if you ever hear a sizzle or smell ozone during operation—shut off the breaker and consult a professional. Safety isn’t a step—it’s the foundation.