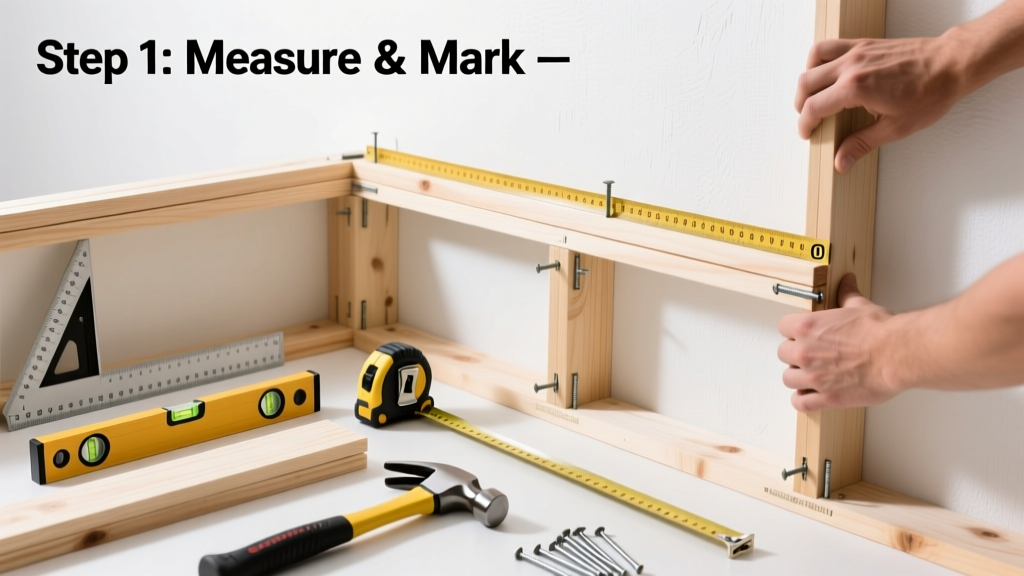
Framing a wall is a foundational carpentry skill that bridges planning and structure—it’s where blueprints become reality. This tutorial walks you through building a standard 8-foot-tall, non-load-bearing interior wall from scratch. Difficulty is moderate (requires measuring precision and basic power tool safety), and most first-timers complete it in 4–6 hours with a helper.
Overview
| Category | Details |
|---|---|
| Skill Level | Intermediate — requires familiarity with tape measures, levels, and nail guns |
| Time Required | 4–6 hours (plus drying time if attaching drywall immediately) |
| Tools Needed | Tape measure, 4-ft level, chalk line, framing square, cordless drill, 16-gauge nail gun or hammer, speed square, utility knife |
| Estimated Cost | $45–$85 (for 2x4s, plates, nails, and hardware; excludes insulation or drywall) |
Tools & Materials
| Item | Quantity & Specs | Notes |
|---|---|---|
| 2x4 SPF studs | 13 pieces @ 92-5/8" long (pre-cut “stud length”) | Use kiln-dried, #2 grade or better; check for warps before cutting |
| 2x4 top/bottom plates | 2 pieces @ 10 ft 0" (or cut to exact wall length) | Must be straight—no crowns or twists |
| 16d common nails or 3" screws | 1 box (1 lb) nails or 100 screws | Nails preferred for speed; screws for shear strength in seismic zones |
| Wall anchors & shims | 4 toggle bolts (for concrete), 8 wood shims | Use masonry anchors only if attaching to concrete; shims compensate for floor/ceiling irregularities |
| Chalk line & pencil | 1 set | Mark plate locations clearly—double-check against adjacent walls and door openings |
Step-by-Step Instructions
1. Measure and mark the floor and ceiling
Use a tape measure and chalk line to snap parallel lines on the floor and ceiling exactly 10 feet apart—the full wall length. Verify alignment with a 4-ft level placed across both lines at three points. If your ceiling joists run perpendicular to the wall, locate their centers using a stud finder or by tapping—mark each joist center above the ceiling line. Warning: Never assume joists are spaced at 16" on-center—measure every one. Misaligned top plates cause drywall cracks later.
2. Cut and lay out the bottom and top plates
Cut two 2x4s to your exact wall length (e.g., 120" for a 10-ft wall). Lay them flat on sawhorses. Mark stud positions on the top plate at 16" on-center, starting 15-1/4" from the left end (so the first stud lands flush with the edge). Repeat for the bottom plate—but offset the first mark by 1" to avoid stacking seams. Use a framing square to transfer marks cleanly across both edges.
3. Assemble the wall flat on the floor
Position the bottom plate face-up. Place studs upright between plates, aligning their edges with your marks. Nail each stud to both plates using two 16d nails per side—or drive four 3" screws per connection for added rigidity. Insert blocking between studs at 48" height if hanging cabinets later. Tip: Build the wall flat—it’s safer, faster, and ensures square corners. Check diagonals: measure corner-to-corner both ways; they must match within 1/8".
4. Raise and secure the wall
With help, lift the wall into position. Tilt it up slowly, keeping the bottom plate aligned with your floor line. Brace temporarily with 2x4 kickers nailed to adjacent walls. Shim gaps between top plate and ceiling joists—use cedar shims, not folded cardboard. Secure the top plate to each ceiling joist with two 16d nails or 3" structural screws. Anchor the bottom plate to the subfloor with 3" screws every 24"—avoid nailing into concrete unless using appropriate anchors.
Pro Tips
Seasoned framers know that 80% of framing problems stem from skipping layout verification. According to the National Association of Home Builders’ Builder Best Practices Manual (2022), misaligned plates account for over 60% of drywall repair callbacks in new construction.
“Always plumb the wall *before* nailing the top plate—once it’s fastened to the joist, correcting a 1/4" lean takes more time than fixing it during the 90-second window while it’s still braced.”
— Carlos M., lead framer with 27 years’ experience, Chicago Framing Collective
Avoid these common mistakes: forgetting fire blocking in concealed spaces (required by IRC R602.8 for walls over 10 ft tall), using green lumber that shrinks and cracks drywall joints, or toe-nailing studs at angles less than 30° (reduces holding power by 40%, per APA Engineered Wood Association test data).
What’s the difference between a load-bearing and non-load-bearing wall?
A load-bearing wall supports roof, floor, or ceiling weight above it—its studs, plates, and connections must meet structural code requirements (e.g., doubled top plates, jack/king studs around openings). Non-load-bearing walls carry only their own weight and drywall. To verify, check your home’s original blueprints or consult a structural engineer—never assume based on thickness or location.
Can I frame a wall over carpet or tile?
You can—but only if you anchor securely to the subfloor beneath. Cut carpet and pad away along the bottom plate path, and remove tile grout lines to expose plywood or OSB. For hardwood floors, use finish nails driven at a 45° angle through the plate into the subfloor. Never rely solely on adhesive or thin-set underlayment.
How far apart should studs be spaced?
Standard spacing is 16 inches on-center for walls supporting drywall, insulation, or cabinets. Some non-structural partitions use 24" o.c. to save material—but only if drywall is 5/8" thick and installed vertically. The U.S. Department of Housing and Urban Development’s 2023 Residential Construction Standards requires 16" o.c. for all walls with plumbing chases or electrical boxes.
Do I need a permit to frame an interior wall?
In most municipalities, yes—if the wall alters egress, adds plumbing/electrical, or affects smoke detector placement. Even non-load-bearing walls often require a permit when built in rental units or condos. Contact your local building department before cutting lumber—they’ll confirm whether a simple “alteration application” suffices or if engineered drawings are needed.
How do I frame around existing pipes or ductwork?
Measure pipe/duct diameter and location precisely. Cut a stud to fit snugly beside it, then notch the adjacent stud no deeper than 25% of its width (so a 2x4 loses ≤ 1-1/4" depth). Wrap pipes with foam insulation before framing to prevent condensation noise. For ducts wider than 8", build a framed chase with access panels—see our guide on how to build a drywall chase.
What type of nails should I use for framing?
Use hot-dipped galvanized 16d common nails (3-1/2" long, 0.162" shank) for standard interior framing. For pressure-treated sills on concrete, switch to stainless steel or ceramic-coated nails rated for ACQ lumber. Avoid ring-shank nails unless specified—standard smooth-shank nails allow slight adjustment during assembly. For seismic zones, the International Building Code (IBC 2021) requires structural screws meeting SDWS rating for all critical connections.
Once your wall is plumb, anchored, and braced, you’re ready for insulation and drywall. Take photos before covering—especially of electrical rough-ins or hidden blocking. That documentation saves hours during future repairs or renovations. For next steps, see our tutorials on how to install drywall and how to wire a light switch inside framed walls.