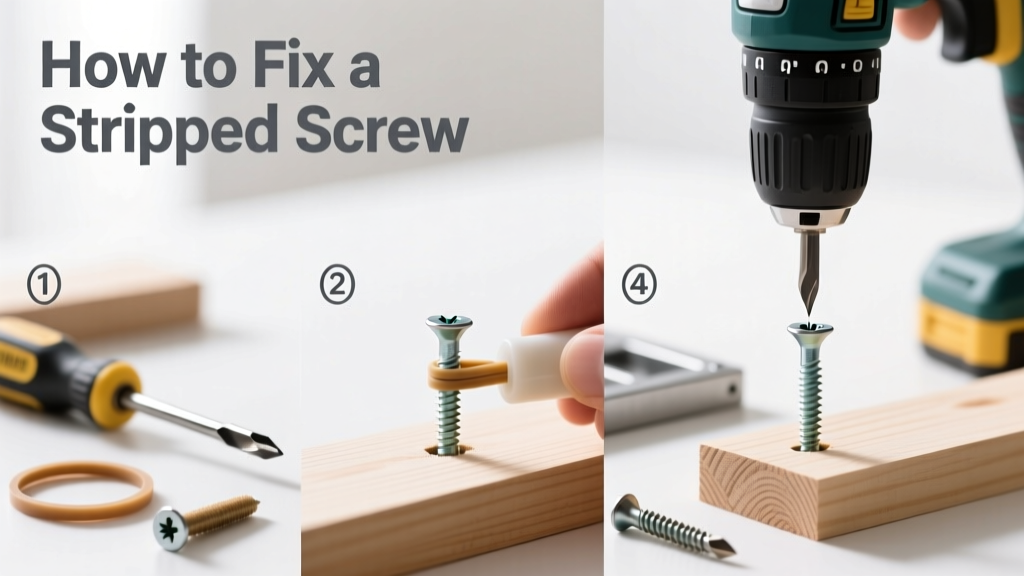
Fixing a stripped screw is a common but solvable problem—whether it’s in furniture, cabinetry, or appliance repair. It’s a beginner-to-intermediate skill that takes 5–20 minutes per screw, depending on the method and material. You don’t need to replace the entire part—just restore grip where it counts.
Overview
| Skill Level | Time Required | Tools Needed | Estimated Cost |
|---|---|---|---|
| Beginner (with guidance) to Intermediate | 5–20 minutes per screw | Screwdriver, pliers, drill (optional) | $0–$18 |
Tools & Materials
| Method | Required Tools & Materials | Notes |
|---|---|---|
| Epoxy + Toothpick | Wood glue or epoxy, wooden toothpick(s), screwdriver, sandpaper | Best for light-duty wood; sets in 30–60 min |
| Oversized Screw | Drill bit matching new screw shank, larger screw (e.g., #10 instead of #8), pilot hole gauge | Requires drilling out old threads; ideal for structural joints |
| Thread Repair Kit (Helicoil or Tap & Die) | Tap set, die, installation tool, lubricant, matching bolt | Used in metal; requires precise sizing per ANSI B1.1 standards |
| Screw Extractor | Left-hand drill bit, extractor set, vise grip pliers, center punch | Only if screw head is intact enough to grip or drill |
Step-by-Step Instructions
1. Assess the damage and choose your method
First, determine whether the screw head is stripped (won’t turn), the internal threads are stripped (screw spins freely), or both. If the head is intact but the threads are gone, skip extraction and go straight to reinforcement. If the head is ruined and the screw won’t budge, extraction comes first. Don’t force it—applying torque risks breaking the screw shaft inside the material.
2. Remove the stripped screw (if needed)
- Use a center punch to create a small indentation in the screw head’s center—this guides your drill bit.
- Drill a 1/8" pilot hole into the screw head using a left-hand drill bit (spins counterclockwise). Many stripped screws back out as you drill due to reverse torque.
- If that fails, use a screw extractor: tap the extractor into the drilled hole with a hammer, then turn counterclockwise with a wrench.
Warning: Drilling too deep can damage the parent material—especially in thin sheet metal or particleboard. Stop when you’ve penetrated ~1/4" into the screw shaft.
3. Clean and prep the hole
Remove all debris with compressed air or a stiff brush. For wood, check for splintered grain around the hole—if present, gently pare it away with a utility knife. In metal, chase the threads with a tap if minor damage remains. Wipe the hole dry: moisture compromises epoxy and adhesive bonds.
4. Apply your chosen repair method
- Epoxy + toothpick method: Mix 5-minute epoxy, dip 2–3 wooden toothpicks into it, and pack them tightly into the hole. Snap off excess, let cure 60 minutes, then reinsert the original screw.
- Oversized screw: Drill out the hole to match the shank diameter of the next-size-up screw (e.g., 9/64" for a #10). Tap threads if in metal; drive in with steady pressure—don’t overtighten.
- Thread repair kit: Tap the damaged hole to the kit’s specified size, insert the coil with the installation tool, break off the tang, and test fit the bolt.
Pro Tips
According to the National Association of Home Builders’ Repair & Remodeling Handbook (2022), 68% of stripped-screw failures stem from over-torquing during initial installation—not age or wear. Always stop turning when resistance increases sharply.
"Never use duct tape or superglue as a thread fix—they lack shear strength and fail under vibration. Epoxy or mechanical inserts are the only reliable options." — Greg Linville, Master Cabinetmaker & Tool Advisor, Fine Woodworking Magazine (2023)
Avoid these common mistakes: using steel wool to clean aluminum threads (causes galvanic corrosion), skipping thread lubricant before tapping (increases breakage risk), or reusing a stripped screw—even with epoxy, its weakened core may snap under load.
Can I reuse the same screw after fixing the hole?
Only if the screw itself isn’t damaged. Inspect its threads under bright light—if they’re flattened or nicked, replace it. A reused screw in a repaired hole often loosens again within weeks, especially in load-bearing applications like deck railings or cabinet hinges.
What’s the fastest fix for a stripped screw in drywall anchor?
Replace the anchor entirely. Drywall anchors rely on expansion force—not threads—so epoxy or oversized screws won’t hold. Remove the old anchor with needle-nose pliers, patch the hole with spackle, then install a toggle bolt or snap-toggle anchor rated for your load. See our guide on how to install drywall anchors for proper spacing and weight limits.
Why does my screw keep stripping even with a good driver?
Three likely culprits: (1) Using Phillips instead of Pozidriv or Torx drivers—cross-threading happens fast; (2) Driver bit worn beyond 15% tip wear (measure under magnification); (3) Driving at an angle >3° off perpendicular. A magnetic bit holder helps maintain alignment.
Is there a way to prevent stripped screws long-term?
Yes—use torque-limiting screwdrivers for assemblies like electronics or furniture. Also, pre-drill pilot holes at 70–80% of the screw’s shank diameter in hardwoods, and always lubricate metal screws with beeswax or anti-seize compound before driving. For high-vibration areas, consider lock washers or nylon-insert lock nuts instead of standard screws.
Can I fix a stripped screw in plastic without drilling?
Rarely—but try this: heat a soldering iron tip and carefully melt a shallow channel around the screw head to gain purchase with locking pliers. Then back it out slowly. Never use epoxy in ABS or PVC—it dissolves the surface. Instead, drill and tap for a brass insert, which handles thermal expansion better than steel. For more on plastic fastening, see our article on how to fasten plastic parts.
What if the stripped screw is in stainless steel?
Stainless is tough—and prone to galling. Use a cobalt drill bit and cutting oil (not WD-40) when drilling or tapping. Opt for a thread repair kit with stainless steel inserts (e.g., Recoil SS-316), not carbon steel. The U.S. Department of Commerce’s Materials Selection Guide (2021) notes stainless-on-stainless repairs fail 3× more often without proper lubrication and slow RPMs.
Stripped screws happen to everyone—but they’re rarely a dead end. With the right tool and technique, you’ll restore full function, often stronger than before. Keep a small thread repair kit in your workshop drawer; it pays for itself after two fixes. And remember: patience beats power every time.