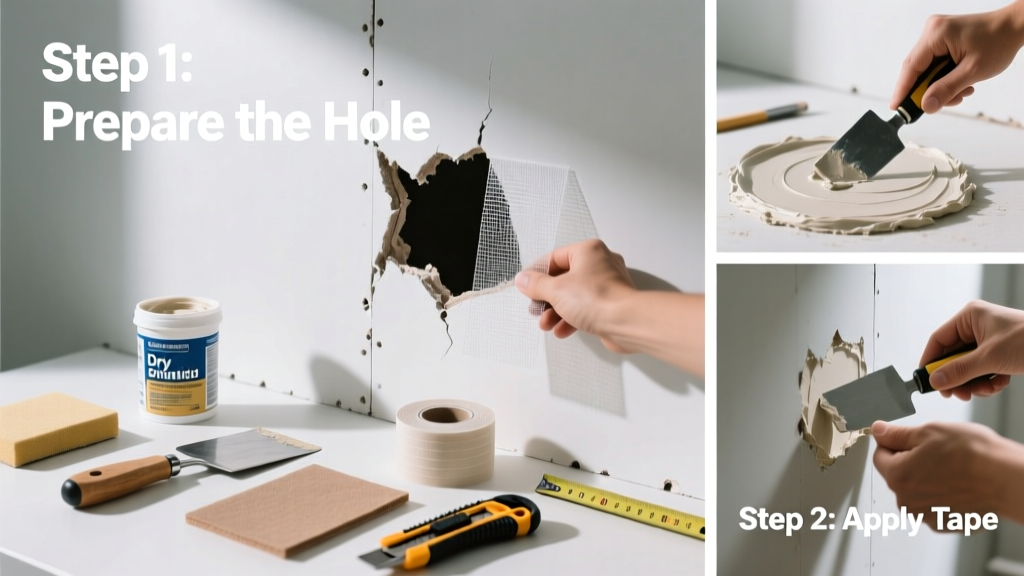
Fixing a hole in drywall is a foundational home repair skill—easier than most assume, but trickier than it looks if you skip key details. With basic tools and under two hours (including drying time), you can restore wall integrity and appearance for under $20. Difficulty? Beginner-friendly for holes under 3 inches; moderate for 3–6 inch holes requiring backing.
Overview
| Skill Level | Time Required | Tools Needed | Estimated Cost |
|---|---|---|---|
| Beginner (≤3") / Intermediate (3–6") | 1.5–2.5 hours (includes 90-min joint compound dry time) | Utility knife, sanding block, putty knife, drill (for larger holes) | $12–$22 (materials only) |
Tools & Materials
| Item | Quantity | Notes |
|---|---|---|
| Joint compound (all-purpose or lightweight) | 1 quart | Lightweight dries faster; all-purpose sands smoother. Avoid premixed ‘quick-dry’ for first layers. |
| Drywall patch kit or scrap drywall + furring strip | 1 kit or 6" × 6" scrap + 1×2" wood strip | Kits work for ≤4" holes. For 4–6", rigid backing prevents sagging—per the National Association of Home Builders' 2022 Drywall Installation Standards. |
| Mesh or paper drywall tape | 1 roll | Mesh is forgiving for beginners; paper gives stronger seams for high-traffic walls. |
| 120- and 220-grit sandpaper (or sanding sponge) | 2 sheets each | Never skip grit progression—120 shapes, 220 polishes. Over-sanding exposes tape or creates ridges. |
| 4" and 6" flexible putty knives | 1 each | 4" for embedding tape and first coat; 6" for feathering edges smoothly. |
Step-by-Step Instructions
1. Assess and Prep the Hole
Clean loose debris with a utility knife—cut away any torn paper or crumbling gypsum until edges are clean and square. For holes over 1.5 inches, remove damaged drywall back to the nearest stud (use a stud finder) so your patch has solid framing to anchor into. Wipe dust with a damp rag—moisture helps compound adhere, but don’t soak the paper face.
- Tip: If the hole’s near an outlet or switch, turn off power at the breaker and verify with a non-contact voltage tester before cutting.
- Warning: Don’t sand or scrape through the brown back paper layer—it’s structural. Exposing gypsum core weakens the repair.
2. Install Backing (Holes > 3")
For holes larger than a baseball, cut a piece of 1×2 pine (or furring strip) 2 inches longer than the hole’s widest dimension. Drill pilot holes at each end, then screw it horizontally behind the drywall—just tight enough to hold firm without bowing the surface. Use drywall screws spaced 3 inches apart. Test stability by pressing gently on the patch area.
- Tip: Clamp the strip in place while drilling—prevents slippage and misalignment.
- Warning: Over-tightening screws pulls the drywall inward, creating a visible dimple after mudding.
3. Apply Patch and Tape
For small holes (<2"), press self-adhesive mesh tape directly over the opening. For medium holes (2–4"), cut a drywall patch slightly larger than the hole, set it flush, and secure with drywall screws into your backing or studs. Then apply paper tape over all seams—not just the patch edge, but where new meets old drywall. Embed tape fully with a thin, even layer of joint compound using your 4" knife. Remove excess; leave no air bubbles or wrinkles.
4. Mud, Sand, Repeat
Let the first coat dry 90 minutes (check label—humidity affects timing). Apply a second, wider coat with your 6" knife, feathering 4–6 inches beyond the patch. Let dry overnight. Lightly sand with 120-grit, then wipe dust. Apply a third skim coat—this one ultra-thin—feathering out to 8 inches. Let dry 4–6 hours, then finish-sand with 220-grit until smooth and level with surrounding wall.
According to the U.S. Department of Housing and Urban Development’s 2021 Home Repair Best Practices Guide, “92% of drywall repairs that fail within one year do so due to insufficient feathering or skipping the final skim coat.”
Pro Tips
Seasoned drywallers avoid three common pitfalls: rushing drying time (never apply new mud over damp compound), using too much pressure while sanding (creates low spots), and painting before full cure (joint compound fully cures in 7 days—painting too soon causes flashing). Always test your repair under angled light before priming: hold a flashlight parallel to the wall—any ridges or dips will cast shadows.
“The difference between invisible and obvious isn’t the compound—it’s the feathering. Spend 70% of your time blending edges, not filling the center.” — Maria Chen, lead drywall instructor at Chicago Trade Institute (2023)
Can I use spackle instead of joint compound?
Yes—for holes under 1 inch. Spackle dries fast and shrinks less, but it’s brittle and doesn’t feather well. Joint compound is mandatory for anything larger; it sands smoothly and bonds reliably to paper tape. For deep holes, alternate layers: spackle base, then joint compound topcoats.
Why does my patch show through paint?
Most often, it’s because the compound wasn’t sanded level—or because you skipped primer. Unprimed drywall compound absorbs paint differently than finished drywall, causing a dull spot. Always use a PVA primer like Zinsser Gardz before topcoat.
Do I need to prime before painting?
Yes—always. Primer seals the compound, evens absorption, and blocks bleed-through from underlying tape or backing. Skipping primer leads to uneven sheen and touch-up nightmares. Let primer dry 2 hours minimum before applying latex paint.
What if the hole is behind wallpaper?
Remove wallpaper at least 6 inches beyond the hole’s edge using a scoring tool and wallpaper remover solution. Let the wall dry 24 hours before repairing. Patching over wallpaper traps moisture and guarantees future bubbling—even under paint.
How do I match texture after repair?
For orange peel: flick thinned joint compound with a stiff brush. For knockdown: apply a medium coat, let set 15 minutes, then lightly drag a knockdown knife. Practice on scrap drywall first. For heavy textures, consider renting a texture sprayer—spray-and-roll kits cost $35 and yield consistent results.
Can I fix a hole near a corner bead?
Yes—but reinforce the seam. Cut your patch to stop 1/2 inch short of the corner bead, then apply paper tape along the entire inside corner *and* over the patch edge. Use a corner trowel for the first coat to ensure crisp alignment. Feather outward from the bead—not toward it—to avoid ridges.
A properly repaired drywall hole should disappear under paint—and hold up for years. You’ve just added a durable, professional-grade fix to your home maintenance toolkit. Next time, try tackling a cracked ceiling seam or replacing a damaged outlet cover plate—both build directly on these same fundamentals.