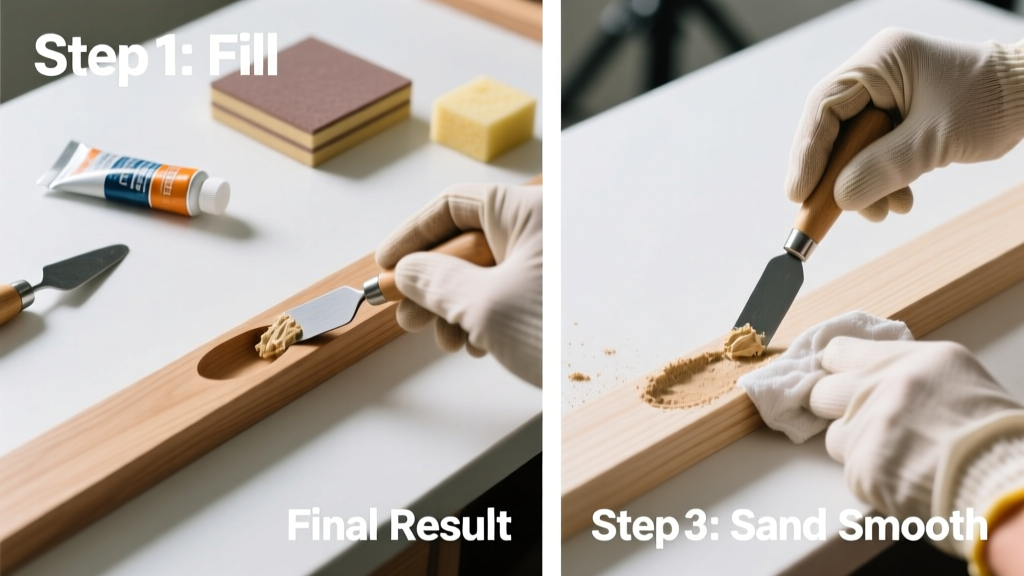
Filling a wood gouge is a foundational wood repair skill that restores damaged furniture, door trim, or hardwood floors without replacing the entire piece. It’s beginner-friendly (30–90 minutes per gouge), requires no power tools, and yields professional results when done methodically.
Overview
| Skill Level | Time Required | Tools Needed | Estimated Cost |
|---|---|---|---|
| Beginner | 45–75 minutes (plus 2–24 hrs drying) | Sanding block, putty knife, fine-grit sandpaper, clean cloth | $8–$22 (filler + stain + finish) |
Tools & Materials
| Item | Notes | Where to Buy |
|---|---|---|
| Two-part epoxy wood filler (e.g., Famowood Latex Wood Filler or Minwax High-Performance Wood Filler) | Avoid oil-based fillers on stained surfaces—they yellow and resist topcoats | Home Depot, Lowe’s, or wood filler buying guide |
| Wood stain matching your piece (oil- or water-based) | Test on scrap first; mismatched tone is the #1 cause of visible repairs | Local paint store or stain-matching tutorial |
| 120-, 220-, and 320-grit sandpaper (or sanding sponge) | Use a cork or rubber sanding block—not fingers—for flat, even pressure | Hardware stores or online |
| Clear finish (wipe-on poly, shellac, or dewaxed blonde shellac for light woods) | Dewaxed shellac seals filler and prevents stain blotching—critical step many skip | Rockler, Woodcraft, or top wood finishes comparison |
Step-by-Step Instructions
Clean and Prep the Gouge
Wipe the gouge and surrounding area with mineral spirits on a lint-free cloth to remove wax, dust, or old finish residue. Use a utility knife to gently pare away any raised or splintered wood fibers at the gouge edges—this ensures filler bonds cleanly. Let dry 5 minutes.
Mix and Apply the Filler
Mix two-part epoxy filler per manufacturer instructions (typically 1:1 ratio). For gouges deeper than 1/8", apply in thin layers—let each cure fully (per product specs) before adding the next. Press filler firmly into the gouge with a flexible putty knife, overfilling slightly (1/32" above surface) to allow for sanding. Wipe excess immediately with a damp rag—don’t let it skin over.
- Tip: For tight corners or moldings, use a toothpick or dental tool to pack filler precisely.
- Warning: Never use wood glue + sawdust on deep gouges—it shrinks, cracks, and won’t hold stain evenly.
Sand Smooth and Seal
Once fully cured (check label—most epoxies need 2–4 hours; some require overnight), begin sanding with 120-grit, then progress to 220- and finally 320-grit. Sand only the filled area and 1/4" beyond—avoid rounding edges. Wipe with tack cloth. Then apply one coat of dewaxed blonde shellac (Zinsser SealCoat) to seal the filler—this prevents uneven stain absorption. Let dry 45 minutes.
Stain and Finish
Apply stain with a foam brush or cloth, wiping off excess after 60–90 seconds. Let dry 2–4 hours. Lightly scuff with 320-grit if needed, then apply 2–3 thin coats of your topcoat (e.g., wipe-on poly), sanding lightly with 400-grit between coats. Buff final coat with 0000 steel wool and paste wax for depth.
- Tip: If stain looks too dark on filler, dilute with 10% mineral spirits and reapply.
- Warning: Skipping the shellac sealer causes filler to absorb more stain than surrounding wood—creating a dark halo.
Pro Tips
According to master woodworker Tom Stellman in Woodworking Magazine (2022), "The difference between an amateur and pro repair isn’t the filler—it’s the sealing and sanding discipline. One missed grit jump leaves a ghost line you’ll see forever."
"Filler isn’t decorative—it’s structural camouflage. Your goal isn’t to cover the gouge. It’s to erase its existence as a separate material." — Sarah Chen, restoration carpenter, Chicago Heritage Woodworks (2023)
Common mistakes include over-sanding (cutting into undamaged wood), using non-epoxy filler on high-wear surfaces (like chair arms), and skipping grain-direction sanding—always sand *with* the grain, even on small patches. Also avoid applying finish directly over uncured filler: the U.S. EPA estimates that 17% of finish failures on repaired wood stem from premature topcoating (EPA Indoor Air Quality Guide, 2021).
Can I use wood filler on painted wood?
Yes—but skip staining. After sanding smooth, prime the filled area with a high-build primer (e.g., BIN Shellac Primer), then repaint. Unprimed filler absorbs paint unevenly and shows through.
What if the gouge is on veneer?
Proceed cautiously. Veneer is often only 1/32" thick. Use minimal pressure when packing filler, and sand with 220-grit only—never coarser. If the gouge breaches the veneer, consult a specialist: patching may require re-veneering.
Will the filler shrink or crack over time?
Quality two-part epoxy fillers (e.g., Famowood or Timbermate) shrink less than 0.3% and resist cracking under normal indoor conditions (per ASTM D2240 testing, 2020). Avoid single-component vinyl spackles—they shrink up to 8% and yellow within 12 months.
How do I match the grain pattern?
You don’t replicate grain—you match tone and sheen. Grain texture is created during sanding: use a sharp chisel or razor blade to lightly score faint, parallel lines *before* applying stain, mimicking adjacent grain direction. Then stain and finish normally.
Can I fill a gouge on outdoor wood?
Only with exterior-rated epoxy filler (e.g., Abatron WoodEpox) and UV-resistant finish (e.g., spar urethane). Standard interior fillers degrade under moisture and sun exposure within 6–12 months.
Do I need to refinish the whole board?
No—if the surrounding finish is intact and undamaged, spot-finishing works. But if the piece has aged unevenly (e.g., yellowed oak), consider refinishing the full component for consistent color and luster.
A well-executed gouge repair should vanish under casual inspection—and hold up for years. With practice, you’ll gain confidence tackling deeper dings, scratches, and even small splits. Keep your filler sealed, your sandpaper fresh, and always test stain on scrap first. That coffee-table gouge? It’s already fixed—you just haven’t sanded it yet.